Posted on

After the Emergency: What to Review, Replace & Improve

Emergency plan of action

The emergency is over.

Everyone is accounted for. The immediate danger has passed. The phones have stopped ringing.

So…now what?

This is the part that often gets overlooked.

Once everyone is safe, it is tempting to put the emergency supplies back on the shelf, close the incident file, and move on to the next thing on the schedule.

But the period after an emergency can be one of the most valuable opportunities you have to improve your workplace emergency plan.

What worked?

What didn’t?

What ran out?

What did employees not understand?

What took longer than expected?

And perhaps the most important question:

What would we do differently next time?

A good emergency response doesn’t end when the immediate danger is over. The lessons learned from an emergency, near miss, or drill should help make the next response better.

Start With People

Before you start worrying about paperwork and replacing supplies, check on your people.

Make sure employees who were involved in the emergency have the support and information they need.

Depending on the situation, that may include:

  • Medical evaluation or follow-up
  • Information about reporting procedures
  • Communication with supervisors
  • Access to appropriate employee support resources
  • Additional training
  • Time to discuss what happened

The response may look different depending on the type and severity of the emergency.

The important thing is not to rush past the human side of what happened simply because the immediate emergency is over.

What Actually Happened?

Once the immediate situation has been addressed, document what happened while the details are still fresh.

Start with the basics:

  • Date and time
  • Location
  • Type of emergency
  • People involved
  • How the emergency was discovered
  • How it was reported
  • What actions were taken
  • How employees were notified
  • Evacuation or shelter procedures used
  • Emergency equipment used
  • Outside agencies contacted
  • Injuries or property damage
  • Any delays or problems
  • When normal operations resumed

Don’t rely entirely on someone’s memory several weeks later.

People remember emergencies differently, especially when things are moving quickly.

Gather information from the employees who were actually involved.

Review What Worked

It’s easy to focus only on what went wrong.

Don’t.

If something worked well, identify it.

Maybe:

  • Employees responded quickly
  • The alarm was easy to hear
  • The evacuation route worked
  • The assembly area was appropriate
  • The emergency response bag was easy to access
  • Employees knew who was in charge
  • The weather warning reached field employees
  • Emergency responders were able to access the facility
  • The accountability process worked
  • Employees knew where first aid supplies were located

Those are successes worth keeping.

OSHA recommends evaluating emergency drills and identifying both the strengths and weaknesses of the plan so improvements can be made. The same approach can be useful after an actual emergency.

Then Ask What Didn’t Work

Now for the less comfortable part.

Where did the plan break down?

Maybe employees didn’t hear the alarm.

Maybe two different people thought the other person was calling 911.

Maybe nobody knew who was responsible for accounting for visitors.

Maybe the evacuation route was blocked.

Maybe employees went to different assembly areas.

Maybe the emergency kit was missing supplies.

Maybe the flashlight had dead batteries.

Maybe the emergency response bag was technically on site, but nobody knew where it was.

Maybe your plan looked great on paper but didn’t match the way the workplace actually operates.

Those aren’t reasons to beat yourself up.

They’re reasons to fix the plan.

Review Your Emergency Action Plan

Pull out the Emergency Action Plan and compare it with what actually happened.

Ask:

  • Did employees follow the procedures?
  • Were the procedures realistic?
  • Were evacuation routes accurate?
  • Was the assembly location appropriate?
  • Did employees know where to go?
  • Did the alarm or notification system work?
  • Did everyone receive the warning?
  • Were visitors and contractors accounted for?
  • Were emergency contacts current?
  • Were responsibilities clear?
  • Did employees know who was in charge?
  • Did emergency responders have the information they needed?
  • Were there hazards the plan didn’t address?

OSHA’s Emergency Action Plan requirements include procedures for reporting emergencies, evacuation, accounting for employees, rescue and medical duties, and identifying people employees can contact for information about the plan.

If the actual emergency exposed a gap in one of those areas, that’s information worth acting on.

Replace What Was Used

This sounds obvious.

It still gets missed.

Emergency supplies may have been used during the incident and need to be replaced before the next emergency.

Check:

  • First aid kits
  • Gauze and wound dressings
  • Gloves
  • Burn supplies
  • Eye care supplies
  • Bleeding-control supplies
  • Spill absorbents
  • Respiratory protection, where applicable
  • Emergency blankets
  • Flashlights
  • Batteries
  • Emergency lighting
  • AED pads or batteries
  • Eyewash supplies
  • Other specialized emergency equipment

Don’t wait until the next inspection.

Replace what was used while the incident is still fresh in everyone’s mind.

Check Expiration Dates

An emergency can also reveal a different problem:

The supplies are there, but some of them are no longer usable.

Check expiration dates on applicable products and equipment.

Pay particular attention to:

  • First aid products
  • Burn care supplies
  • Medications, where applicable and appropriate
  • Eyewash products
  • AED pads
  • AED batteries
  • Certain sterile dressings
  • Chemical spill products with shelf-life requirements
  • Other manufacturer-specified replacement items

If an emergency kit hasn’t been opened in a long time, don’t assume everything inside is ready to use.

Open it.

Look at it.

Check it.

Replace More Than You Used

This is where the post-emergency review becomes especially useful.

Maybe you used 10 gauze pads.

You replace the 10 gauze pads.

But while you’re checking the kit, you notice there are only three pairs of gloves left and the flashlight batteries are nearly dead.

Replace those, too.

The goal isn’t simply to restore the kit to the condition it was in five minutes before the emergency.

The goal is to make the kit better prepared for the next one.

Review Your Emergency Equipment

Emergency equipment should be inspected after use and after drills.

Ask:

  • Did employees know where it was?
  • Was it accessible?
  • Did it work?
  • Was it appropriate for the situation?
  • Was there enough of it?
  • Was it located where employees actually needed it?
  • Did anyone have difficulty using it?
  • Did the equipment create any unexpected problems?

This could include:

  • First aid stations
  • Emergency response bags
  • AEDs
  • Eyewash stations
  • Emergency showers
  • Spill kits
  • Fire extinguishers
  • Emergency lighting
  • Radios
  • Weather radios
  • Communication systems
  • PPE

If the equipment wasn’t where people needed it, moving it may be more valuable than simply buying more.

Review Your Emergency Communications

Communication problems can create chaos quickly.

After an emergency, ask:

Did everyone get the message?

Look at the entire communication chain.

How was the emergency discovered?

How was it reported?

How were employees notified?

How were supervisors notified?

How were visitors and contractors notified?

How did employees working remotely or at another location receive the information?

How did the company communicate when the primary communication system wasn’t available?

OSHA recommends that emergency action plans address notification and communication procedures and that workers understand the warning systems and their responsibilities.

If the answer to any of those questions is “we weren’t sure,” you’ve found something to improve.

Review Employee Training

Your employees may have technically been trained.

That doesn’t necessarily mean the training worked.

Ask employees what they remember.

Did they know:

  • Where to go?
  • Who to call?
  • Who was in charge?
  • Where emergency supplies were located?
  • How to report the emergency?
  • How to account for coworkers?
  • What they were expected to do?
  • What they were not expected to do?

If several employees give you different answers, that’s useful information.

It may mean the training needs to be clearer.

OSHA says employees should be trained when an emergency action plan is developed, when responsibilities change, and when the plan changes. OSHA also recommends training when new equipment, materials, processes, or facility changes affect emergency procedures.

Don’t Forget New Employees

One emergency can expose another problem.

Your plan may make perfect sense to the employees who have been there for years.

But what about the person who started three weeks ago?

Or the temporary worker who started Monday?

Or the subcontractor who has never been through your emergency procedures?

Review how new employees, temporary workers, contractors, and visitors are introduced to your emergency procedures.

Your plan only works if the people in the building understand it.

Update the Plan

Now comes the part where you actually make changes.

Update:

  • Emergency contacts
  • Phone numbers
  • Evacuation maps
  • Shelter locations
  • Assembly areas
  • Employee responsibilities
  • Backup personnel
  • Alarm procedures
  • Communication procedures
  • Emergency equipment locations
  • Emergency supply lists
  • Procedures for visitors and contractors
  • Procedures for employees with specific assistance needs
  • Jobsite-specific procedures

OSHA’s general industry standard requires employers to review the emergency action plan with employees when the plan is developed, when employees are initially assigned to a job, when their responsibilities change, and when the plan itself changes.

That means your emergency plan shouldn’t be treated like a document that gets written once and then forgotten in a filing cabinet.

Look for Changes in the Workplace

Your emergency plan should reflect your current workplace.

Has anything changed since the last time you reviewed it?

Maybe you:

  • Added a new production area
  • Moved equipment
  • Added chemicals
  • Changed evacuation routes
  • Added employees
  • Changed shifts
  • Added a warehouse
  • Started using new equipment
  • Added outdoor operations
  • Opened another location
  • Changed jobsite layouts
  • Added new contractors
  • Changed emergency equipment

Any of those changes could affect your emergency procedures.

OSHA specifically recommends reviewing training and emergency procedures when equipment, materials, processes, employee responsibilities, or facility layouts change.

Review the Emergency From the Employee’s Perspective

This can be one of the most useful parts of the review.

Ask the people who actually experienced the emergency:

What was confusing?

What took too long?

What did you wish you had?

What didn’t you know?

What worked really well?

Employees may notice problems management never sees.

Someone on the third floor may know the alarm was difficult to hear.

Someone working outside may know they never received the warning.

Someone responsible for first aid may know the supplies were poorly organized.

Someone at the assembly area may know accountability took 20 minutes because nobody had an updated roster.

Those observations are valuable.

Don’t Turn the Review Into a Blame Session

The purpose of a post-emergency review is to improve the system.

Not to find someone to blame for every imperfect decision made under pressure.

Ask:

What happened?

Why did it happen?

What can we change?

Then make the change.

A good review should leave you with specific corrective actions, not just a meeting where everyone agrees that “we need to do better.”

Create a Corrective Action List

Turn what you learned into actual tasks.

For example:

What We FoundWhat We Will ChangeWho Is ResponsibleDue Date
Employees could not hear the alarm outsideAdd outdoor notification methodSafety ManagerOctober 15
First aid kit was missing suppliesRestock and add monthly inspectionWarehouseOctober 5
Visitor accountability was unclearUpdate EAP procedureManagementOctober 10
Emergency contact list was outdatedUpdate and post new listHROctober 3
Shelter area was too smallIdentify alternate shelterFacilitiesOctober 20

The exact format can be whatever works for your company.

The important part is assigning responsibility and actually following up.

Use the Next Drill to Test the Fixes

This is where your emergency preparedness program starts getting stronger.

You found a problem.

You fixed it.

Now test it.

If the alarm couldn’t be heard, test the new notification system.

If employees weren’t sure where to go, conduct another drill.

If accountability was slow, test the new process.

If the emergency kit was difficult to access, change its location and see whether employees can find it.

Don’t just check the box that says “Corrective action completed.”

Make sure the correction actually worked.

What About an Emergency Drill?

The same process applies even if the emergency wasn’t real.

After a drill, ask:

  • What worked?
  • What didn’t?
  • Were employees confused?
  • Did the alarm work?
  • Did everyone know where to go?
  • Was accountability accurate?
  • Were emergency supplies accessible?
  • Did supervisors understand their responsibilities?
  • Did anyone identify a hazard we missed?
  • What should change before the next drill?

OSHA specifically recommends gathering management and workers after drills to evaluate effectiveness, identify strengths and weaknesses, and determine ways to improve the plan.

A drill that ends with “Great job, everyone!” is nice.

A drill that ends with three specific improvements assigned to three specific people is much more useful.

After the Emergency Checklist

Before you consider the incident or drill completely closed, walk through this list:

  • Everyone involved has been accounted for and appropriate follow-up completed
  • The emergency was documented
  • Employees involved were asked what they observed
  • What worked was identified
  • Problems and gaps were identified
  • Used emergency supplies were replaced
  • Expired supplies were removed
  • Emergency equipment was inspected
  • AEDs and other equipment were checked as applicable
  • Communication procedures were reviewed
  • Employee training needs were identified
  • Emergency contacts were updated
  • Evacuation or shelter locations were reviewed
  • The Emergency Action Plan was updated if necessary
  • Corrective actions were assigned
  • Someone was responsible for following up
  • Changes were tested through training or a future drill

The Goal Is Not a Perfect Emergency

No emergency response is going to look exactly like the plan on paper.

Real emergencies are messy.

People get nervous. Conditions change. Equipment doesn’t always cooperate. The person who normally handles something may not be there.

That’s why preparedness is a process.

Every emergency, near miss, or drill gives you information.

Use it.

Review what happened.

Replace what was used.

Fix what didn’t work.

Improve what you can.

Then train your people on the changes.

The Bottom Line

Emergency preparedness isn’t something you finish.

It’s something you maintain.

The emergency itself may last minutes or hours.

The lessons from it can make your workplace safer for years.

So once everyone is safe and the immediate crisis is over, don’t simply put the first aid kit back on the shelf and forget about it.

Review. Replace. Improve.

Then make sure your people know what changed.

Because the goal of emergency preparedness isn’t to have the perfect plan sitting in a binder.

The goal is to have a plan that works when your employees actually need it.

Need Help Getting Your Emergency Supplies Ready?

Southern Safety Supply carries first aid, emergency response, spill response, PPE, emergency lighting, eyewash, AED, and other safety supplies to help workplaces prepare for emergencies.

We can also help you identify the supplies that need to be replaced, replenished, or added after an emergency or drill.

And if keeping track of all those supplies is becoming its own emergency, that’s where NEVER OUT™ Inventory Management can help.

Our scheduled inventory service helps keep essential safety supplies checked, stocked, and ready so you aren’t discovering an empty shelf at the worst possible time.

Keep Building Your Emergency Preparedness Plan

This article is the final piece in our National Preparedness Month workplace safety series.

Continue exploring the series:

And don’t forget to download our Workplace Emergency Preparedness Checklist to help identify gaps in your current plan.

Important Note

This article is provided for general educational purposes and is not legal or safety consulting advice. Emergency drills should be planned for the specific hazards and conditions of your workplace. Do not conduct exercises that create unnecessary risk or interfere with actual emergency response. Follow applicable OSHA requirements and coordinate with appropriate safety personnel and emergency responders when necessary.

Posted on

Severe Weather Emergency Preparedness:

Is Your Workplace Ready?

Severe weather has a funny way of making everyone an expert.

“Looks like it’s moving this way.” Apple App – Android

“Radar says we’re fine.”

“Just give it another ten minutes.”

And then suddenly everybody is looking for the weather app, the emergency contact list, and somewhere safe to go.

The problem is that severe weather is not the time to figure out your emergency plan.

Tornadoes, lightning, flooding, high winds, severe thunderstorms, hurricanes, and winter weather can create very different hazards. Your workplace emergency plan should account for the types of severe weather that could realistically affect your employees, facilities, equipment, and jobsites.

OSHA identifies natural disasters and weather events, including tornadoes, floods, hurricanes, lightning, and winter weather, as hazards that should be considered as part of emergency preparedness.

Weather Alert Technology
One of the most important preparedness efforts is being on alert to changing weather conditions. Here are a few resources we suggest:

Severe Weather Planning Starts Before the Storm

A good severe weather plan answers a few basic questions:

  • How will we know severe weather is approaching?
  • Who monitors weather conditions?
  • How will employees receive warnings?
  • Where should employees go?
  • When should outdoor work stop?
  • Who has authority to stop work?
  • How will we account for employees?
  • What happens to employees working away from the main facility?
  • What happens if employees cannot safely leave?
  • How will we communicate after the immediate threat?
  • What emergency supplies do we need?

These questions may seem simple.

They are also much easier to answer on a sunny Tuesday than during a tornado warning.

OSHA recommends planning ahead, identifying appropriate shelter or refuge areas, establishing warning systems, accounting for workers, training employees, and practicing emergency procedures.

Know Which Weather Hazards Affect Your Workplace

Not every business needs the same severe weather plan.

Your location, industry, building, employees, and work activities all matter.

Consider the severe weather hazards most likely to affect your operation.

Tornadoes

Tornadoes can develop quickly and may leave little time to react.

Your workplace should have predetermined shelter locations and a way to receive warnings.

OSHA recommends identifying a place to take shelter, monitoring community warning systems, establishing procedures to account for employees, and keeping emergency supply kits in shelter locations.

For tornado sheltering, OSHA recommends moving to an appropriate interior location, away from windows and outside walls, with underground areas providing the best protection when available.

Your plan should answer:

  • Where do employees shelter?
  • How will the warning be communicated?
  • Who initiates shelter procedures?
  • How will employees be accounted for?
  • Where do visitors and contractors go?
  • What happens if employees are working outside?
  • What happens if the normal shelter area is inaccessible?

And don’t wait until the sirens start to figure out where everybody is supposed to go.

Lightning and Severe Thunderstorms

Lightning deserves its own place in your severe weather plan, especially for outdoor workers.

Construction crews, utility workers, landscapers, event staff, road crews, and other outdoor employees can be exposed to thunderstorms while working far from a traditional office or shelter.

The National Weather Service recommends moving indoors when thunder is heard because lightning can strike well outside the immediate area of rainfall.

For outdoor operations, establish:

  • A reliable way to monitor weather
  • A designated safe shelter
  • A process for stopping outdoor work
  • A communication method for field employees
  • A procedure for determining when work can safely resume

A tent, open-sided shelter, or picnic pavilion is not the same thing as an enclosed substantial building when it comes to lightning protection.

That is an important distinction for jobsites and outdoor events.

Flooding and Flash Flooding

Flooding can create hazards both inside and outside the workplace.

Depending on the location, employees may face:

  • Rising water
  • Road closures
  • Electrical hazards
  • Contaminated floodwater
  • Structural damage
  • Equipment damage
  • Difficult emergency access
  • Employees becoming stranded at work

Your emergency plan should consider whether employees need to evacuate, shelter, or stop work before flooding becomes dangerous.

And if employees are traveling between jobsites, don’t forget about the route between the workplace and home.

A perfectly safe building doesn’t help much if the road out is already flooded.

High Winds and Severe Thunderstorms

High winds can turn ordinary workplace materials into hazards.

Outdoor equipment, temporary structures, signs, materials, ladders, debris, and unsecured objects can become dangerous when winds increase.

Before severe weather arrives, consider:

  • Securing loose materials
  • Moving equipment when appropriate
  • Protecting or relocating outdoor supplies
  • Closing doors and windows
  • Protecting critical equipment
  • Identifying areas where employees should shelter
  • Suspending outdoor work when conditions become unsafe

For construction sites, this can be especially important because conditions can change rapidly as the project progresses.

Winter Weather

Winter weather creates a different set of challenges.

Snow, ice, freezing temperatures, reduced visibility, and changing road conditions can affect both indoor and outdoor operations.

OSHA notes that employers should monitor weather conditions during winter storms, maintain reliable communication with workers, and be prepared to stop work or evacuate when necessary. OSHA also recommends training workers on cold-weather hazards and considering protective clothing and other safe work practices.

Your winter weather plan may need to address:

  • Cold stress
  • Ice and snow
  • Slippery walking surfaces
  • Travel conditions
  • Vehicle operations
  • Power outages
  • Heating failures
  • Outdoor work
  • Remote workers
  • Emergency communication

Sometimes the safest decision is simply to stop work.

Your plan should make it clear who has the authority to make that call.

Severe Weather and Construction Sites

This is where things can get complicated. Here’s a Download

A construction site may have employees spread across several areas, changing access points, temporary structures, heavy equipment, excavations, scaffolding, and materials that are not normally found in a completed building.

The safest shelter location today may not be the safest location next month.

OSHA’s construction emergency action plan requirements under 29 CFR 1926.35 include emergency escape procedures, accountability, rescue and medical duties, emergency reporting, alarm systems, evacuation procedures, and employee training.

For construction companies, severe weather planning should consider:

  • Current jobsite layout
  • Current shelter locations
  • Access roads
  • Evacuation routes
  • Temporary structures
  • Excavations and trenches
  • Cranes and equipment
  • Building materials
  • Electrical hazards
  • Weather-sensitive work
  • Subcontractors
  • Visitors
  • Remote workers
  • Emergency responder access

And remember that the plan needs to change when the jobsite changes.

What About Employees Working Outside?

This is one of the biggest gaps in many severe weather plans.

It is easy to make a plan for the people sitting inside the main building.

It’s harder when your employees are:

  • On a construction site
  • Working on utility lines
  • Driving between locations
  • Working in a warehouse yard
  • Performing road work
  • Working on rooftops
  • Inspecting outdoor equipment
  • Working in remote areas

Your severe weather plan should address how those employees will receive warnings and where they should go.

A weather alert on the office manager’s computer doesn’t help much if nobody outside knows it was issued.

Establish a Reliable Warning System

Don’t depend on one person watching the weather.

Use multiple ways to receive and communicate warnings when appropriate.

These may include:

  • Weather radios
  • Local emergency alerts
  • Wireless Emergency Alerts
  • Weather apps
  • Local television or radio
  • Outdoor warning sirens
  • Facility alarms
  • Text messages
  • Two-way radios
  • Company communication systems

OSHA recommends establishing alarm systems, testing them, and making sure warnings can reach workers, including workers with disabilities or workers who may not speak English.

The National Weather Service also recommends having multiple ways to receive weather information and being able to quickly activate your severe weather plan.

Decide Who Makes the Call

This is a big one.

Who decides when outdoor work stops?

Who tells employees to shelter?

Who contacts employees working remotely or at another jobsite?

Who communicates with emergency responders?

Who determines when employees can return to work?

If the answer is “we’ll figure it out when something happens,” that’s a gap in the plan.

Assign responsibilities ahead of time.

Also designate backups.

The person responsible for activating the emergency plan might be on vacation when the tornado warning comes through.

OSHA recommends assigning specific emergency responsibilities and training alternate personnel in case the primary person is unavailable.

Don’t Forget Accountability

Getting employees into a shelter is only part of the job.

You also need to know who is there.

Your severe weather plan should address how you will account for:

  • Employees
  • Contractors
  • Temporary workers
  • Visitors
  • Customers
  • Delivery personnel

Maintain appropriate rosters or other methods of accounting for people during an emergency.

OSHA specifically recommends procedures for accounting for workers and others during emergencies.

This becomes especially important for businesses with multiple buildings, large facilities, outdoor crews, or changing jobsites.

What Should Be in a Severe Weather Emergency Kit?

Your supplies should match the emergency.

A workplace severe weather kit may include:

  • Flashlights
  • Spare batteries
  • Battery-powered or hand-crank radio
  • First aid supplies
  • Emergency blankets
  • Drinking water
  • Basic sanitation supplies
  • Emergency contact information
  • Phone chargers or backup power
  • Weather radio
  • Protective gloves
  • Basic tools
  • High-visibility equipment for appropriate situations
  • Emergency response supplies

For tornado shelter areas, OSHA specifically recommends keeping emergency supply kits available in shelter locations.

You don’t necessarily need to turn your shelter area into a survival warehouse.

You do need enough basic supplies to support your employees if severe weather disrupts normal operations or prevents immediate access to outside assistance.

Think About What Happens After the Storm

Preparedness doesn’t stop when the weather passes.

The aftermath may create new hazards.

Employees may encounter:

  • Downed power lines
  • Broken glass
  • Structural damage
  • Floodwater
  • Debris
  • Damaged equipment
  • Unstable trees
  • Chemical releases
  • Blocked roads
  • Loss of power
  • Communication problems

Employees should not automatically assume that because the storm has passed, it is safe to go back outside and start cleaning up.

Your plan should identify who is responsible for assessing the workplace and when employees can safely return.

If the cleanup involves hazards beyond your employees’ training or capabilities, outside assistance may be necessary.

Severe Weather Drills Should Not Be a Surprise

You don’t need to create a Hollywood production every time you test your emergency plan.

But employees should know what they are supposed to do.

Practice:

  • Receiving a warning
  • Moving to the correct shelter
  • Communicating with employees
  • Accounting for personnel
  • Handling visitors and contractors
  • Contacting emergency services
  • Responding when the normal route is unavailable

OSHA recommends practicing emergency procedures and updating plans based on lessons learned from exercises.

After the drill, ask the uncomfortable questions.

Did everybody know where to go?

Could everyone hear the warning?

Did anybody have to guess what to do?

Did the accountability process work?

Did employees in the field receive the warning?

Did the plan work when the person normally responsible wasn’t available?

Those answers are valuable.

Severe Weather Emergency Preparedness Checklist

Download Link

Use this checklist as a quick starting point for your workplace:

  • Have we identified the severe weather hazards most likely to affect our workplace?
  • Do we have designated shelter locations?
  • Do employees know where those locations are?
  • Do outdoor workers know where to seek shelter?
  • Do we have multiple ways to receive weather warnings?
  • Do we have a reliable way to communicate warnings to employees?
  • Do we have procedures for visitors and contractors?
  • Do we know who is responsible for activating the emergency plan?
  • Do we have backup personnel assigned?
  • Can we account for employees during an emergency?
  • Do we have emergency supplies available?
  • Are flashlights and batteries checked regularly?
  • Do we have first aid supplies readily available?
  • Have we addressed severe weather at each active jobsite?
  • Do we have procedures for stopping outdoor work?
  • Do employees know when they are expected to evacuate or shelter?
  • Have we practiced our severe weather procedures?
  • Do we review and update the plan when conditions change?

The Bottom Line

Severe weather preparedness is not about predicting exactly when the next storm will arrive.

It is about being ready when it does.

Your workplace may face tornadoes, lightning, flooding, high winds, winter weather, or several of these hazards throughout the year.

The specific weather may change.

The need for a plan does not.

Know the hazards. Know the warning system. Know where to go. Know who is responsible. Know how you will account for your people.

And most importantly, make sure your employees know the plan before they need it.

Because “Everybody just do what feels right” is not an emergency procedure.

Need Help Getting Prepared?

Southern Safety Supply carries first aid, emergency response, spill response, PPE, emergency lighting, weather-related safety supplies, and other equipment that can help support your workplace emergency plan.

We can help you look at your workplace, jobsite, or operation and identify the supplies that make sense for your specific needs.

And once you have the supplies, don’t forget to maintain them.

That’s one reason we created NEVER OUT™ Inventory Management. Regular inventory checks help keep essential safety supplies stocked, organized, and ready instead of discovering they’re missing when you need them.

Keep Building Your Emergency Preparedness Plan

Keep Building Your Emergency Preparedness Plan

This article is part of our National Preparedness Month workplace safety series.

Continue exploring the series:

And don’t forget to download our Workplace Emergency Preparedness Checklist to help identify gaps in your current

Important Note

This article is provided for general educational purposes and is not legal or safety consulting advice. Emergency drills should be planned for the specific hazards and conditions of your workplace. Do not conduct exercises that create unnecessary risk or interfere with actual emergency response. Follow applicable OSHA requirements and coordinate with appropriate safety personnel and emergency responders when necessary.
Posted on

Emergency Drills: How to Test Your Plan Before You Need It

Nobody wants to hear the alarm go off at work.

Especially when someone says:

“Don’t worry. It’s just a drill.”

Cue the eye rolls.

Someone grabs their coffee.

Someone else asks if they really have to leave.

And there is always at least one person who suddenly discovers they have a very important meeting happening in the parking lot.

But here’s the thing:

Emergency drills matter.

A drill gives your team a chance to practice what to do before there is an actual emergency.

Because the middle of a fire, severe weather event, chemical spill, or other emergency is a terrible time to discover that nobody knows where the evacuation map is.

Why Do Emergency Drills Matter?

An emergency plan can look perfect on paper.

That doesn’t mean it will work perfectly in real life.

A drill can show you things that a written plan can’t.

Maybe the alarm can’t be heard in part of the building.

Maybe employees aren’t sure where to assemble.

Maybe the evacuation route is blocked.

Maybe nobody knows who is responsible for accounting for visitors.

Maybe the person responsible for the emergency plan is on vacation.

Oops.

That’s exactly why you test the plan.

OSHA recommends drills and exercises as a way to help workers understand and remember their roles and responsibilities during an emergency.

A Drill Is a Rehearsal, Not a Gotcha

The purpose of an emergency drill isn’t to catch employees doing something wrong.

It’s to find problems before the stakes are real.

Think of it like a fire drill for your emergency plan.

You’re looking for questions such as:

  • Did everyone hear the alarm?
  • Did people know where to go?
  • Did anyone use the wrong exit?
  • Was the assembly area large enough?
  • Could supervisors account for their crews?
  • Were visitors included?
  • Did anyone get confused?
  • Did emergency equipment get in the way?
  • Did communication work?

If something doesn’t work during the drill, that’s good information.

Fix it.

That’s the whole point.

Start With the Emergency You Want to Test

You don’t have to simulate every possible disaster at once.

Pick one scenario.

For example:

Fire

Employees practice evacuation and accountability.

Severe weather

Employees practice moving to the designated shelter area.

Chemical spill

Employees practice reporting, isolating the area, and following the appropriate response procedures.

Workplace violence or active threat

Employees practice the procedures established for their facility and the specific situation.

Power outage

Employees practice communication, accountability, and safe shutdown procedures where applicable.

Different emergencies require different responses.

That’s why your drills should test different parts of your emergency plan over time.

Don’t Announce Every Drill

There’s a balance here.

Employees should know that drills are part of the safety program.

But if every drill is announced days in advance, you’re mostly testing whether people can remember something they were told to expect.

You may get a very orderly evacuation.

Congratulations.

You successfully evacuated a building because everyone knew Tuesday at 10:00 was evacuation day.

That’s not necessarily the same thing as testing your emergency plan.

OSHA’s emergency preparedness guidance encourages employers to conduct drills and exercises appropriate to their emergency plans and workplace hazards.

The exact approach should fit your workplace.

And don’t surprise employees with anything that could create a real safety risk.

Test the Alarm

Here’s an easy one.

Can everyone actually hear it?

Walk the facility.

Check:

  • Offices
  • Warehouses
  • Restrooms
  • Break rooms
  • Outdoor work areas
  • Mechanical rooms
  • Noisy production areas
  • Remote work areas

A beautiful alarm system doesn’t help the person who can’t hear it.

If your facility has multiple alarm signals, make sure employees understand what each one means.

Watch What Employees Actually Do

During a drill, resist the urge to jump in and correct everyone immediately.

Watch.

Where do people go?

Who stops to collect personal belongings?

Who heads for the nearest exit?

Who follows someone else because they aren’t sure what to do?

Who doesn’t move at all?

Who heads to the wrong assembly area?

This isn’t about embarrassing anybody.

It’s about learning where your plan needs work.

Check the Evacuation Routes

Walk the routes after the drill.

Ask:

Was anything in the way?

Construction materials.

Boxes.

Equipment.

Furniture.

Delivery carts.

That random pallet that has apparently been living there since 2024.

If employees can’t easily get through the route, it isn’t really an emergency exit route.

Construction sites need an additional level of attention because routes can change as the project progresses.

For more information, see our article on Emergency Preparedness for Construction Sites: What Changes When the Jobsite Changes?

Check the Assembly Area

Once everyone is outside, where do they go?

And can everyone fit?

The assembly area should be appropriate for your workplace and emergency plan.

During the drill, watch what happens.

Do people spread out?

Do employees know where their department or crew should assemble?

Can supervisors find their people?

Are employees standing somewhere that could interfere with emergency responders?

A meeting point is only useful if everyone knows where it is.

Practice Accountability

This is where the drill gets interesting.

Who is actually responsible for counting people?

Don’t assume someone will figure it out.

Your plan should identify who is responsible for employee accountability.

Depending on the workplace, that may involve:

  • Supervisors
  • Department managers
  • Foremen
  • Safety personnel
  • Employee rosters
  • Visitor logs
  • Contractor lists

Construction sites have an additional challenge because the people on site can change throughout the day.

Your drill should test how you account for employees, subcontractors, visitors, and others who may be present.

Don’t Forget the People Who Aren’t There Every Day

A workplace isn’t always filled with the same people.

Think about:

  • Visitors
  • Contractors
  • Delivery drivers
  • Temporary workers
  • New employees
  • Customers

If your drill only works for your regular employees, your plan may have a hole in it.

Make sure your process includes people who may not know the building.

Test Communication

Emergency communication can get messy quickly.

During a drill, test:

  • Alarm systems
  • Radios
  • Phones
  • Public-address systems
  • Text alerts
  • Emergency contact lists
  • Supervisor communication

Ask:

Did everyone receive the message?

And just as important:

Did everyone understand it?

“Something is happening” isn’t nearly as useful as:

“Evacuate the building using your assigned exit and report to the north parking lot assembly area.”

Try Something Besides a Fire Drill

Fire drills are important.

But they’re not the only emergency worth practicing.

If your emergency plan only gets tested when someone pulls the fire alarm, you’re leaving a lot of questions unanswered.

Consider rotating scenarios throughout the year.

Severe Weather Drill

Practice:

  • Receiving the warning
  • Moving to shelter
  • Accounting for employees
  • Communicating updates

Spill Response Exercise

Practice:

  • Reporting the spill
  • Identifying the material
  • Isolating the area
  • Locating the spill kit
  • Identifying appropriate PPE
  • Determining whether the spill is something employees can safely handle

Medical Emergency Exercise

Practice:

  • Calling for help
  • Directing emergency responders
  • Retrieving first aid supplies or an AED
  • Assigning someone to meet EMS
  • Maintaining access to the injured worker

Evacuation Exercise

Practice:

  • Alarm notification
  • Exit routes
  • Assembly
  • Accountability
  • Communication

The goal isn’t to create a Hollywood production.

The goal is to practice the response.

Construction Sites: Drill What Can Actually Change

Construction sites deserve special attention.

Your emergency plan may change because:

  • The building is at a different stage
  • The access road moved
  • A new subcontractor arrived
  • The crew changed
  • The assembly area moved
  • A stairway changed
  • Temporary power was installed
  • New hazards were introduced

That means a drill can do more than test employees.

It can test whether the current version of the plan still matches the current jobsite.

And that’s valuable.

Don’t Make the Drill Too Complicated

You don’t need smoke machines.

You don’t need crisis actors pretending to be injured.

You don’t need a dramatic countdown clock.

And please don’t create a scenario that puts employees or emergency responders at unnecessary risk.

A simple, well-planned exercise can reveal plenty.

Start with:

What are we testing?

Then decide:

What do we want to learn?

That’s enough.

After the Drill: Ask the Awkward Questions

This is the part people often skip.

Everyone goes back inside.

The coffee resumes.

Someone says, “Well, that went pretty well.”

And the drill disappears into history.

Don’t do that.

Spend a few minutes reviewing what happened.

Ask:

  • What worked?
  • What didn’t?
  • What confused people?
  • Was the alarm effective?
  • Were the exits clear?
  • Did everyone know where to go?
  • Was accountability successful?
  • Were visitors included?
  • Did communication work?
  • Did anyone identify a problem we hadn’t considered?

Most importantly:

What are we going to fix?

Write Down What You Learned

Keep a simple record of the exercise.

Document:

  • Date
  • Type of drill
  • Scenario
  • Participants
  • What worked
  • Problems identified
  • Corrective actions
  • Person responsible
  • Target completion date

That turns a drill into an improvement tool.

Otherwise, six months later someone may say:

“Didn’t we have a problem with that last time?”

And nobody remembers.

Fix the Problems You Find

This is the most important part.

If the drill shows that the emergency exit is blocked, clear it.

If employees don’t understand the alarm, train them.

If the assembly area doesn’t work, change it.

If nobody knows who accounts for visitors, assign someone.

If the radio doesn’t work inside the warehouse, find another communication method.

Don’t let your drill become an annual tradition where everyone practices the same mistakes.

A Quick Emergency Drill Checklist

Before the next drill, ask:

☐ What emergency are we testing?

☐ What part of the emergency plan are we evaluating?

☐ Do employees know the basic emergency procedures?

☐ Are evacuation routes clear?

☐ Is the assembly area appropriate?

☐ Can employees hear or receive the emergency notification?

☐ Can supervisors account for their employees?

☐ Are visitors and contractors included?

☐ Are emergency contacts current?

☐ Are emergency supplies available?

☐ Did we identify corrective actions?

☐ Did someone take responsibility for fixing them?

☐ Will we follow up?

If the answer to that last question is “we’ll get around to it,” put a date on the calendar.

Future You will appreciate it.

The Best Drill Is the One That Teaches You Something

A perfect emergency drill isn’t necessarily the goal.

In fact, a drill that uncovers a problem can be incredibly valuable.

You found the problem without anyone being hurt.

That’s a win.

Emergency preparedness isn’t about predicting exactly what will happen.

It’s about giving your team the knowledge, training, equipment, and procedures they need to respond when something unexpected happens.

So run the drill.

Let it be a little awkward.

Find the problems.

Fix them.

Then do it again.

Because the emergency is not the time for a dress rehearsal.

Take the Checklist to the Workplace

Want to put your emergency preparedness plan through a practical check?

Our Workplace Emergency Preparedness Checklist can help you review evacuation procedures, communication, accountability, emergency supplies, and other important areas. Download here

Keep Building Your Emergency Preparedness Plan

This article is part of our National Preparedness Month work place safety series.

Continue exploring the series:

And don’t forget to download our Workplace Emergency Preparedness Checklist to help identify gaps in your current

Important Note

This article is provided for general educational purposes and is not legal or safety consulting advice. Emergency drills should be planned for the specific hazards and conditions of your workplace. Do not conduct exercises that create unnecessary risk or interfere with actual emergency response. Follow applicable OSHA requirements and coordinate with appropriate safety personnel and emergency responders when necessary.
Posted on

Emergency Preparedness for Construction Sites:

What Changes When the Jobsite Changes

Construction sites have one thing that many other workplaces don’t:

They don’t stay the same.

The entrance may move.

A new floor gets added.

Temporary power changes.

Equipment comes and goes.

Crews change.

New subcontractors arrive.

And the hazards can change right along with them.

That creates a unique challenge for emergency preparedness.

A plan that made sense two months ago may not make sense today.

For construction companies, emergency preparedness needs to be more than a document created at the beginning of a project. It needs to keep up with the jobsite.

Why Construction Sites Need a Different Approach

A traditional workplace may have the same exits, assembly area, equipment, and employees every day.

A construction site can change from week to week.

That means emergency planning needs to account for changing conditions.

Some of the challenges can include:

  • Changing access points
  • Temporary stairways and ladders
  • Openings and unfinished floors
  • Temporary electrical systems
  • Heavy equipment
  • Excavation and trenching
  • Scaffolding
  • Cranes and lifts
  • Welding and hot work
  • Flammable materials
  • Chemicals and fuels
  • Changing weather conditions
  • Multiple contractors and subcontractors
  • Employees who may not regularly work at the site

Because the jobsite changes, the emergency plan needs to change with it.

What Does OSHA Say About Construction Emergency Plans?

OSHA’s construction standard, 29 CFR 1926.35, addresses employee emergency action plans.

The standard requires employers to have an emergency action plan for workplaces covered by the requirement. The plan addresses emergency escape procedures, emergency reporting, procedures for employees who remain behind for critical operations, accounting for employees, rescue and medical duties, and designated employees who assist with evacuation.

Construction employers must also designate and train enough people to assist with a safe and orderly emergency evacuation.

OSHA also requires the plan to be reviewed with employees when appropriate, including when employees are initially assigned to the job and when their responsibilities under the plan change.

The important takeaway is simple:

Your construction site needs an emergency plan that employees can actually use.

Start With the Hazards on This Jobsite

Every construction project is different.

So don’t start with a generic emergency plan and assume it covers everything.

Start with the hazards.

Ask:

What could realistically go wrong here?

Depending on the project, that might include:

  • Fire
  • Severe weather
  • Electrical incidents
  • Falls
  • Equipment accidents
  • Trench or excavation emergencies
  • Structural collapse
  • Chemical spills
  • Fuel releases
  • Confined-space emergencies
  • Medical emergencies
  • Utility strikes
  • Heat-related emergencies
  • Workplace violence
  • Flooding
  • Power outages

The list should reflect the actual work being performed.

A high-rise project and a road construction project may have very different emergency risks.

Know How Employees Will Report an Emergency

When something goes wrong, employees shouldn’t have to figure out who to call.

Your plan should clearly explain how emergencies are reported.

Depending on the project, that might include:

  • Calling 911
  • Using a site radio
  • Contacting the superintendent
  • Contacting the safety manager
  • Activating an alarm
  • Using a designated emergency phone

Make sure employees know the procedure.

This is especially important for new workers and subcontractors who may not be familiar with the site.

Keep Emergency Contact Information Current

Construction projects can have a long list of important contacts.

That may include:

  • 911
  • Site superintendent
  • Project manager
  • Safety manager
  • General contractor
  • Property owner
  • Utility companies
  • Emergency medical services
  • Fire department
  • Local emergency management
  • Environmental or hazardous-material response contacts

Don’t let the emergency contact list become another outdated document.

Review it when project contacts change.

Know Where the Emergency Access Points Are

Emergency responders need to be able to find you.

That sounds obvious.

On a construction site, it isn’t always easy.

Temporary roads, gates, equipment, fencing, materials, and changing site conditions can make access difficult.

Make sure employees know:

  • The current site address
  • The best emergency entrance
  • Gate locations
  • Access roads
  • Restricted areas
  • Designated emergency vehicle routes
  • The location of the nearest hospital or medical facility

If the site is large, consider how responders will find the exact area where an incident occurs.

“Come to the construction site” isn’t exactly a great set of directions.

Establish an Assembly Area

Employees need to know where to go after an evacuation.

That means identifying an assembly area that is:

  • Safe from the emergency
  • Accessible
  • Easy to identify
  • Away from emergency vehicle access
  • Large enough for the expected number of people

However, remember that a construction site’s assembly area may need to change.

A location that is safe today may be directly beside tomorrow’s excavation or equipment operation.

Check it as the jobsite changes.

Account for Employees and Subcontractors

Getting everyone out is only half the job.

You also need to know who is missing.

Construction sites may have:

  • General contractor employees
  • Subcontractors
  • Temporary workers
  • Delivery drivers
  • Inspectors
  • Visitors
  • Vendors

That can make accountability challenging.

Your emergency plan should explain how workers will be accounted for and who is responsible for doing it.

Don’t rely entirely on someone yelling, “Is everybody here?”

Use whatever system makes sense for your project.

That could include:

  • Daily sign-in systems
  • Badging
  • Crew rosters
  • Foreman accountability
  • Visitor logs
  • Digital workforce tracking systems

The important thing is that someone owns the process.

Keep Evacuation Routes Usable

A construction site can create new obstacles every day.

Materials get delivered.

Equipment gets parked.

Temporary walls go up.

Stairways change.

Access routes move.

Emergency exits and evacuation paths need to be kept clear and communicated to workers.

Employees should know how to get out from the areas where they are actually working.

That may mean different routes for different phases of the project.

Don’t Forget About Temporary Conditions

Construction sites frequently use temporary systems.

These can include:

  • Temporary electrical systems
  • Temporary stairs
  • Temporary lighting
  • Temporary barriers
  • Temporary access roads
  • Temporary fire protection
  • Temporary structures

Temporary does not mean unimportant.

If a temporary condition changes the way employees evacuate or respond to an emergency, it belongs in the safety conversation.

Severe Weather Can Change Everything

Weather is one of the biggest reasons construction emergency planning needs to stay flexible.

Construction workers may be exposed to:

  • Lightning
  • Tornadoes
  • High winds
  • Heavy rain
  • Flooding
  • Extreme heat
  • Winter weather
  • Hail

A severe-weather plan should explain how employees will receive warnings and where they should go.

For example, an open construction site may not provide adequate shelter during a tornado.

A plan should identify appropriate shelter locations before severe weather arrives.

Don’t wait until the sky turns green to decide where everyone is going.

Excavation and Trench Emergencies

Excavation work creates hazards that require specialized planning.

A trench collapse can happen quickly.

Employees should understand that an unplanned rescue attempt can create additional victims.

Construction emergency planning should identify how excavation emergencies will be reported and how qualified emergency responders will be contacted.

OSHA’s excavation standards contain specific requirements for protective systems, access and egress, inspections, and other excavation hazards. Emergency preparedness should work alongside those requirements rather than replace them.

Never treat a trench rescue like a normal cleanup job.

Falls and Rescue Planning

Falls are another important consideration.

Construction sites may involve:

  • Roof work
  • Leading edges
  • Scaffolds
  • Lifts
  • Ladders
  • Structural steel
  • Openings

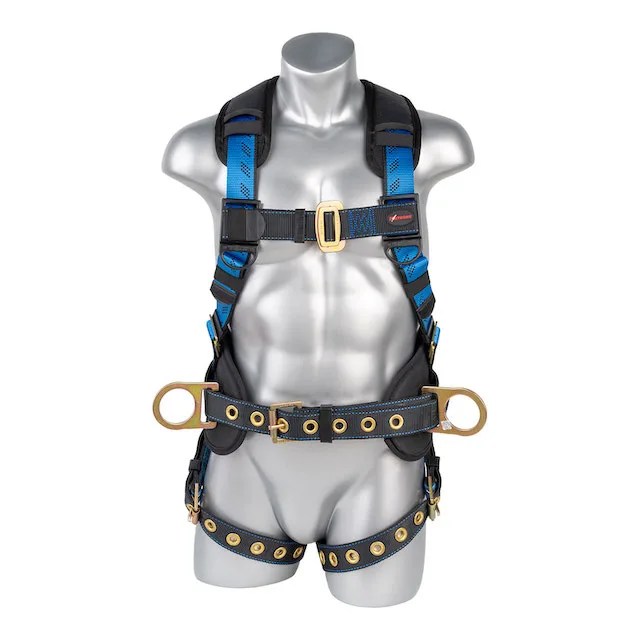
A fall-arrest system may save a worker’s life, but it can also create a need for prompt rescue planning.

A worker suspended in a harness after a fall may need assistance.

That means employers should consider rescue procedures when developing their fall protection program rather than simply asking, “Do we have harnesses?”

Fall protection and rescue planning go together.

Fire and Hot Work

Welding, cutting, grinding, roofing, temporary heating, and other hot-work activities can introduce fire hazards.

Construction emergency planning should consider:

  • Fire extinguishers
  • Alarm methods
  • Emergency exits
  • Flammable materials
  • Fuel storage
  • Hot-work procedures
  • Fire watch responsibilities
  • Emergency access for responders

Employees should know what they are expected to do if a fire starts.

They should also know when the appropriate response is to evacuate rather than attempt to extinguish the fire.

Spill Response on Construction Sites

Construction sites can contain fuel, oils, paints, solvents, adhesives, cleaning products, and other materials.

That means spill preparedness belongs in the emergency plan.

Employees should know:

  • What materials are present
  • Where SDS information is available
  • Where spill kits are located
  • What PPE is required
  • How to report a spill
  • When an incidental spill can be safely handled
  • When employees should leave the area and call for help

Not every spill should be handled by the person who happens to be standing closest to it.

For more information, see our guide:

Spill Happens: What Every Workplace Should Know About Spill Response

Medical Emergencies

Construction sites should also have a plan for medical emergencies.

Depending on the project, consider:

  • First aid supplies
  • Trained first-aid personnel
  • AED availability
  • Emergency communication
  • Site access for EMS
  • Address or GPS information
  • Nearest medical facility
  • Procedures for serious injuries

Make sure employees know how to get help quickly.

Minutes matter during a serious injury.

New Workers Need Emergency Information

Construction sites regularly bring new workers onto the project.

That makes orientation important.

A new employee or subcontractor should understand the site’s emergency procedures before starting work.

At a minimum, workers should know:

  • How to report an emergency
  • Emergency exits and routes
  • Assembly locations
  • Alarm signals
  • Emergency contacts
  • First aid locations
  • Severe-weather procedures
  • Site-specific hazards

A five-minute conversation can be much more useful than handing someone a 40-page document and saying, “Read this.”

Subcontractors Need to Be Part of the Plan

A construction site’s emergency plan shouldn’t stop with the general contractor’s employees.

Subcontractors need to understand the site’s emergency procedures too.

Different companies may have different:

  • Radios
  • Communication systems
  • Emergency procedures
  • Training
  • PPE
  • Supervisors

The jobsite still needs one coordinated emergency response.

Make sure subcontractors know how the site’s emergency system works and who is responsible for coordinating the response.

Review the Plan When the Jobsite Changes

This may be the biggest difference between construction emergency preparedness and emergency planning in a permanent facility.

The jobsite changes.

So review the plan when:

  • A new phase of construction begins
  • Site access changes
  • Crews change
  • New hazards are introduced
  • Temporary structures are added
  • Work moves to a different area
  • Evacuation routes change
  • The assembly area changes
  • Emergency contacts change
  • New subcontractors arrive
  • A drill identifies a problem
  • An incident occurs

Don’t wait for the annual safety meeting to discover that the emergency exit is now behind a stack of drywall.

A Quick Construction Emergency Preparedness Check

Take the Checklist to the Jobsite

Emergency preparedness is easier to evaluate when you have something practical to work from.

Our Workplace Emergency Preparedness Checklist gives you a simple way to review your emergency procedures, supplies, communication, evacuation, accountability, and other key areas.

Download the checklist and walk the jobsite with it. You may find a few things that need attention before an emergency puts your plan to the test.

Walk the site and ask:

☐ Does everyone know how to report an emergency?

☐ Is the current site address clearly available?

☐ Can emergency responders easily access the site?

☐ Are evacuation routes current?

☐ Is the assembly area still safe?

☐ Can employees be accounted for?

☐ Are subcontractors included?

☐ Are emergency contacts current?

☐ Are first aid supplies available?

☐ Are spill supplies appropriate for the materials on site?

☐ Are employees prepared for severe weather?

☐ Have fall-rescue needs been considered?

☐ Have excavation and trench emergencies been addressed where applicable?

☐ Has the emergency plan been reviewed since the jobsite changed?

If you answered “I’m not sure” to several of these questions, your emergency plan may need an update.

Emergency Preparedness Is a Moving Target

Construction safety already requires you to think about what can go wrong.

Emergency preparedness takes that thinking one step further.

It asks:

What happens if something goes wrong, and how are we going to respond?

The answer can change as the project changes.

That is why emergency preparedness shouldn’t be treated as a one-time paperwork requirement.

Walk the site.

Talk to the crews.

Review the hazards.

Check the equipment.

Update the plan.

Then do it again when the job changes.

Because on a construction site, the only thing you can count on staying the same is that something will change.

Keep Building Your Emergency Preparedness Plan

This article is part of our National Preparedness Month work place safety series.

Continue exploring the series:

And don’t forget to download our Workplace Emergency Preparedness Checklist to help identify gaps in your current

Important Note

This article is provided for general educational purposes and is not legal or safety consulting advice. Emergency drills should be planned for the specific hazards and conditions of your workplace. Do not conduct exercises that create unnecessary risk or interfere with actual emergency response. Follow applicable OSHA requirements and coordinate with appropriate safety personnel and emergency responders when necessary.
Sources

Posted on

Night Work Zone Safety at Night:

Protecting Workers After Dark

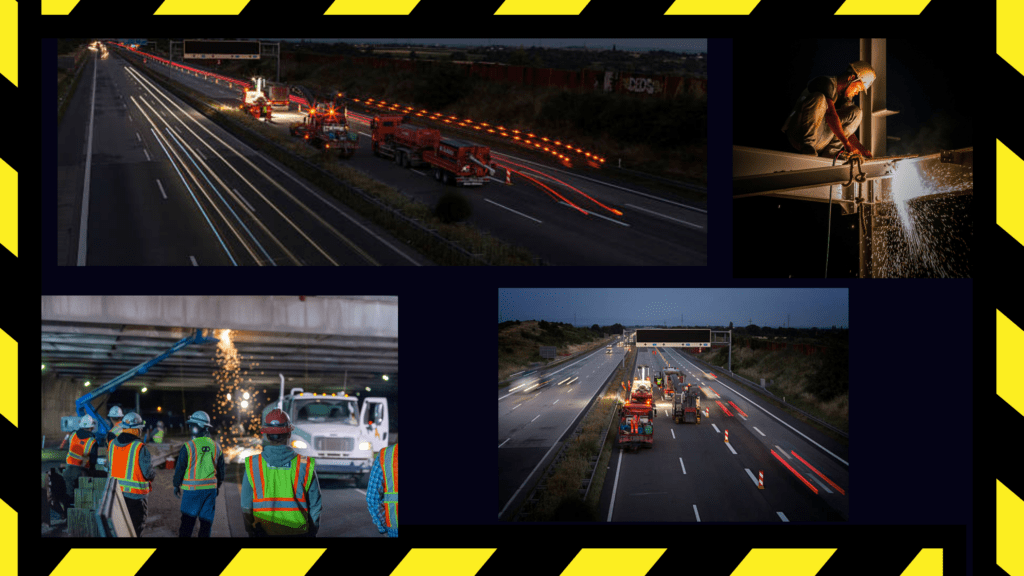
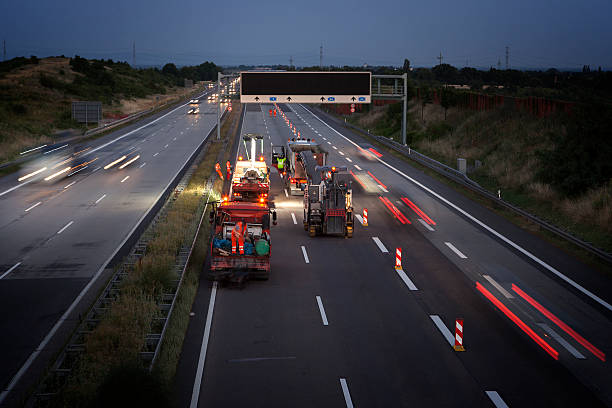
Road construction workers wearing ANSI high-visibility apparel in a nighttime work zone illuminated by traffic control lighting.

Night work zones help keep projects moving, reduce traffic congestion, and allow critical repairs and construction to continue with less disruption. However, working after dark creates challenges that significantly increase risk for both workers and motorists.

Reduced visibility, driver fatigue, improper lighting, and changing traffic patterns can all contribute to incidents in a nighttime work zone. Understanding these hazards and preparing for them is essential for contractors, utility crews, public works departments, and transportation teams.

Download Our Free Night Work Zone Safety Checklist

Preparing for a nighttime project? Download our free Night Work Zone Safety Checklist to help your crew review traffic control, lighting, PPE, fatigue management, and emergency preparedness before work begins.

Why Night Work Zone Safety Matters

Nighttime operations are inherently different from daytime work. Studies have shown that driver reaction times can be up to 50 percent slower at night because of reduced visibility, glare, and fatigue. Drivers often rely on expectations instead of details, increasing the likelihood of sudden braking, missed signs, and incorrect lane choices.

Workers can also experience fatigue during overnight operations, reducing awareness and increasing the potential for mistakes. Effective night work zone safety requires a coordinated approach that combines visibility, traffic control, lighting, and worker readiness.

Visibility Is About Recognition, Not Brightness

A common misconception is that brighter always means safer. In reality, drivers need to quickly recognize what they are seeing and understand where to travel.

Confusing traffic patterns, inconsistent device placement, and visual clutter can delay reactions and increase risk. A well-designed work zone uses clear traffic control layouts, clean reflective devices, and consistent channelization to help drivers instantly recognize the intended path through the work zone.

Lighting and Driver Behavior After Dark

Lighting is one of the most important elements of a nighttime work zone, but poor lighting can create new hazards. Improperly aimed lights can produce glare, reduce contrast, and make hazards more difficult to identify.

Driver behavior also changes after dark. Limited visibility and fatigue can lead to delayed reactions and poor decisions. Simple, easy-to-understand traffic control measures and properly directed lighting help motorists navigate work zones more safely.

High-Visibility PPE and Worker Readiness

High-visibility PPE remains one of the final layers of protection between workers and moving traffic. ANSI-compliant high-visibility apparel uses retroreflective materials that help workers stand out in vehicle headlights, but only when garments are properly maintained and workers remain visible from all directions.

Fatigue is another critical factor. Alertness naturally decreases during overnight hours, especially between 2:00 a.m. and 5:00 a.m. Monitoring workers for signs of fatigue, encouraging hydration, scheduling breaks, and rotating tasks can significantly improve worker readiness and reduce risk.

A Systems Approach to Night Work Zone Safety

There is no single product or procedure that makes a nighttime work zone safe. Effective work zone safety depends on several elements working together, including traffic control, lighting, high-visibility PPE, fatigue management, and ongoing worker training.

By focusing on visibility, consistency, and human factors, organizations can reduce confusion, improve driver recognition, and create safer conditions for everyone on the roadway.

Southern Safety Supply LLC provides ANSI-compliant high-visibility apparel, traffic control products, lighting solutions, hard hats, and jobsite safety equipment to help organizations prepare for nighttime operations. Whether you’re managing a roadway project, utility repair, public works operation, or industrial shutdown, our team can help keep your crews visible, compliant, and protected.

Contact Southern Safety Supply LLC, today to learn more about our work zone safety solutions.

Never Out™ Inventory Management

Running Low on Safety Gear?

Night work is hard enough without discovering you’re short on vests, gloves, hard hats, batteries, or traffic control products. Southern Safety Supply’s Never Out™ Inventory Management Program helps keep critical PPE and safety supplies stocked, organized, and ready when your crews need them.

Posted on

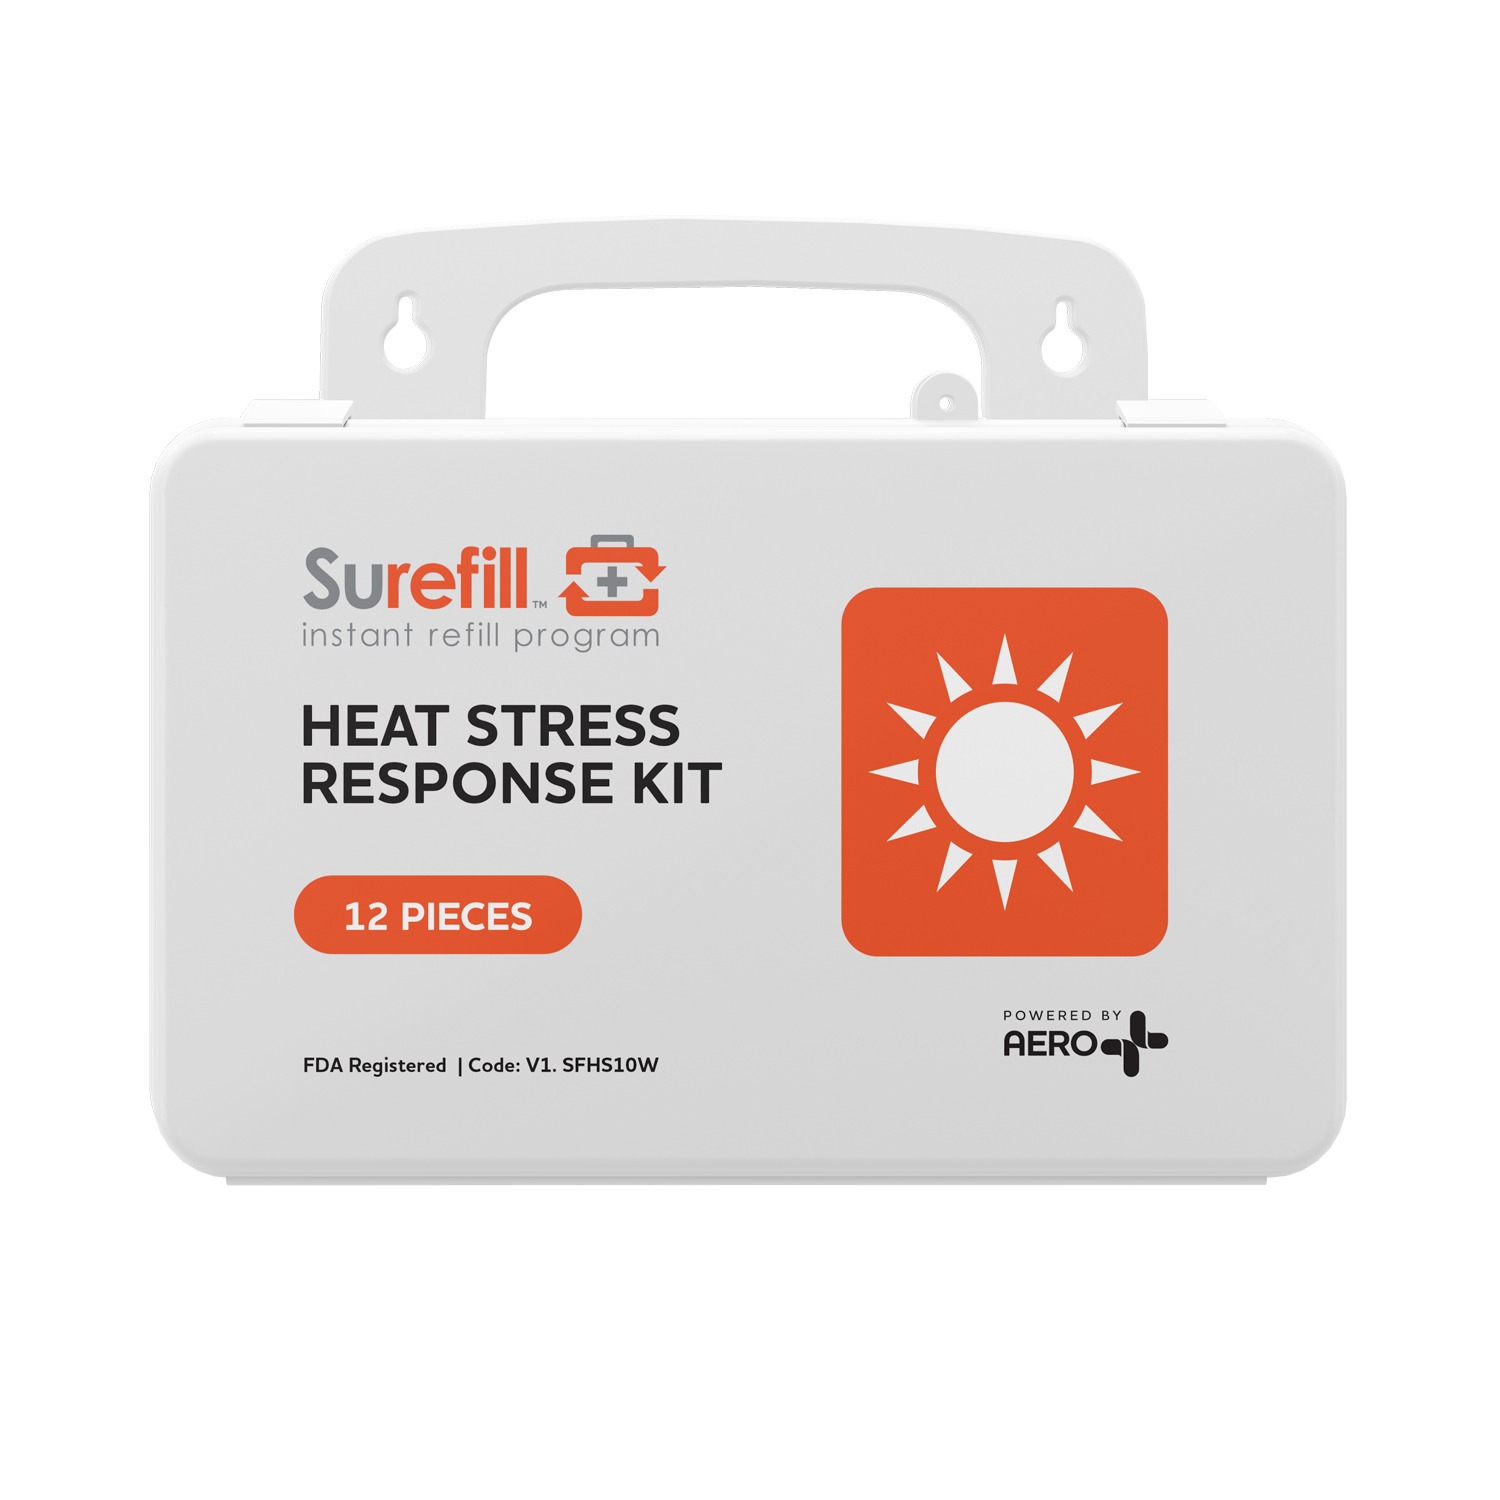
Why Aero’s Surefill Heat Stress Response Kits Belong on Every Jobsite

Working in high temperatures can be dangerous—especially for outdoor crews and industrial workers. That’s why every jobsite should be equipped with Aero Heat Stress Response Kits. Designed for fast response and hydration, these kits help prevent serious heat-related illness before it escalates.

Why Aero’s Surefill Heat Stress Response Kits Belong on Every Jobsite

Working in high temperatures can be dangerous—especially for outdoor crews and industrial workers. That’s why every jobsite should be equipped with Aero Heat Stress Response Kits. Designed for fast response and hydration, these kits help prevent serious heat-related illness before it escalates.

When heat stress strikes, time is critical. That’s why having a Heat Stress Response Kit on hand can make all the difference.

Aero Healthcare’s Surefill Kits: Your First Line of Defense

At Southern Safety Supply, we recommend Aero Healthcare’s Surefill Heat Stress Response Kits because they’re specifically designed for rapid, effective response in hot environments.

Whether you’re running a construction crew, managing a road work project, or preparing for outdoor summer events, these kits help you stay compliant, prepared, and safe.

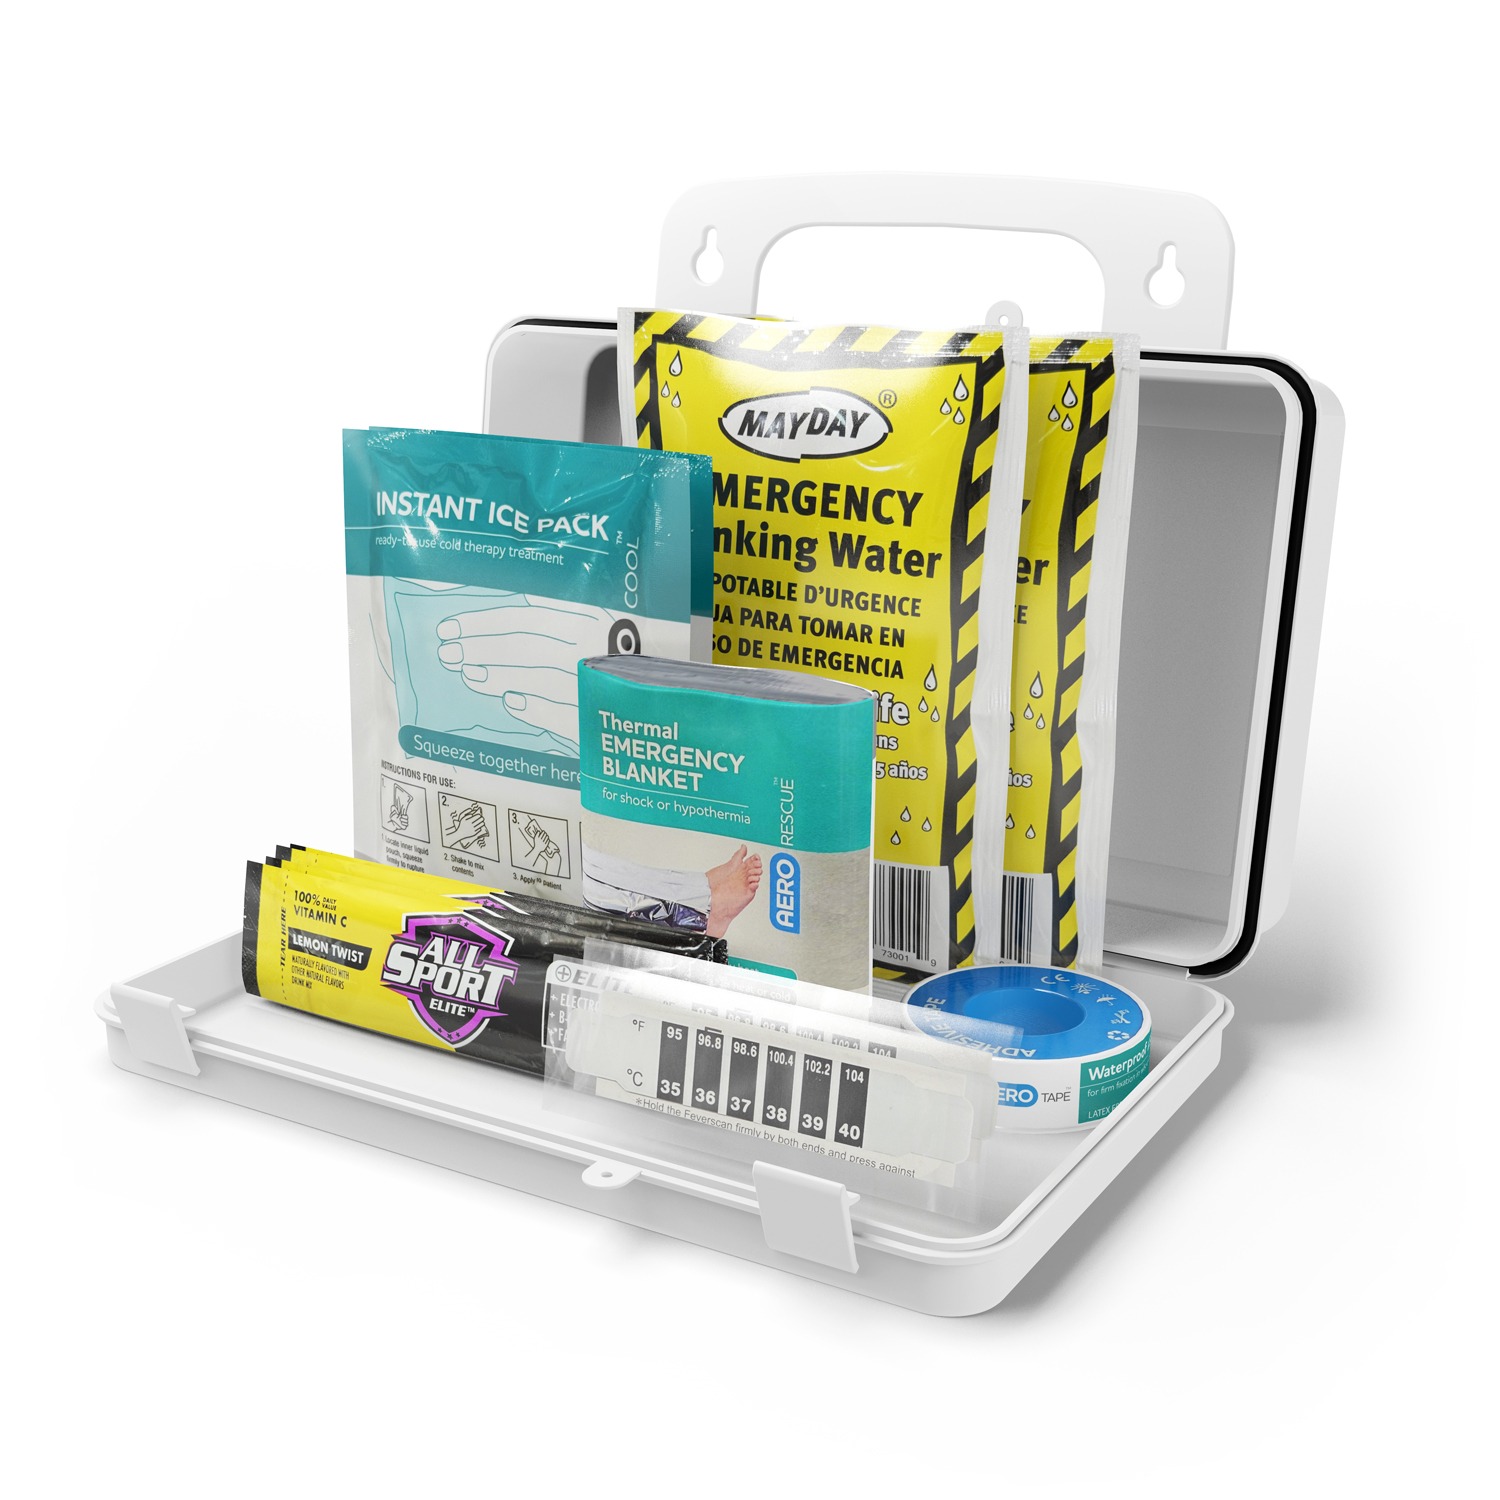
What’s Inside the Surefill Heat Stress Kits?

Each kit is packed with essential cooling and hydration supplies to help manage heat-related emergencies right on the spot:

  • Cold packs for rapid temperature reduction
  • Thermal blankets to help stabilize body heat
  • Electrolyte drink powder to replenish fluids fast
  • Drinking water pouches for immediate hydration
  • Electrolyte tablets (available in large kits)

With compact and portable packaging, these kits are built for quick deployment anywhere—job sites, warehouses, delivery fleets, or outdoor work zones.

Who Needs These Kits?

If your team works outdoors or in high-heat indoor conditions, heat stress kits should be a standard part of your workplace safety gear.

Industries that benefit from Surefill Heat Stress Kits include:

  • Construction
  • Transportation & delivery
  • Manufacturing
  • Agriculture
  • Event staffing
  • First responders

Stay Compliant. Stay Ready.

According to OSHA, employers must provide a safe work environment—including protection from heat-related hazards. Aero’s Heat Stress Kits support compliance with heat illness prevention protocols and demonstrate your commitment to employee well-being.

Don’t Wait—Call to Order Before the Heat Peaks

As summer temperatures rise, so does the demand for heat stress supplies. Aero’s Surefill Heat Stress Response Kits are in high demand during peak heat months, and availability can be limited. Ensure your crew is protected before the next heatwave hits.

📞 Call us today to place your order and get your kits delivered in time for the season. Whether you’re gearing up for a busy construction schedule or prepping outdoor teams, now is the time to act.

Stay Ahead of Summer Hazards

Be sure to follow us on Facebook for ongoing National Safety Month tips, workplace safety gear updates, and seasonal promos. Sign up for our Monthly Safety Newsletter to stay informed and prepared.

Let’s keep safety simple—and summer heat survivable.

Posted on

Choosing the Right AED: Philips vs ZOLL for Jobsite Safety

Philips vs ZOLL for Jobsite Safety

Be Ready for Anything: AEDs for High-Risk Worksites

Choosing the Right AED: Philips vs ZOLL for Jobsite Safety:

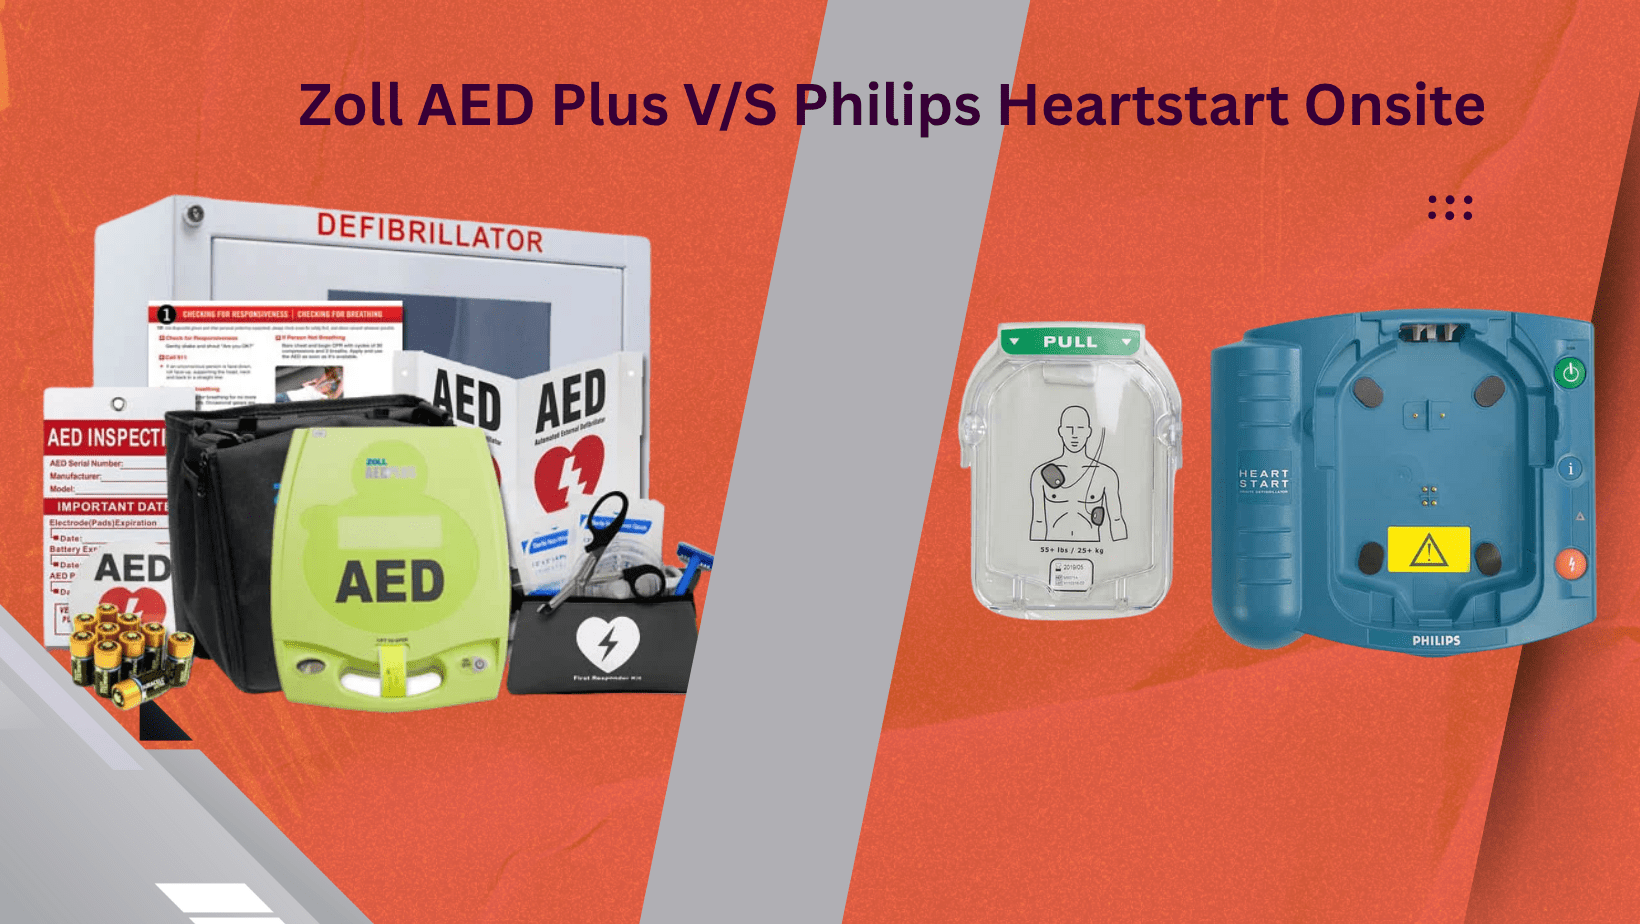
Emergencies don’t wait—and in high-risk environments like construction sites, factories, or warehouses, having an automated external defibrillator (AED) on hand can make the difference between life and death. But which one is right for your team?

We’re breaking down the best AEDs for jobsite safety, comparing two top-rated models from AED Leader: the Philips HeartStart Onsite Package and the ZOLL AED Plus Package. These devices combine ease of use, durability, and advanced features—perfect for fast-paced, unpredictable environments.

Philips HeartStart Onsite AED: Simplicity Meets Readiness

Trusted for its intuitive design, the Philips HeartStart Onsite AED is made for quick, confident action. With step-by-step voice prompts and a lightweight frame, it’s a favorite among both first-time users and seasoned safety pros.

✅ Key Benefits:

  • No prescription required
  • Ready to use out of the box
  • Daily self-checks for reliability
  • Clear CPR guidance

💡 Best For: Office buildings, warehouses, small to medium job sites

🔗 View the Philips HeartStart Onsite AED Package »

ZOLL AED Plus: Real-Time CPR Coaching on the Jobsite

For teams needing rugged performance and advanced CPR support, the ZOLL AED Plus is a standout. Its Real CPR Help® technology gives real-time feedback on chest compressions—so your team isn’t just acting fast, they’re doing it right.

✅ Key Benefits:

  • Visual, audio, and text prompts
  • Long battery and pad life (up to 5 years)
  • Water-resistant, durable case
  • One-piece CPR-D-padz® for speed and accuracy

💡 Best For: Construction zones, large-scale industrial sites, outdoor crews

🔗 Check out the ZOLL AED Plus Package »

Which AED Is Right for You?

If you’re looking for simplicity and affordability, the Philips HeartStart is a dependable choice. If your site demands more advanced CPR feedback or a tougher build, ZOLL is worth the investment.

Both AEDs meet OSHA and ANSI safety standards and are excellent additions to your emergency preparedness plan.

Jobsite Safety Tip:

Always train your team and perform monthly AED inspections. Proper placement and visibility of your AED can increase survival rates by over 70%.

🔄 Browse AED packages for your jobsite »

👍 Follow us on Facebook for safety updates »

Posted on

Do I Need Hearing Protection?

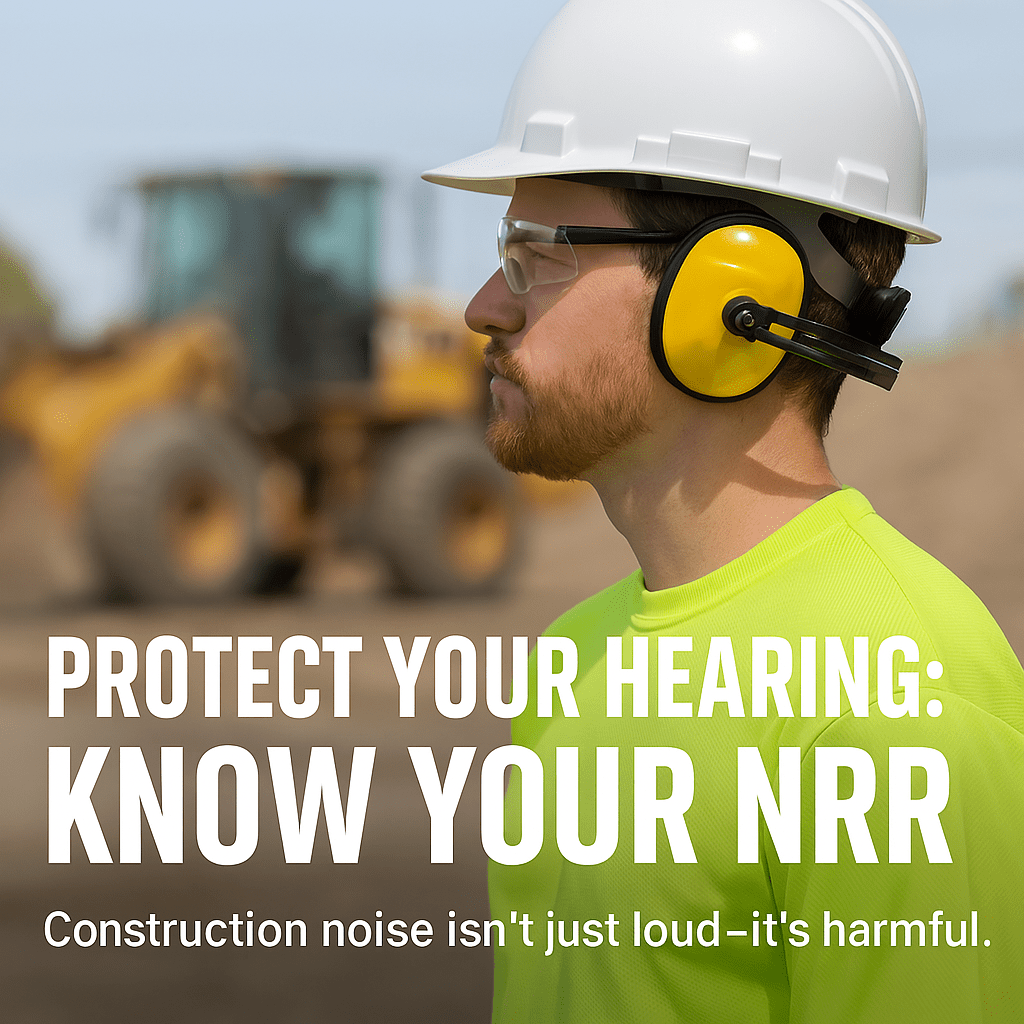
Protect Your Hearing on the Job: What Construction Workers Need to Know About Noise Reduction Rating (NRR)

If you work in construction or heavy industry, chances are you’re surrounded by high-decibel noise every day—power tools, heavy machinery, compressors, jackhammers, and more. While these are essential tools of the trade, long-term exposure to loud noise can lead to irreversible hearing damage. That’s why hearing protection for construction workers isn’t just a recommendation—it’s a necessity.

One of the most important things to understand when selecting industrial hearing protection is the Noise Reduction Rating (NRR). But what does NRR really mean, and how can you be sure you’re getting the right level of protection for your work environment?

What is Noise Reduction Rating (NRR)?

The Noise Reduction Rating (NRR) is a standardized measurement used to determine how much noise a hearing protection device (HPD) can block. It’s expressed in decibels (dB), and you’ll find it clearly marked on the packaging of earplugs and earmuffs.

For example:

  • Disposable foam earplugs: NRR 29–33 dB
  • Over-the-ear earmuffs: NRR 25–31 dB
  • Dual protection (earplugs + earmuffs): Can achieve effective reduction beyond 30 dB

The higher the NRR, the greater the protection—in theory. However, real-world usage often doesn’t match lab-tested conditions.

Real-World Noise Reduction: What You Actually Get

On job sites, perfect use is rare. To better reflect real-world hearing protection, safety organizations like OSHA and NIOSH recommend the following calculation:

(NRR – 7) ÷ 2 = Actual dB protection

So if your earmuffs are rated NRR 30:

  • 30 – 7 = 23
  • 23 ÷ 2 = 11.5 dB of actual protection

This formula helps account for imperfect fit, movement, and environmental factors that reduce effectiveness.

Why Hearing Protection is Critical in Construction and Industrial Settings

Banded Ear Plugs
Hearing protection that goes around the neck. Comes with replacement pods.

Daily exposure to sounds above 85 decibels can lead to noise-induced hearing loss (NIHL). Common noise levels on construction sites include:

  • Circular saw: 100 dB
  • Pneumatic drill: 110 dB
  • Bulldozer: 95–105 dB

Without proper protection, even short bursts of these sounds can cause long-term damage.

Recommended Hearing Protection Products for Construction Workers

Here are a few reliable options that balance protection, comfort, and durability for industrial environments:

  • 3M E-A-R Classic Earplugs (NRR 29 dB)
    Great for general construction use. Comfortable, disposable, and effective.
  • Howard Leight Laser Lite Foam Earplugs (NRR 32 dB)
    Brightly colored for visibility and compliance checks, with high attenuation.
  • 3M Peltor Optime 105 Over-the-Head Earmuffs (NRR 30 dB)
    Heavy-duty earmuffs ideal for use around jackhammers or concrete saws.
  • Honeywell Sync Digital AM/FM Earmuffs (NRR 25 dB)
    Combines hearing protection with built-in radio for long shifts.
  • 3M Peltor X5A Earmuffs (NRR 31 dB)
    Designed for extremely loud environments—great for demolition or airport work.

For high-noise areas, doubling up (earplugs + earmuffs) is often required. This combo can offer significantly more protection and is standard practice in many industrial settings.

Pro Tips for Maximum Hearing Safety

  • Train your team on proper earplug insertion—most underperform due to poor fit.
  • Inspect and replace hearing protection regularly—foam earplugs are not meant to be reused indefinitely.
  • Use signage on job sites to remind workers when and where hearing protection is mandatory.
  • Monitor sound levels with a noise dosimeter if you’re unsure whether protection is adequate.

Wrap-Up: Don’t Take Chances with Your Ears

Your hearing is one of your most important tools—and it’s not replaceable. By choosing the right hearing protection for construction sites and understanding how NRR works, you can drastically reduce your risk of permanent hearing damage.

Whether you’re cutting lumber, breaking concrete, or working near heavy equipment, always wear properly rated industrial ear protection. Your future self will thank you.


Looking for more safety gear? Sign up for our email alerts or check out our full Product line for our PPE.

Posted on

Essential Elements of Fall Protection Systems

Essential Elements of Fall Protection

Fall protection is essential when working at heights or in confined spaces. It serves as a regulatory requirement. It is also a crucial safeguard for life and safety. Comprehensive fall protection systems for construction and industrial settings include anchorages. They also feature body support harnesses, connectors, and descent and rescue equipment. Let’s explore each of these elements in detail and see how they work together to protect workers in hazardous environments.

What Are Anchorages and Why Are They Important?

Anchorages are the secure attachment points that form the foundation of any fall protection system. Designed to bear significant loads, anchorages must meet OSHA and ANSI standards to ensure safety. Common types of anchorages include:

  • Fixed Anchor Points: Installed directly onto structures like beams or walls.
  • Portable Anchor Systems: Easily moved and adjusted for temporary job sites.
  • Beam Anchors and Roof Anchors: Designed for specific surfaces to ensure stability.

The right anchorage choice depends on the job site conditions. It also depends on the type of work being performed and the maximum intended load. Regular inspection and maintenance of anchor points are crucial to maintaining their integrity.

Fall protection
Full Body HarnessWhat Makes a Good Body Support Harness?

The body harness is the wearable component of a fall protection system, designed to distribute the forces of a fall across the body’s stronger areas. Unlike traditional safety belts, modern full-body harnesses offer enhanced comfort, adjustability, and multiple attachment points. Features to look for include:

  • Padded Straps: For increased comfort during prolonged use.
  • D-Rings: Positioned at the back, chest, and sides for versatile connections.
  • Quick-Connect Buckles: Allow for easy donning and removal.

A properly fitted harness is critical to preventing injury in the event of a fall. Training workers on how to correctly wear and adjust their harnesses is equally important.

How Do Connectors Guarantee Safety?

Connectors serve as the link between the harness and the anchorage point, ensuring a secure and reliable connection. These include:

  • Lanyards: Shock-absorbing or self-retracting options that minimize fall distances.
  • Lifelines: Horizontal or vertical systems that allow mobility while maintaining safety.
  • Carabiners and Snap Hooks: High-strength metal connectors with locking mechanisms.

Each connector should be inspected before use to ensure it is free of damage, corrosion, or wear that could compromise its effectiveness.

What Is the Role of Descent and Rescue in Fall Protection?

No fall protection system is complete without a plan for descent and rescue. Confined spaces, in particular, require specialized equipment and strategies for emergency situations. Key components include:

  • Descent Devices: Controlled lowering systems for safe evacuation.
  • Rescue Tripods and Winches: Essential for confined space entry and emergency retrieval.
  • Rescue Plans: A clear, well-communicated strategy that includes trained personnel and rapid response protocols.

Employers must ensure that rescue equipment is readily available and that workers are trained in its proper use.

How Do You Integrate Fall Protection Systems?

An effective fall protection system isn’t just about having the right equipment—it’s about integrating these components into a cohesive strategy. Conducting site-specific risk assessments, providing comprehensive training, and performing regular equipment inspections are vital steps in protecting workers from fall-related hazards.

Conclusion

You need fall protection systems in every workplace. This is true whether you’re working on a construction site, in industrial settings, or entering confined spaces. They are a non-negotiable aspect of workplace safety. Understand and implement the key elements of anchorages, body support harnesses, connectors, and descent and rescue solutions. You’re complying with ANSI/ASP Z359.11-2021. You are also safeguarding lives. Stay proactive, stay prepared, and prioritize fall protection to ensure every worker returns home safely.