
Posted on

Emergency Drills: How to Test Your Plan Before You Need It

Nobody wants to hear the alarm go off at work.

Especially when someone says:

“Don’t worry. It’s just a drill.”

Cue the eye rolls.

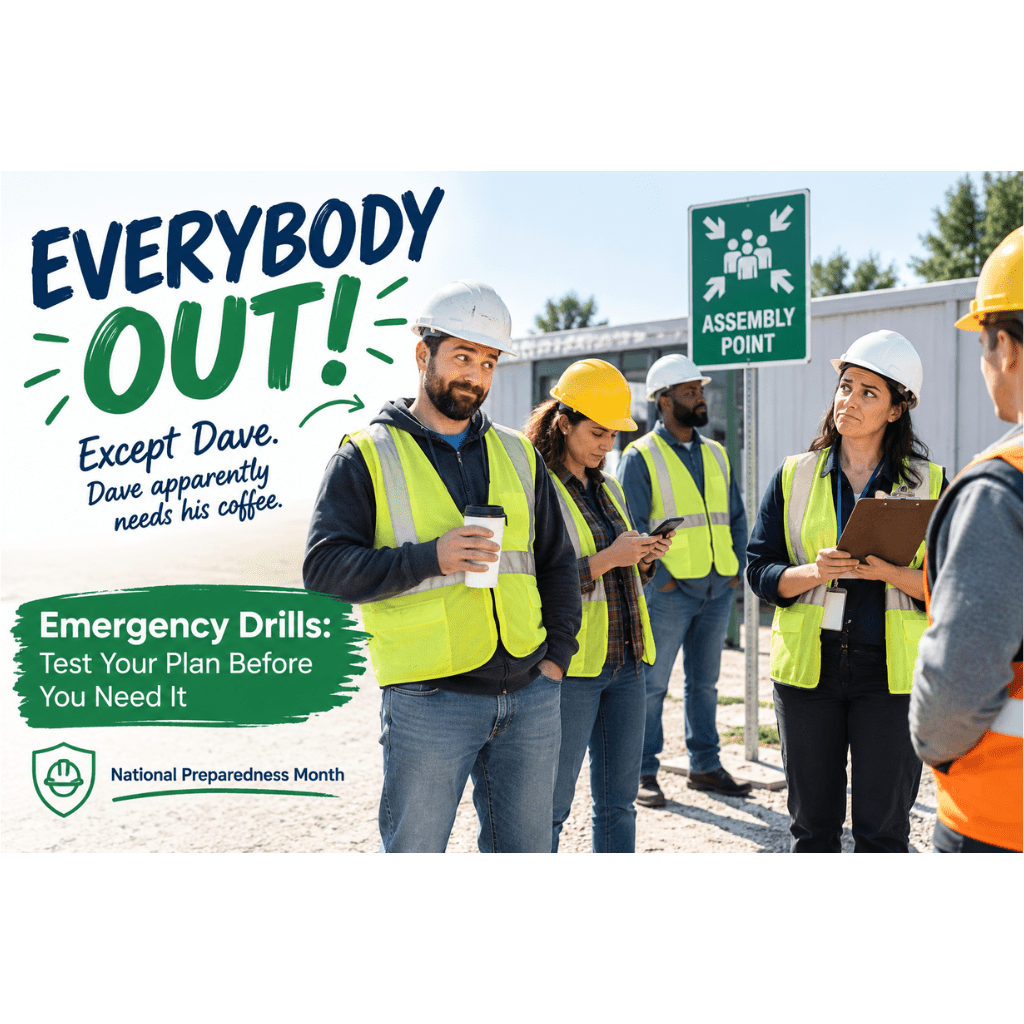
Someone grabs their coffee.

Someone else asks if they really have to leave.

And there is always at least one person who suddenly discovers they have a very important meeting happening in the parking lot.

But here’s the thing:

Emergency drills matter.

A drill gives your team a chance to practice what to do before there is an actual emergency.

Because the middle of a fire, severe weather event, chemical spill, or other emergency is a terrible time to discover that nobody knows where the evacuation map is.

Why Do Emergency Drills Matter?

An emergency plan can look perfect on paper.

That doesn’t mean it will work perfectly in real life.

A drill can show you things that a written plan can’t.

Maybe the alarm can’t be heard in part of the building.

Maybe employees aren’t sure where to assemble.

Maybe the evacuation route is blocked.

Maybe nobody knows who is responsible for accounting for visitors.

Maybe the person responsible for the emergency plan is on vacation.

Oops.

That’s exactly why you test the plan.

OSHA recommends drills and exercises as a way to help workers understand and remember their roles and responsibilities during an emergency.

A Drill Is a Rehearsal, Not a Gotcha

The purpose of an emergency drill isn’t to catch employees doing something wrong.

It’s to find problems before the stakes are real.

Think of it like a fire drill for your emergency plan.

You’re looking for questions such as:

  • Did everyone hear the alarm?
  • Did people know where to go?
  • Did anyone use the wrong exit?
  • Was the assembly area large enough?
  • Could supervisors account for their crews?
  • Were visitors included?
  • Did anyone get confused?
  • Did emergency equipment get in the way?
  • Did communication work?

If something doesn’t work during the drill, that’s good information.

Fix it.

That’s the whole point.

Start With the Emergency You Want to Test

You don’t have to simulate every possible disaster at once.

Pick one scenario.

For example:

Fire

Employees practice evacuation and accountability.

Severe weather

Employees practice moving to the designated shelter area.

Chemical spill

Employees practice reporting, isolating the area, and following the appropriate response procedures.

Workplace violence or active threat

Employees practice the procedures established for their facility and the specific situation.

Power outage

Employees practice communication, accountability, and safe shutdown procedures where applicable.

Different emergencies require different responses.

That’s why your drills should test different parts of your emergency plan over time.

Don’t Announce Every Drill

There’s a balance here.

Employees should know that drills are part of the safety program.

But if every drill is announced days in advance, you’re mostly testing whether people can remember something they were told to expect.

You may get a very orderly evacuation.

Congratulations.

You successfully evacuated a building because everyone knew Tuesday at 10:00 was evacuation day.

That’s not necessarily the same thing as testing your emergency plan.

OSHA’s emergency preparedness guidance encourages employers to conduct drills and exercises appropriate to their emergency plans and workplace hazards.

The exact approach should fit your workplace.

And don’t surprise employees with anything that could create a real safety risk.

Test the Alarm

Here’s an easy one.

Can everyone actually hear it?

Walk the facility.

Check:

  • Offices
  • Warehouses
  • Restrooms
  • Break rooms
  • Outdoor work areas
  • Mechanical rooms
  • Noisy production areas
  • Remote work areas

A beautiful alarm system doesn’t help the person who can’t hear it.

If your facility has multiple alarm signals, make sure employees understand what each one means.

Watch What Employees Actually Do

During a drill, resist the urge to jump in and correct everyone immediately.

Watch.

Where do people go?

Who stops to collect personal belongings?

Who heads for the nearest exit?

Who follows someone else because they aren’t sure what to do?

Who doesn’t move at all?

Who heads to the wrong assembly area?

This isn’t about embarrassing anybody.

It’s about learning where your plan needs work.

Check the Evacuation Routes

Walk the routes after the drill.

Ask:

Was anything in the way?

Construction materials.

Boxes.

Equipment.

Furniture.

Delivery carts.

That random pallet that has apparently been living there since 2024.

If employees can’t easily get through the route, it isn’t really an emergency exit route.

Construction sites need an additional level of attention because routes can change as the project progresses.

For more information, see our article on Emergency Preparedness for Construction Sites: What Changes When the Jobsite Changes?

Check the Assembly Area

Once everyone is outside, where do they go?

And can everyone fit?

The assembly area should be appropriate for your workplace and emergency plan.

During the drill, watch what happens.

Do people spread out?

Do employees know where their department or crew should assemble?

Can supervisors find their people?

Are employees standing somewhere that could interfere with emergency responders?

A meeting point is only useful if everyone knows where it is.

Practice Accountability

This is where the drill gets interesting.

Who is actually responsible for counting people?

Don’t assume someone will figure it out.

Your plan should identify who is responsible for employee accountability.

Depending on the workplace, that may involve:

  • Supervisors
  • Department managers
  • Foremen
  • Safety personnel
  • Employee rosters
  • Visitor logs
  • Contractor lists

Construction sites have an additional challenge because the people on site can change throughout the day.

Your drill should test how you account for employees, subcontractors, visitors, and others who may be present.

Don’t Forget the People Who Aren’t There Every Day

A workplace isn’t always filled with the same people.

Think about:

  • Visitors
  • Contractors
  • Delivery drivers
  • Temporary workers
  • New employees
  • Customers

If your drill only works for your regular employees, your plan may have a hole in it.

Make sure your process includes people who may not know the building.

Test Communication

Emergency communication can get messy quickly.

During a drill, test:

  • Alarm systems
  • Radios
  • Phones
  • Public-address systems
  • Text alerts
  • Emergency contact lists
  • Supervisor communication

Ask:

Did everyone receive the message?

And just as important:

Did everyone understand it?

“Something is happening” isn’t nearly as useful as:

“Evacuate the building using your assigned exit and report to the north parking lot assembly area.”

Try Something Besides a Fire Drill

Fire drills are important.

But they’re not the only emergency worth practicing.

If your emergency plan only gets tested when someone pulls the fire alarm, you’re leaving a lot of questions unanswered.

Consider rotating scenarios throughout the year.

Severe Weather Drill

Practice:

  • Receiving the warning
  • Moving to shelter
  • Accounting for employees
  • Communicating updates

Spill Response Exercise

Practice:

  • Reporting the spill
  • Identifying the material
  • Isolating the area
  • Locating the spill kit
  • Identifying appropriate PPE
  • Determining whether the spill is something employees can safely handle

Medical Emergency Exercise

Practice:

  • Calling for help
  • Directing emergency responders
  • Retrieving first aid supplies or an AED
  • Assigning someone to meet EMS
  • Maintaining access to the injured worker

Evacuation Exercise

Practice:

  • Alarm notification
  • Exit routes
  • Assembly
  • Accountability
  • Communication

The goal isn’t to create a Hollywood production.

The goal is to practice the response.

Construction Sites: Drill What Can Actually Change

Construction sites deserve special attention.

Your emergency plan may change because:

  • The building is at a different stage
  • The access road moved
  • A new subcontractor arrived
  • The crew changed
  • The assembly area moved
  • A stairway changed
  • Temporary power was installed
  • New hazards were introduced

That means a drill can do more than test employees.

It can test whether the current version of the plan still matches the current jobsite.

And that’s valuable.

Don’t Make the Drill Too Complicated

You don’t need smoke machines.

You don’t need crisis actors pretending to be injured.

You don’t need a dramatic countdown clock.

And please don’t create a scenario that puts employees or emergency responders at unnecessary risk.

A simple, well-planned exercise can reveal plenty.

Start with:

What are we testing?

Then decide:

What do we want to learn?

That’s enough.

After the Drill: Ask the Awkward Questions

This is the part people often skip.

Everyone goes back inside.

The coffee resumes.

Someone says, “Well, that went pretty well.”

And the drill disappears into history.

Don’t do that.

Spend a few minutes reviewing what happened.

Ask:

  • What worked?
  • What didn’t?
  • What confused people?
  • Was the alarm effective?
  • Were the exits clear?
  • Did everyone know where to go?
  • Was accountability successful?
  • Were visitors included?
  • Did communication work?
  • Did anyone identify a problem we hadn’t considered?

Most importantly:

What are we going to fix?

Write Down What You Learned

Keep a simple record of the exercise.

Document:

  • Date
  • Type of drill
  • Scenario
  • Participants
  • What worked
  • Problems identified
  • Corrective actions
  • Person responsible
  • Target completion date

That turns a drill into an improvement tool.

Otherwise, six months later someone may say:

“Didn’t we have a problem with that last time?”

And nobody remembers.

Fix the Problems You Find

This is the most important part.

If the drill shows that the emergency exit is blocked, clear it.

If employees don’t understand the alarm, train them.

If the assembly area doesn’t work, change it.

If nobody knows who accounts for visitors, assign someone.

If the radio doesn’t work inside the warehouse, find another communication method.

Don’t let your drill become an annual tradition where everyone practices the same mistakes.

A Quick Emergency Drill Checklist

Before the next drill, ask:

☐ What emergency are we testing?

☐ What part of the emergency plan are we evaluating?

☐ Do employees know the basic emergency procedures?

☐ Are evacuation routes clear?

☐ Is the assembly area appropriate?

☐ Can employees hear or receive the emergency notification?

☐ Can supervisors account for their employees?

☐ Are visitors and contractors included?

☐ Are emergency contacts current?

☐ Are emergency supplies available?

☐ Did we identify corrective actions?

☐ Did someone take responsibility for fixing them?

☐ Will we follow up?

If the answer to that last question is “we’ll get around to it,” put a date on the calendar.

Future You will appreciate it.

The Best Drill Is the One That Teaches You Something

A perfect emergency drill isn’t necessarily the goal.

In fact, a drill that uncovers a problem can be incredibly valuable.

You found the problem without anyone being hurt.

That’s a win.

Emergency preparedness isn’t about predicting exactly what will happen.

It’s about giving your team the knowledge, training, equipment, and procedures they need to respond when something unexpected happens.

So run the drill.

Let it be a little awkward.

Find the problems.

Fix them.

Then do it again.

Because the emergency is not the time for a dress rehearsal.

Take the Checklist to the Workplace

Want to put your emergency preparedness plan through a practical check?

Our Workplace Emergency Preparedness Checklist can help you review evacuation procedures, communication, accountability, emergency supplies, and other important areas. Download here

Keep Building Your Emergency Preparedness Plan

This article is part of our National Preparedness Month work place safety series.

Continue exploring the series:

And don’t forget to download our Workplace Emergency Preparedness Checklist to help identify gaps in your current

Important Note

This article is provided for general educational purposes and is not legal or safety consulting advice. Emergency drills should be planned for the specific hazards and conditions of your workplace. Do not conduct exercises that create unnecessary risk or interfere with actual emergency response. Follow applicable OSHA requirements and coordinate with appropriate safety personnel and emergency responders when necessary.
Posted on

Evacuation vs. Shelter-in-Place: Does Your Workplace Know the Difference?

When an emergency happens, one question can become very important very quickly:

Do we get out, or do we stay inside?

The answer depends on the emergency.

Sometimes the safest choice is to evacuate.

Other times, leaving the building can put employees in greater danger.

That is why a good Emergency Action Plan should address both evacuation and shelter-in-place when appropriate. OSHA specifically recommends that employers consider the conditions that would require evacuation and the conditions under which sheltering in place may be safer.

Knowing the difference can help employees respond faster and with less confusion.

What Does Evacuation Mean?

Evacuation means leaving a building, work area, or other location because remaining there presents a danger.

The goal is to move employees away from the hazard and toward a safe location.

Depending on the emergency, that might mean:

  • Leaving the entire building
  • Leaving only part of a building
  • Moving to another area of the facility
  • Moving to a designated assembly area
  • Moving away from a specific hazard

OSHA’s Emergency Action Plan standard requires covered employers to establish emergency evacuation procedures, including the type of evacuation and exit route assignments.

When Might a Workplace Evacuate?

Evacuation may be appropriate when remaining inside creates a greater risk.

Examples can include:

  • Fire
  • Explosion
  • Structural damage
  • Certain hazardous-material releases
  • Gas leaks
  • Bomb threats
  • Some workplace violence situations
  • Other emergencies that make the building or work area unsafe

The correct response depends on the specific emergency.

For example, OSHA identifies fires, explosions, chemical releases, natural disasters, civil disturbances, and workplace violence among situations that may require evacuation planning.

What Does Shelter-in-Place Mean?

Shelter-in-place means staying inside a designated safe area instead of evacuating.

The idea is simple:

If the danger is outside the building or moving through the surrounding area, remaining inside may provide more protection than going outside.

OSHA describes shelter-in-place as selecting an interior room or rooms within a facility, often with few or no windows, and taking refuge there.

Depending on the emergency, sheltering may involve:

  • Moving employees to designated interior areas
  • Closing doors and windows
  • Limiting outside air entry when appropriate
  • Taking emergency supplies into the shelter area
  • Accounting for employees
  • Monitoring official instructions
  • Remaining there until authorities or designated personnel provide further instructions

When Might Shelter-in-Place Make Sense?

Shelter-in-place may be appropriate when the hazard is outside the building and leaving would increase exposure.

Examples can include:

  • A hazardous chemical release nearby
  • A transportation accident involving hazardous materials
  • Certain severe weather events
  • A dangerous situation outside the facility
  • Some workplace violence or active-threat situations

OSHA gives the example of a hazardous chemical release near a workplace where remaining indoors may be safer than evacuating through the contaminated area.

The key is to understand the hazard.

Staying inside isn’t automatically safer.

The emergency determines the response.

Evacuation vs. Shelter-in-Place

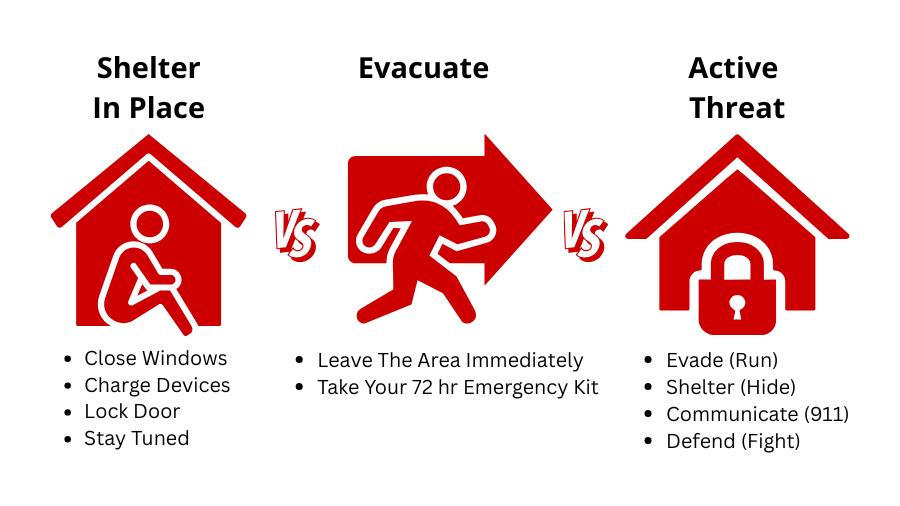
Shelter in place or evacuate

Here’s the simplest way to think about it:

If the danger is…The plan may call for…
Inside the buildingEvacuation may be appropriate
Outside the buildingShelter-in-place may be appropriate
Moving toward or through the facilityFollow the specific emergency plan
A severe weather eventShelter or evacuation may depend on the hazard
A hazardous-material releaseEvacuation or sheltering may depend on the location and type of release
A fire or explosionEvacuation is commonly part of the response
A dangerous intruderEmployees may need to evacuate or shelter depending on circumstances

This isn’t a universal decision table.

The emergency, the workplace, and official instructions all matter.

Your Emergency Action Plan Should Address Both

A strong emergency plan shouldn’t simply say:

“In an emergency, evacuate.”

That’s not enough.

OSHA’s guidance says employers should identify the conditions that require evacuation and the conditions under which shelter-in-place may be better. See here.

Your plan should explain:

  • What situations require evacuation
  • What situations may require shelter-in-place
  • Who can order an evacuation
  • Who can initiate shelter-in-place procedures
  • How employees will be notified
  • Where employees should go
  • How employees will be accounted for
  • What happens to visitors and contractors
  • How employees with special needs will be assisted
  • How employees will receive further instructions

Don’t Use the Same Alarm for Everything

This is an easy detail to overlook.

If your workplace uses alarms or other signals for emergency actions, employees need to understand what those signals mean.

OSHA recommends that different emergency actions use distinguishable notification methods when appropriate. Its shelter-in-place guidance specifically recommends an alert that is distinguishable from the signal used for evacuation.

Think about it this way:

If the alarm goes off, employees shouldn’t have to ask, “What are we supposed to do?”

The signal should trigger a known response.

Where Would Employees Shelter?

“Stay inside” isn’t a complete shelter-in-place plan.

Employees need to know where to go.

A designated shelter area may be:

  • An interior room
  • An area with few or no windows
  • A location away from the hazard
  • An area appropriate for the type of emergency

The best location depends on the emergency.

For example, the ideal shelter location for severe weather may not be the same location used for a chemical release.

That is why emergency planning needs to consider different scenarios.

What Should Be Available in a Shelter Area?

The supplies you need will depend on your workplace and the emergencies you are planning for.

However, consider whether employees may need access to:

  • Emergency communication
  • Flashlights
  • Batteries
  • First aid supplies
  • Drinking water
  • Emergency contact information
  • Employee rosters
  • Basic emergency supplies
  • Appropriate PPE
  • Radios or other communication equipment (NOAA’s Weather Radar and Alerts App – iPhone Android)

For certain shelter-in-place situations, additional supplies may be appropriate.

The goal isn’t to turn a conference room into a survival bunker.

The goal is to make sure employees can safely remain there long enough to receive further instructions.

Account for Everyone

Whether employees evacuate or shelter in place, accountability matters.

Your emergency plan should explain how you will know who is safe.

That can include:

  • Employee rosters
  • Department lists
  • Visitor logs
  • Contractor lists
  • Supervisors
  • Designated accountability personnel

Construction sites may need additional planning because crews and subcontractors can change frequently.

For more information, see our guide to Emergency Preparedness for Construction Sites: What Changes When the Jobsite Changes?

Don’t Forget Visitors and Contractors

Your employees aren’t the only people who may need instructions.

Think about:

  • Visitors
  • Delivery drivers
  • Contractors
  • Temporary workers
  • Customers
  • Vendors

Someone who has never been inside your facility won’t automatically know where to go.

Your emergency procedures should include a way to account for people who aren’t part of your regular workforce.

Employees With Special Needs Need a Plan Too

Emergency planning should consider employees who may need additional assistance.

That could include people with:

  • Mobility limitations
  • Hearing limitations
  • Vision limitations
  • Language barriers
  • Other circumstances that may affect their ability to receive or follow emergency instructions

OSHA specifically recommends considering special-needs employees as part of emergency planning.

The best time to figure this out is before the emergency.

What About Active Threats?

Active-threat situations are a good example of why “always evacuate” isn’t a sufficient emergency plan.

Depending on the circumstances, employees may need to evacuate, shelter, or take other actions based on the immediate threat.

OSHA includes special considerations for evacuation during an active shooter or other dangerous intruder situation in its emergency preparedness guidance.

Employees should receive clear training appropriate to the workplace rather than being expected to make up a response in the moment.

Construction Sites Have an Extra Challenge

Construction sites can make evacuation and shelter planning more complicated.

The safest location can change as the project changes.

Consider:

  • Temporary structures
  • Open floors
  • Excavations
  • Equipment
  • Temporary power
  • Changing access points
  • Changing crews
  • Severe weather exposure
  • Limited enclosed areas

For construction companies, emergency plans should be reviewed as site conditions change.

OSHA’s construction standard, 29 CFR 1926.35, requires employers to establish the types of evacuation to be used in emergency circumstances and to train employees to assist with safe and orderly evacuation.

Practice Both Responses

You can have the best emergency plan in the world.

If nobody has practiced it, employees may still hesitate.

OSHA notes that drills and exercises can help workers understand and remember their roles and responsibilities during emergencies.

Consider practicing different scenarios.

For example:

Scenario 1: Fire in the facility
→ Evacuation

Scenario 2: Hazardous chemical release outside the building
→ Shelter-in-place

Scenario 3: Tornado warning
→ Move to designated shelter

Scenario 4: Emergency affecting one area of the building
→ Partial evacuation or relocation

After each exercise, ask:

What worked?

What didn’t?

What confused people?

Those answers can make your emergency plan better.

A Quick Evacuation vs. Shelter-in-Place Check

Walk through these questions with your team:

☐ Do employees know when they should evacuate?

☐ Do employees know when they may need to shelter in place?

☐ Are evacuation routes clearly identified?

☐ Are shelter locations clearly identified?

☐ Are emergency signals easy to understand?

☐ Can employees receive emergency instructions?

☐ Do you have a way to account for employees?

☐ Are visitors and contractors included?

☐ Have special-needs considerations been addressed?

☐ Are shelter supplies available where needed?

☐ Have employees practiced the procedures?

☐ Has the plan been reviewed since the workplace or jobsite changed?

If several answers are “I’m not sure,” that’s a good indication that your emergency plan deserves another look.

The Goal Is Knowing What to Do Before You Need It

Evacuation and shelter-in-place are not competing safety philosophies.

They are different tools for different emergencies.

The right response depends on the hazard, the workplace, and the information available at the time.

The important part is planning ahead.

Your employees should not have to figure out the plan while the emergency is happening.

They should already know:

Where do I go?

How do I get there?

What am I supposed to do when I get there?

Who tells me when it is safe?

That’s what preparedness looks like.

Take the Checklist to the Workplace

Want to put your emergency preparedness plan to the test?

Our Workplace Emergency Preparedness Checklist gives you a practical way to review evacuation, communication, accountability, emergency supplies, and other important areas.

Download the Workplace Emergency Preparedness Checklist and walk through it with your team.

Keep Building Your Emergency Preparedness Plan

This article is part of our National Preparedness Month work place safety series.

Continue exploring the series:

And don’t forget to download our Workplace Emergency Preparedness Checklist to help identify gaps in your current

Important Note

This article is provided for general educational purposes and is not legal or safety consulting advice. Emergency drills should be planned for the specific hazards and conditions of your workplace. Do not conduct exercises that create unnecessary risk or interfere with actual emergency response. Follow applicable OSHA requirements and coordinate with appropriate safety personnel and emergency responders when necessary.

Posted on

Spill Happens: What Every Workplace Should Know About Spill Response

Let’s face it.

Spills happen.

A container gets knocked over. A hydraulic line leaks. A drum develops a problem. Someone drops a bottle of cleaning chemical.

The question isn’t whether your workplace will ever have a spill.

The better question is:

Will your employees know what to do when one happens?

A good spill response plan can help employees recognize hazards, protect themselves, contain an appropriate spill, and know when it is time to step away and call for help.

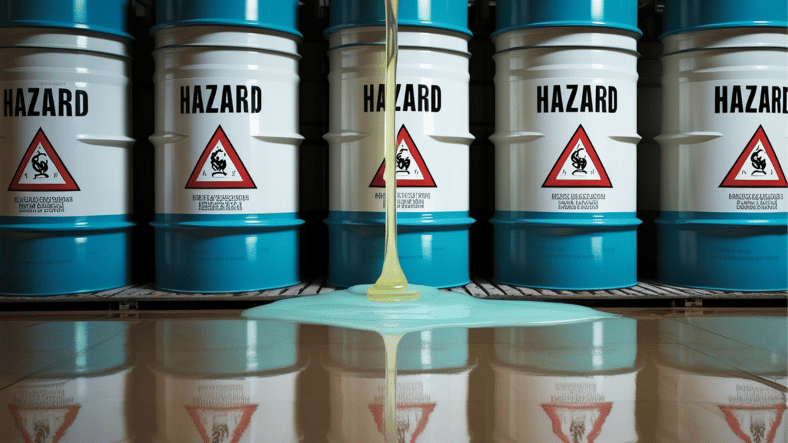
Workplace spill response
Drum develops a problem

What Is a Workplace Spill Response Plan?

A spill response plan explains what employees should do when a material is accidentally released.

The plan should be based on the materials used or stored at your workplace and the hazards they present.

Depending on your operation, that could include:

  • Oil and lubricants
  • Fuel
  • Cleaning chemicals
  • Paints and coatings
  • Solvents
  • Battery chemicals
  • Industrial chemicals
  • Bodily fluids
  • Other hazardous substances

Your plan should also identify who is responsible for responding, what equipment is available, and when employees should evacuate or call for outside assistance.

Not Every Spill Is an Emergency

This is one of the most important things to understand.

OSHA’s Hazardous Waste Operations and Emergency Response standard, commonly called HAZWOPER, makes an important distinction between an incidental release and an emergency response.

An incidental release is one that employees in the immediate area can safely absorb, neutralize, or otherwise control without creating a significant safety or health hazard.

An uncontrolled release of a hazardous substance, or a release that creates a significant potential for fire, explosion, or exposure, can require a much different response.

In other words:

A small spill that you can safely control is not the same thing as an uncontrolled hazardous-material release.

That distinction matters.

Employees should never be encouraged to “just clean it up” simply because a spill looks small.

Step 1: Stop and Identify the Hazard

Before anyone reaches for a spill kit, stop.

Ask:

What spilled?

If the material is unknown, employees should not guess.

Check the container label and the Safety Data Sheet (SDS), when available. The SDS can provide important information about hazards, handling, required PPE, first aid, storage, and accidental-release measures.

Employees should also consider:

  • Is the material flammable?
  • Can it produce harmful vapors?
  • Can it burn the skin?
  • Can it damage the eyes?
  • Is it reactive?
  • Is there a risk of exposure?
  • Is the spill spreading?
  • Could it reach a drain or waterway?
  • Is there a fire or explosion hazard?

If employees cannot safely identify or assess the material, back away and get help.

Step 2: Protect People First

The first priority is not saving the floor.

It’s protecting people.

Depending on the situation, the appropriate response may include:

  • Alerting nearby employees
  • Isolating the area
  • Preventing unnecessary access
  • Moving employees away from the release
  • Using an emergency alarm
  • Evacuating the area
  • Calling emergency responders

Do not let the desire to save a product, floor, machine, or cleanup cost put someone in danger.

People first. Property second.

Step 3: Know Your Spill Kit

A spill kit is only useful if employees know where it is and know how to use it.

A basic spill kit may include items such as:

  • Absorbent pads
  • Absorbent socks or booms
  • Granular absorbent
  • Disposal bags
  • Gloves
  • Eye protection
  • Protective clothing
  • Warning or caution tape
  • Other equipment appropriate for the material being handled

The right kit depends on the hazard.

For example, an oil-only spill kit is designed for petroleum-based liquids. A universal kit may be suitable for many non-aggressive liquids. Chemical spills may require specialized absorbents and PPE.

One spill kit does not automatically fit every spill.

Step 4: Wear the Right PPE

PPE should be selected based on the hazard.

That may include:

  • Chemical-resistant gloves
  • Safety glasses
  • Goggles
  • Face shields
  • Protective clothing
  • Chemical-resistant aprons
  • Respiratory protection when required
  • Safety footwear

The important word is appropriate.

A pair of disposable gloves may be perfectly reasonable for one cleanup and completely inadequate for another.

OSHA’s HAZWOPER requirements emphasize hazard evaluation and the use of appropriate engineering controls, work practices, and PPE for covered hazardous-material operations.

Employees should know what PPE is required before they begin cleanup.

Step 5: Stop the Spill From Spreading When It Is Safe

If the situation is safe to control, employees may need to prevent the material from spreading.

That might mean:

  • Uprighting a container
  • Closing a valve
  • Placing absorbent socks around the spill
  • Protecting nearby drains
  • Using appropriate absorbent material
  • Moving unaffected materials away from the area

But there is an important limitation:

Do not attempt to stop a release if doing so would expose an employee to an unsafe condition.

Containment is not worth an injury.

Step 6: Keep Spills Away From Drains

A spill that reaches a floor drain can quickly become a much bigger problem.

Depending on the material, a release can move beyond the immediate work area and potentially reach wastewater systems, soil, or waterways.

That’s why drain covers and absorbent socks can be valuable components of a spill response program.

Employees should know where these supplies are located before an emergency happens.

Step 7: Clean Up and Dispose of Materials Properly

Once the spill has been safely contained, cleanup materials still need to be handled correctly.

Used absorbents, contaminated PPE, containers, and other cleanup materials may need special handling or disposal depending on what they contain.

Don’t assume that everything used to clean up a chemical spill can simply go into the regular trash.

The material, the amount released, and applicable environmental and waste requirements can all affect disposal decisions.

When in doubt, consult the SDS, your workplace procedures, environmental requirements, and qualified professionals.

When Should Employees NOT Clean Up a Spill?

This may be the most important section of this article.

Employees should not attempt to clean up a release simply because they have access to a spill kit.

Stop and get help when:

  • The material is unknown.
  • The spill is spreading rapidly.
  • There is a fire or explosion hazard.
  • Dangerous vapors are present.
  • Employees may be exposed to a hazardous substance.
  • The spill is beyond the employee’s training.
  • The required PPE is not available.
  • The release cannot be safely contained.
  • The incident requires specialized equipment or trained responders.
  • The workplace emergency plan calls for evacuation.

OSHA’s HAZWOPER standard specifically distinguishes emergency response to uncontrolled releases from incidental releases that can be safely controlled by employees in the immediate area.

Knowing when not to respond is part of good emergency preparedness.

Training Matters

A spill response plan only works if employees understand it.

Employees should know:

  • What materials they may encounter
  • Where SDSs are located
  • Where spill kits are stored
  • What PPE is required
  • How to report a spill
  • How to isolate an area
  • When they can handle an incidental spill
  • When they should evacuate
  • Who to contact for help

For workplaces covered by HAZWOPER emergency-response requirements, OSHA has specific training requirements based on the employee’s role in the response.

Don’t Forget to Check the Spill Kit

This one sounds obvious.

It isn’t.

Spill kits have a way of becoming the workplace equivalent of the junk drawer.

Someone uses half the absorbent.

The gloves disappear.

The disposal bags get borrowed.

Nobody replaces anything.

Then six months later, there is a spill.

And suddenly everyone discovers that the “spill kit” isn’t really a spill kit anymore.

Check your supplies regularly.

Make sure employees can find them quickly.

Replace used or expired supplies.

Keep the appropriate PPE nearby.

And make sure the equipment matches the hazards present in your workplace.

A Quick Spill Response Checklist

Use this as a simple starting point for your workplace:

☐ Do employees know how to report a spill?

☐ Are hazardous materials clearly identified?

☐ Are current SDSs accessible?

☐ Does your workplace have the right type of spill kit?

☐ Do employees know where spill kits are located?

☐ Is appropriate PPE available?

☐ Do employees know when they can handle an incidental spill?

☐ Do employees know when to evacuate?

☐ Are emergency contacts easy to find?

☐ Are used spill supplies replaced promptly?

☐ Are employees trained on your spill response procedures?

If you answered “I’m not sure” to a few of these, that’s a good reason to review your spill response plan.

Spill Preparedness Is Part of Emergency Preparedness

A spill doesn’t have to become a major emergency.

Good preparation can help employees recognize the hazard, protect themselves, contain an appropriate release, and get the right help when the situation goes beyond their training.

That starts before the spill happens.

Know your hazards.

Know your procedures.

Know your PPE.

Know your spill supplies.

And most importantly, know when to walk away.

Keep Building Your Emergency Preparedness Plan

This article is part of our National Preparedness Month work place safety series.

Continue exploring the series:

And don’t forget to download our Workplace Emergency Preparedness Checklist to help identify gaps in your current

Important Note

This article is provided for general educational purposes and is not legal or safety consulting advice. Emergency drills should be planned for the specific hazards and conditions of your workplace. Do not conduct exercises that create unnecessary risk or interfere with actual emergency response. Follow applicable OSHA requirements and coordinate with appropriate safety personnel and emergency responders when necessary.

Sources