Posted on

Workplace Emergency Kits: What Should You Actually Have on Hand?

When an emergency happens, nobody wants to discover that the first aid kit is missing half its supplies, the flashlight batteries are dead, or the emergency response bag is sitting somewhere nobody can find.

Unfortunately, that is exactly why emergency preparedness needs to happen before an emergency.

So, what should you actually have on hand?

The answer depends on your workplace.

A construction site may need different emergency supplies than a manufacturing facility. A utility crew working in the field has different challenges than an office. A warehouse, school, contractor, or remote jobsite may all need different equipment based on their hazards, number of employees, location, and emergency response capabilities.

There is no single “one-size-fits-all” workplace emergency kit.

Instead, think about what your employees could realistically encounter, what they may need immediately, and how quickly outside emergency services can reach them.

Start With the Basics: First Aid

First aid supplies are one of the most obvious parts of an emergency preparedness plan.

OSHA’s general industry standard, 29 CFR 1910.151, requires adequate first aid supplies to be readily available when the circumstances covered by the standard apply.

For construction, OSHA’s 29 CFR 1926.50 requires first aid supplies to be easily accessible when required. Construction first aid kits also have specific requirements for being kept in weatherproof containers and checked before being sent to each job and at least weekly on each job so used supplies can be replaced.

That does not mean every workplace needs the same size or type of kit.

Consider:

  • Number of employees
  • Number and location of work areas
  • Distance from medical facilities
  • Types of injuries that could occur
  • Whether employees work indoors or outdoors
  • Whether employees travel between jobsites
  • Whether the workplace has trained first aid responders
  • Whether the work involves chemicals, machinery, vehicles, heights, or other hazards

OSHA also recognizes that larger or multiple operations may need additional first aid kits, additional types of equipment, and larger quantities of supplies.

In other words, the size of your workforce and the hazards of your workplace matter.

What Might Belong in a Workplace Emergency Kit?

Depending on your workplace, an emergency kit may include:

First Aid Supplies

  • Adhesive bandages
  • Gauze and wound dressings
  • Medical tape
  • Antiseptic wipes
  • Disposable gloves
  • Scissors
  • Cold packs
  • Burn care supplies
  • Eye pads
  • Emergency blankets
  • CPR barriers
  • First aid instructions

Larger or higher-risk workplaces may need additional supplies and more specialized equipment.

The goal is not to build the biggest kit possible.

The goal is to have the right supplies, in the right quantities, where employees can actually get to them.

Consider a Modular Emergency Response System

This is where things can get interesting.

Not every workplace needs the same emergency supplies. A construction company, manufacturing facility, utility crew, warehouse, and office can have very different risks.

That is one reason a modular emergency response system can make sense.

One example we carry at Southern Safety Supply is the Aero Healthcare Modulator Emergency Response Bag.

Instead of putting everything into one giant compartment and hoping someone can find what they need when the pressure is on, the Modulator system organizes supplies into clearly identified modules.

That can make it easier to identify and access the type of supplies needed for a particular situation.

The system can also be configured for different response needs, including options for trauma care, bleeding control, burns, eye injuries, sprains and fractures, general first aid, and AED/CPR preparation.

There are also different bag and case configurations, including options designed for more demanding environments.

Why Go Modular?

A modular emergency response system may help you:

  • Organize supplies by type of injury or response need
  • Find critical supplies more quickly
  • Replace or replenish specific components
  • Build a kit around the hazards of your workplace
  • Choose a portable bag, backpack, or rugged case
  • Add equipment based on your emergency response plan
  • Keep supplies organized instead of digging through one large bag

And that last part matters.

During an emergency, “I know it’s in here somewhere” is not exactly a great response strategy.

A modular system is not necessary for every workplace. A basic first aid kit may be perfectly appropriate for a lower-risk environment.

The important part is matching the emergency response equipment to the workplace.

What About AEDs?

An automated external defibrillator, or AED, may be an important part of an emergency response plan depending on the workplace and its needs.

If your workplace has an AED, don’t stop at purchasing the device.

Make sure employees know:

  • Where it is located
  • How to access it
  • How to recognize the emergency situations covered by your training
  • Who is trained to respond
  • How emergency medical services will be contacted
  • What other emergency equipment is located nearby

Some emergency response systems can be configured to carry an AED along with other trauma and first aid supplies.

For example, Aero Healthcare offers Modulator configurations that combine emergency response supplies with AED equipment and additional bleeding-control supplies.

That type of setup can be useful when the goal is to create a centralized, mobile emergency response system rather than keeping several pieces of equipment scattered around a facility.

Don’t Forget Bleeding Control

Serious bleeding can become a life-threatening emergency very quickly.

Depending on your workplace hazards, bleeding-control supplies may be appropriate in addition to a standard first aid kit.

Potential supplies can include:

  • Pressure dressings
  • Hemostatic dressings
  • Tourniquets
  • Trauma shears
  • Gloves
  • Additional wound dressings

The right equipment depends on your workplace risk assessment and employee training.

For higher-risk environments, it may make sense to have dedicated bleeding-control supplies that are clearly identified and quickly accessible.

Spill Response Supplies

First aid is only one part of emergency preparedness.

If your workplace stores, handles, or transports chemicals, oils, fuels, or other liquids, spill response supplies may also belong in your emergency preparedness plan.

Depending on the hazards involved, that could include:

  • Absorbent pads
  • Absorbent socks
  • Spill pillows
  • Disposal bags
  • Protective gloves
  • Protective eyewear
  • Caution or warning signs
  • Chemical-specific absorbents
  • Spill kits designed for particular materials

The type of spill kit you need should match the materials present in your workplace.

A kit designed for an oil spill is not automatically the right choice for every chemical spill.

Your emergency plan should also explain who is responsible for responding, when employees should evacuate instead, and when outside emergency assistance is needed.

Emergency Lighting and Communication

Power outages and other emergencies can quickly turn a normal workplace into a difficult place to navigate.

Consider keeping emergency supplies such as:

  • Flashlights
  • Headlamps
  • Spare batteries
  • Battery-powered radios
  • Backup communication equipment
  • Portable chargers
  • Emergency contact information

Think about where these supplies are stored, too.

A flashlight locked in an office that employees cannot reach during a power failure isn’t particularly helpful.

Emergency equipment should be accessible and employees should know where to find it.

Severe Weather Supplies

Your emergency kit should reflect the emergencies most likely to affect your location.

Depending on your area and workplace, that could include:

  • Severe thunderstorms
  • Tornadoes
  • Flooding
  • Winter weather
  • Extreme heat
  • Power outages
  • Wildfires
  • Other regional hazards

For shelter-in-place situations, emergency supplies may include water, flashlights, batteries, first aid supplies, communication equipment, and other items identified in your emergency plan.

OSHA’s emergency preparedness guidance also recommends considering emergency equipment and supplies as part of the overall emergency plan.

The important thing is to plan for the emergencies that are realistic for your workplace.

Construction Sites Need a Little More Thought

Construction sites change constantly.

The crew changes. The work changes. The building changes. Access points move. Hazards change.

Your emergency supplies need to keep up.

Construction employers should consider:

  • Where first aid supplies are located
  • How employees will reach them
  • How emergency responders will access the site
  • How injured employees will be transported
  • Communication methods
  • Changing evacuation routes
  • Temporary work areas
  • Severe weather
  • Falls and rescue situations
  • Trenching and excavation hazards
  • Electrical hazards
  • Hot work and fire risks
  • Chemical and spill hazards

For construction, OSHA specifically requires provisions for prompt medical attention and requires first aid supplies to be accessible when required.

The first aid kit also needs to be checked before being sent out on each job and at least weekly on each job, with expended items replaced.

That makes one thing very clear:

Buying the kit is not the same thing as maintaining the kit.

Don’t Forget Eyewash

If employees could be exposed to injurious corrosive materials, OSHA’s general industry standard requires suitable facilities for quick drenching or flushing of the eyes and body to be available for immediate emergency use.

That means a first aid kit alone may not address the emergency response needs of a workplace where corrosive materials are present.

Depending on the hazard, your emergency response plan may need to include appropriate eyewash or emergency shower equipment located where employees can reach it quickly.

Again, this is about matching your equipment to the actual hazards.

Location Matters Almost as Much as the Supplies

Imagine having a fully stocked emergency response bag.

Now imagine it is locked in a cabinet on the other side of the building.

Not quite as useful.

Emergency equipment should be easy to locate and accessible to the people who may need it.

Consider:

  • Is the location clearly marked?
  • Do employees know where it is?
  • Can employees reach it quickly?
  • Is it accessible after normal business hours?
  • Is it protected from weather when necessary?
  • Is it portable if the work location changes?
  • Are multiple kits needed?
  • Do contractors and temporary employees know where supplies are located?

Your emergency plan should answer these questions before an emergency happens.

Check the Kit. Then Check It Again.

Emergency supplies have a bad habit of disappearing.

Bandages get used. Gloves get opened. Batteries go dead. Products expire. Someone borrows the flashlight and forgets to put it back.

And sometimes the emergency kit becomes the place where random stuff goes to retire.

Don’t let that happen.

Emergency equipment should be inspected regularly to make sure:

  • Supplies are present
  • Used items have been replaced
  • Expired items have been removed
  • Packaging is intact
  • Batteries are charged or replaced
  • Equipment is clean and ready
  • Emergency contact information is current
  • Employees know where the equipment is located

For construction operations, remember that OSHA’s 1926.50 standard specifically calls for first aid kits to be checked before being sent out on each job and at least weekly on each job.

Your Emergency Kit Should Match Your Emergency Plan

An emergency kit should not exist by itself.

It should support your Emergency Action Plan.

Your plan should address questions such as:

  • What emergencies are most likely to happen?
  • Who calls 911?
  • Who provides first aid?
  • Where are first aid supplies located?
  • Where is the AED?
  • Where are spill kits located?
  • Where do employees evacuate?
  • Where should employees shelter in place?
  • How will employees be accounted for?
  • Who meets emergency responders?
  • How will visitors and contractors be accounted for?
  • When should employees attempt to respond, and when should they evacuate?

Your emergency supplies should support those procedures.

If the plan says employees will shelter in a specific location, that location may need appropriate emergency supplies.

If a construction crew moves from one area of a project to another, emergency equipment may need to move with them.

If a manufacturing operation has specific chemical hazards, the emergency response equipment should reflect those hazards.

Workplace Emergency Kit Reality Check

Take a few minutes and look at your current emergency supplies.

Can you answer “yes” to these questions?

  • Do we have appropriate first aid supplies?
  • Are the supplies readily accessible?
  • Do we have enough supplies for the number of employees and work areas?
  • Are supplies appropriate for our workplace hazards?
  • Do we have appropriate spill response supplies?
  • Do we have emergency lighting and communication supplies where needed?
  • Do employees know where emergency equipment is located?
  • Are emergency supplies checked regularly?
  • Are expired and used supplies replaced?
  • Do construction kits get checked as required?
  • Do we have appropriate eyewash or emergency flushing equipment where corrosive exposure is possible?
  • Do we have an AED if our emergency plan calls for one?
  • Are bleeding-control supplies appropriate for our workplace hazards?
  • Does our emergency equipment support our Emergency Action Plan?
  • Have we actually tested our emergency procedures?

If you found a few boxes you couldn’t check, that’s not necessarily a problem.

It means you found something to work on before you need it.

The Bottom Line

A workplace emergency kit isn’t about buying the biggest kit you can find and putting it in a closet.

It is about having the right supplies, in the right place, in the right quantities, and ready to use.

For some workplaces, that may mean a basic first aid kit.

For others, it may mean a more comprehensive modular emergency response system with trauma supplies, bleeding control, AED equipment, spill response supplies, emergency lighting, or other specialized equipment.

The best emergency kit is the one that matches your workplace and supports your emergency plan.

And remember, preparedness doesn’t end when the kit arrives.

Check it. Maintain it. Replenish it. Know where it is. Make sure your people know, too.

Because discovering that your emergency kit is missing what you need is not the kind of surprise anyone wants on a Tuesday morning.

Need Help Building Your Workplace Emergency Kit?

Southern Safety Supply can help you look at your workplace hazards, employees, work environment, and emergency response needs to determine what supplies make sense for your operation.

We carry a wide range of first aid, emergency response, spill response, PPE, eyewash, AED, and safety equipment for workplaces of all sizes.

And if you’re tired of finding out you’re out of something when you need it, that’s where our NEVER OUT™ Inventory Management service comes in. Regular inventory checks help keep essential safety supplies stocked, organized, and ready.

Preparedness works better when somebody actually checks the supplies.

Keep Building Your Emergency Preparedness Plan

This article is part of our National Preparedness Month work place safety series.

Continue exploring the series:

And don’t forget to download our Workplace Emergency Preparedness Checklist to help identify gaps in your current

Important Note

This article is provided for general educational purposes and is not legal or safety consulting advice. Emergency drills should be planned for the specific hazards and conditions of your workplace. Do not conduct exercises that create unnecessary risk or interfere with actual emergency response. Follow applicable OSHA requirements and coordinate with appropriate safety personnel and emergency responders when necessary.
Posted on

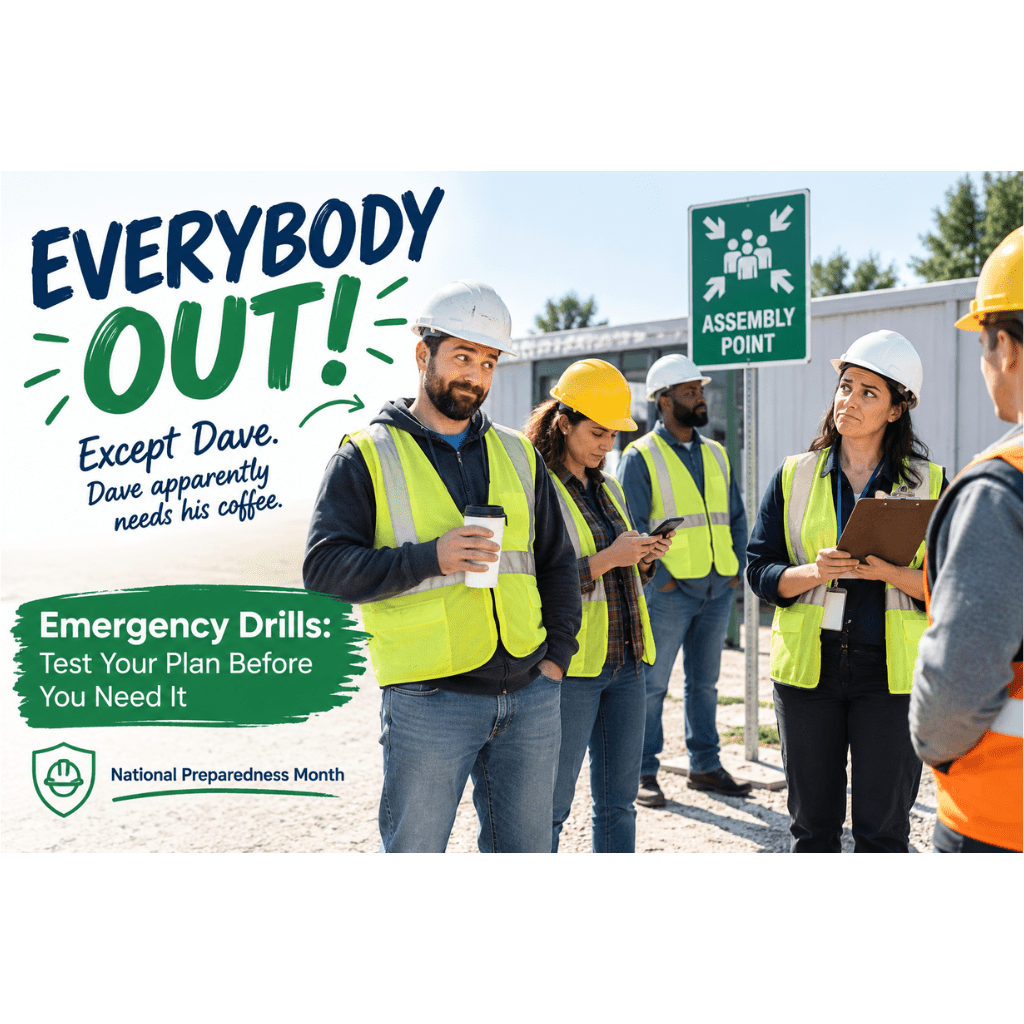
Emergency Drills: How to Test Your Plan Before You Need It

Nobody wants to hear the alarm go off at work.

Especially when someone says:

“Don’t worry. It’s just a drill.”

Cue the eye rolls.

Someone grabs their coffee.

Someone else asks if they really have to leave.

And there is always at least one person who suddenly discovers they have a very important meeting happening in the parking lot.

But here’s the thing:

Emergency drills matter.

A drill gives your team a chance to practice what to do before there is an actual emergency.

Because the middle of a fire, severe weather event, chemical spill, or other emergency is a terrible time to discover that nobody knows where the evacuation map is.

Why Do Emergency Drills Matter?

An emergency plan can look perfect on paper.

That doesn’t mean it will work perfectly in real life.

A drill can show you things that a written plan can’t.

Maybe the alarm can’t be heard in part of the building.

Maybe employees aren’t sure where to assemble.

Maybe the evacuation route is blocked.

Maybe nobody knows who is responsible for accounting for visitors.

Maybe the person responsible for the emergency plan is on vacation.

Oops.

That’s exactly why you test the plan.

OSHA recommends drills and exercises as a way to help workers understand and remember their roles and responsibilities during an emergency.

A Drill Is a Rehearsal, Not a Gotcha

The purpose of an emergency drill isn’t to catch employees doing something wrong.

It’s to find problems before the stakes are real.

Think of it like a fire drill for your emergency plan.

You’re looking for questions such as:

  • Did everyone hear the alarm?
  • Did people know where to go?
  • Did anyone use the wrong exit?
  • Was the assembly area large enough?
  • Could supervisors account for their crews?
  • Were visitors included?
  • Did anyone get confused?
  • Did emergency equipment get in the way?
  • Did communication work?

If something doesn’t work during the drill, that’s good information.

Fix it.

That’s the whole point.

Start With the Emergency You Want to Test

You don’t have to simulate every possible disaster at once.

Pick one scenario.

For example:

Fire

Employees practice evacuation and accountability.

Severe weather

Employees practice moving to the designated shelter area.

Chemical spill

Employees practice reporting, isolating the area, and following the appropriate response procedures.

Workplace violence or active threat

Employees practice the procedures established for their facility and the specific situation.

Power outage

Employees practice communication, accountability, and safe shutdown procedures where applicable.

Different emergencies require different responses.

That’s why your drills should test different parts of your emergency plan over time.

Don’t Announce Every Drill

There’s a balance here.

Employees should know that drills are part of the safety program.

But if every drill is announced days in advance, you’re mostly testing whether people can remember something they were told to expect.

You may get a very orderly evacuation.

Congratulations.

You successfully evacuated a building because everyone knew Tuesday at 10:00 was evacuation day.

That’s not necessarily the same thing as testing your emergency plan.

OSHA’s emergency preparedness guidance encourages employers to conduct drills and exercises appropriate to their emergency plans and workplace hazards.

The exact approach should fit your workplace.

And don’t surprise employees with anything that could create a real safety risk.

Test the Alarm

Here’s an easy one.

Can everyone actually hear it?

Walk the facility.

Check:

  • Offices
  • Warehouses
  • Restrooms
  • Break rooms
  • Outdoor work areas
  • Mechanical rooms
  • Noisy production areas
  • Remote work areas

A beautiful alarm system doesn’t help the person who can’t hear it.

If your facility has multiple alarm signals, make sure employees understand what each one means.

Watch What Employees Actually Do

During a drill, resist the urge to jump in and correct everyone immediately.

Watch.

Where do people go?

Who stops to collect personal belongings?

Who heads for the nearest exit?

Who follows someone else because they aren’t sure what to do?

Who doesn’t move at all?

Who heads to the wrong assembly area?

This isn’t about embarrassing anybody.

It’s about learning where your plan needs work.

Check the Evacuation Routes

Walk the routes after the drill.

Ask:

Was anything in the way?

Construction materials.

Boxes.

Equipment.

Furniture.

Delivery carts.

That random pallet that has apparently been living there since 2024.

If employees can’t easily get through the route, it isn’t really an emergency exit route.

Construction sites need an additional level of attention because routes can change as the project progresses.

For more information, see our article on Emergency Preparedness for Construction Sites: What Changes When the Jobsite Changes?

Check the Assembly Area

Once everyone is outside, where do they go?

And can everyone fit?

The assembly area should be appropriate for your workplace and emergency plan.

During the drill, watch what happens.

Do people spread out?

Do employees know where their department or crew should assemble?

Can supervisors find their people?

Are employees standing somewhere that could interfere with emergency responders?

A meeting point is only useful if everyone knows where it is.

Practice Accountability

This is where the drill gets interesting.

Who is actually responsible for counting people?

Don’t assume someone will figure it out.

Your plan should identify who is responsible for employee accountability.

Depending on the workplace, that may involve:

  • Supervisors
  • Department managers
  • Foremen
  • Safety personnel
  • Employee rosters
  • Visitor logs
  • Contractor lists

Construction sites have an additional challenge because the people on site can change throughout the day.

Your drill should test how you account for employees, subcontractors, visitors, and others who may be present.

Don’t Forget the People Who Aren’t There Every Day

A workplace isn’t always filled with the same people.

Think about:

  • Visitors
  • Contractors
  • Delivery drivers
  • Temporary workers
  • New employees
  • Customers

If your drill only works for your regular employees, your plan may have a hole in it.

Make sure your process includes people who may not know the building.

Test Communication

Emergency communication can get messy quickly.

During a drill, test:

  • Alarm systems
  • Radios
  • Phones
  • Public-address systems
  • Text alerts
  • Emergency contact lists
  • Supervisor communication

Ask:

Did everyone receive the message?

And just as important:

Did everyone understand it?

“Something is happening” isn’t nearly as useful as:

“Evacuate the building using your assigned exit and report to the north parking lot assembly area.”

Try Something Besides a Fire Drill

Fire drills are important.

But they’re not the only emergency worth practicing.

If your emergency plan only gets tested when someone pulls the fire alarm, you’re leaving a lot of questions unanswered.

Consider rotating scenarios throughout the year.

Severe Weather Drill

Practice:

  • Receiving the warning
  • Moving to shelter
  • Accounting for employees
  • Communicating updates

Spill Response Exercise

Practice:

  • Reporting the spill
  • Identifying the material
  • Isolating the area
  • Locating the spill kit
  • Identifying appropriate PPE
  • Determining whether the spill is something employees can safely handle

Medical Emergency Exercise

Practice:

  • Calling for help
  • Directing emergency responders
  • Retrieving first aid supplies or an AED
  • Assigning someone to meet EMS
  • Maintaining access to the injured worker

Evacuation Exercise

Practice:

  • Alarm notification
  • Exit routes
  • Assembly
  • Accountability
  • Communication

The goal isn’t to create a Hollywood production.

The goal is to practice the response.

Construction Sites: Drill What Can Actually Change

Construction sites deserve special attention.

Your emergency plan may change because:

  • The building is at a different stage
  • The access road moved
  • A new subcontractor arrived
  • The crew changed
  • The assembly area moved
  • A stairway changed
  • Temporary power was installed
  • New hazards were introduced

That means a drill can do more than test employees.

It can test whether the current version of the plan still matches the current jobsite.

And that’s valuable.

Don’t Make the Drill Too Complicated

You don’t need smoke machines.

You don’t need crisis actors pretending to be injured.

You don’t need a dramatic countdown clock.

And please don’t create a scenario that puts employees or emergency responders at unnecessary risk.

A simple, well-planned exercise can reveal plenty.

Start with:

What are we testing?

Then decide:

What do we want to learn?

That’s enough.

After the Drill: Ask the Awkward Questions

This is the part people often skip.

Everyone goes back inside.

The coffee resumes.

Someone says, “Well, that went pretty well.”

And the drill disappears into history.

Don’t do that.

Spend a few minutes reviewing what happened.

Ask:

  • What worked?
  • What didn’t?
  • What confused people?
  • Was the alarm effective?
  • Were the exits clear?
  • Did everyone know where to go?
  • Was accountability successful?
  • Were visitors included?
  • Did communication work?
  • Did anyone identify a problem we hadn’t considered?

Most importantly:

What are we going to fix?

Write Down What You Learned

Keep a simple record of the exercise.

Document:

  • Date
  • Type of drill
  • Scenario
  • Participants
  • What worked
  • Problems identified
  • Corrective actions
  • Person responsible
  • Target completion date

That turns a drill into an improvement tool.

Otherwise, six months later someone may say:

“Didn’t we have a problem with that last time?”

And nobody remembers.

Fix the Problems You Find

This is the most important part.

If the drill shows that the emergency exit is blocked, clear it.

If employees don’t understand the alarm, train them.

If the assembly area doesn’t work, change it.

If nobody knows who accounts for visitors, assign someone.

If the radio doesn’t work inside the warehouse, find another communication method.

Don’t let your drill become an annual tradition where everyone practices the same mistakes.

A Quick Emergency Drill Checklist

Before the next drill, ask:

☐ What emergency are we testing?

☐ What part of the emergency plan are we evaluating?

☐ Do employees know the basic emergency procedures?

☐ Are evacuation routes clear?

☐ Is the assembly area appropriate?

☐ Can employees hear or receive the emergency notification?

☐ Can supervisors account for their employees?

☐ Are visitors and contractors included?

☐ Are emergency contacts current?

☐ Are emergency supplies available?

☐ Did we identify corrective actions?

☐ Did someone take responsibility for fixing them?

☐ Will we follow up?

If the answer to that last question is “we’ll get around to it,” put a date on the calendar.

Future You will appreciate it.

The Best Drill Is the One That Teaches You Something

A perfect emergency drill isn’t necessarily the goal.

In fact, a drill that uncovers a problem can be incredibly valuable.

You found the problem without anyone being hurt.

That’s a win.

Emergency preparedness isn’t about predicting exactly what will happen.

It’s about giving your team the knowledge, training, equipment, and procedures they need to respond when something unexpected happens.

So run the drill.

Let it be a little awkward.

Find the problems.

Fix them.

Then do it again.

Because the emergency is not the time for a dress rehearsal.

Take the Checklist to the Workplace

Want to put your emergency preparedness plan through a practical check?

Our Workplace Emergency Preparedness Checklist can help you review evacuation procedures, communication, accountability, emergency supplies, and other important areas. Download here

Keep Building Your Emergency Preparedness Plan

This article is part of our National Preparedness Month work place safety series.

Continue exploring the series:

And don’t forget to download our Workplace Emergency Preparedness Checklist to help identify gaps in your current

Important Note

This article is provided for general educational purposes and is not legal or safety consulting advice. Emergency drills should be planned for the specific hazards and conditions of your workplace. Do not conduct exercises that create unnecessary risk or interfere with actual emergency response. Follow applicable OSHA requirements and coordinate with appropriate safety personnel and emergency responders when necessary.

Posted on

Evacuation vs. Shelter-in-Place: Does Your Workplace Know the Difference?

When an emergency happens, one question can become very important very quickly:

Do we get out, or do we stay inside?

The answer depends on the emergency.

Sometimes the safest choice is to evacuate.

Other times, leaving the building can put employees in greater danger.

That is why a good Emergency Action Plan should address both evacuation and shelter-in-place when appropriate. OSHA specifically recommends that employers consider the conditions that would require evacuation and the conditions under which sheltering in place may be safer.

Knowing the difference can help employees respond faster and with less confusion.

What Does Evacuation Mean?

Evacuation means leaving a building, work area, or other location because remaining there presents a danger.

The goal is to move employees away from the hazard and toward a safe location.

Depending on the emergency, that might mean:

  • Leaving the entire building
  • Leaving only part of a building
  • Moving to another area of the facility
  • Moving to a designated assembly area
  • Moving away from a specific hazard

OSHA’s Emergency Action Plan standard requires covered employers to establish emergency evacuation procedures, including the type of evacuation and exit route assignments.

When Might a Workplace Evacuate?

Evacuation may be appropriate when remaining inside creates a greater risk.

Examples can include:

  • Fire
  • Explosion
  • Structural damage
  • Certain hazardous-material releases
  • Gas leaks
  • Bomb threats
  • Some workplace violence situations
  • Other emergencies that make the building or work area unsafe

The correct response depends on the specific emergency.

For example, OSHA identifies fires, explosions, chemical releases, natural disasters, civil disturbances, and workplace violence among situations that may require evacuation planning.

What Does Shelter-in-Place Mean?

Shelter-in-place means staying inside a designated safe area instead of evacuating.

The idea is simple:

If the danger is outside the building or moving through the surrounding area, remaining inside may provide more protection than going outside.

OSHA describes shelter-in-place as selecting an interior room or rooms within a facility, often with few or no windows, and taking refuge there.

Depending on the emergency, sheltering may involve:

  • Moving employees to designated interior areas
  • Closing doors and windows
  • Limiting outside air entry when appropriate
  • Taking emergency supplies into the shelter area
  • Accounting for employees
  • Monitoring official instructions
  • Remaining there until authorities or designated personnel provide further instructions

When Might Shelter-in-Place Make Sense?

Shelter-in-place may be appropriate when the hazard is outside the building and leaving would increase exposure.

Examples can include:

  • A hazardous chemical release nearby
  • A transportation accident involving hazardous materials
  • Certain severe weather events
  • A dangerous situation outside the facility
  • Some workplace violence or active-threat situations

OSHA gives the example of a hazardous chemical release near a workplace where remaining indoors may be safer than evacuating through the contaminated area.

The key is to understand the hazard.

Staying inside isn’t automatically safer.

The emergency determines the response.

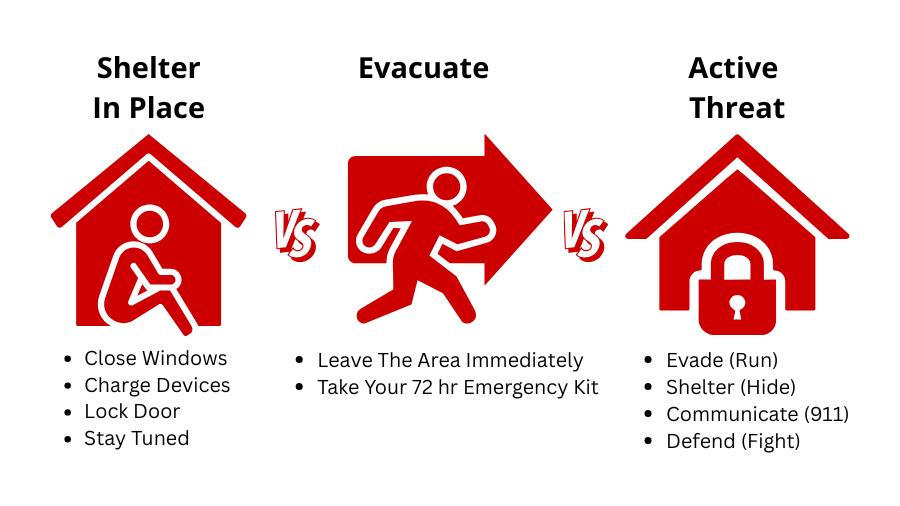
Evacuation vs. Shelter-in-Place

Shelter in place or evacuate

Here’s the simplest way to think about it:

If the danger is…The plan may call for…
Inside the buildingEvacuation may be appropriate
Outside the buildingShelter-in-place may be appropriate
Moving toward or through the facilityFollow the specific emergency plan
A severe weather eventShelter or evacuation may depend on the hazard
A hazardous-material releaseEvacuation or sheltering may depend on the location and type of release
A fire or explosionEvacuation is commonly part of the response
A dangerous intruderEmployees may need to evacuate or shelter depending on circumstances

This isn’t a universal decision table.

The emergency, the workplace, and official instructions all matter.

Your Emergency Action Plan Should Address Both

A strong emergency plan shouldn’t simply say:

“In an emergency, evacuate.”

That’s not enough.

OSHA’s guidance says employers should identify the conditions that require evacuation and the conditions under which shelter-in-place may be better. See here.

Your plan should explain:

  • What situations require evacuation
  • What situations may require shelter-in-place
  • Who can order an evacuation
  • Who can initiate shelter-in-place procedures
  • How employees will be notified
  • Where employees should go
  • How employees will be accounted for
  • What happens to visitors and contractors
  • How employees with special needs will be assisted
  • How employees will receive further instructions

Don’t Use the Same Alarm for Everything

This is an easy detail to overlook.

If your workplace uses alarms or other signals for emergency actions, employees need to understand what those signals mean.

OSHA recommends that different emergency actions use distinguishable notification methods when appropriate. Its shelter-in-place guidance specifically recommends an alert that is distinguishable from the signal used for evacuation.

Think about it this way:

If the alarm goes off, employees shouldn’t have to ask, “What are we supposed to do?”

The signal should trigger a known response.

Where Would Employees Shelter?

“Stay inside” isn’t a complete shelter-in-place plan.

Employees need to know where to go.

A designated shelter area may be:

  • An interior room
  • An area with few or no windows
  • A location away from the hazard
  • An area appropriate for the type of emergency

The best location depends on the emergency.

For example, the ideal shelter location for severe weather may not be the same location used for a chemical release.

That is why emergency planning needs to consider different scenarios.

What Should Be Available in a Shelter Area?

The supplies you need will depend on your workplace and the emergencies you are planning for.

However, consider whether employees may need access to:

  • Emergency communication
  • Flashlights
  • Batteries
  • First aid supplies
  • Drinking water
  • Emergency contact information
  • Employee rosters
  • Basic emergency supplies
  • Appropriate PPE
  • Radios or other communication equipment (NOAA’s Weather Radar and Alerts App – iPhone Android)

For certain shelter-in-place situations, additional supplies may be appropriate.

The goal isn’t to turn a conference room into a survival bunker.

The goal is to make sure employees can safely remain there long enough to receive further instructions.

Account for Everyone

Whether employees evacuate or shelter in place, accountability matters.

Your emergency plan should explain how you will know who is safe.

That can include:

  • Employee rosters
  • Department lists
  • Visitor logs
  • Contractor lists
  • Supervisors
  • Designated accountability personnel

Construction sites may need additional planning because crews and subcontractors can change frequently.

For more information, see our guide to Emergency Preparedness for Construction Sites: What Changes When the Jobsite Changes?

Don’t Forget Visitors and Contractors

Your employees aren’t the only people who may need instructions.

Think about:

  • Visitors
  • Delivery drivers
  • Contractors
  • Temporary workers
  • Customers
  • Vendors

Someone who has never been inside your facility won’t automatically know where to go.

Your emergency procedures should include a way to account for people who aren’t part of your regular workforce.

Employees With Special Needs Need a Plan Too

Emergency planning should consider employees who may need additional assistance.

That could include people with:

  • Mobility limitations
  • Hearing limitations
  • Vision limitations
  • Language barriers
  • Other circumstances that may affect their ability to receive or follow emergency instructions

OSHA specifically recommends considering special-needs employees as part of emergency planning.

The best time to figure this out is before the emergency.

What About Active Threats?

Active-threat situations are a good example of why “always evacuate” isn’t a sufficient emergency plan.

Depending on the circumstances, employees may need to evacuate, shelter, or take other actions based on the immediate threat.

OSHA includes special considerations for evacuation during an active shooter or other dangerous intruder situation in its emergency preparedness guidance.

Employees should receive clear training appropriate to the workplace rather than being expected to make up a response in the moment.

Construction Sites Have an Extra Challenge

Construction sites can make evacuation and shelter planning more complicated.

The safest location can change as the project changes.

Consider:

  • Temporary structures
  • Open floors
  • Excavations
  • Equipment
  • Temporary power
  • Changing access points
  • Changing crews
  • Severe weather exposure
  • Limited enclosed areas

For construction companies, emergency plans should be reviewed as site conditions change.

OSHA’s construction standard, 29 CFR 1926.35, requires employers to establish the types of evacuation to be used in emergency circumstances and to train employees to assist with safe and orderly evacuation.

Practice Both Responses

You can have the best emergency plan in the world.

If nobody has practiced it, employees may still hesitate.

OSHA notes that drills and exercises can help workers understand and remember their roles and responsibilities during emergencies.

Consider practicing different scenarios.

For example:

Scenario 1: Fire in the facility
→ Evacuation

Scenario 2: Hazardous chemical release outside the building
→ Shelter-in-place

Scenario 3: Tornado warning
→ Move to designated shelter

Scenario 4: Emergency affecting one area of the building
→ Partial evacuation or relocation

After each exercise, ask:

What worked?

What didn’t?

What confused people?

Those answers can make your emergency plan better.

A Quick Evacuation vs. Shelter-in-Place Check

Walk through these questions with your team:

☐ Do employees know when they should evacuate?

☐ Do employees know when they may need to shelter in place?

☐ Are evacuation routes clearly identified?

☐ Are shelter locations clearly identified?

☐ Are emergency signals easy to understand?

☐ Can employees receive emergency instructions?

☐ Do you have a way to account for employees?

☐ Are visitors and contractors included?

☐ Have special-needs considerations been addressed?

☐ Are shelter supplies available where needed?

☐ Have employees practiced the procedures?

☐ Has the plan been reviewed since the workplace or jobsite changed?

If several answers are “I’m not sure,” that’s a good indication that your emergency plan deserves another look.

The Goal Is Knowing What to Do Before You Need It

Evacuation and shelter-in-place are not competing safety philosophies.

They are different tools for different emergencies.

The right response depends on the hazard, the workplace, and the information available at the time.

The important part is planning ahead.

Your employees should not have to figure out the plan while the emergency is happening.

They should already know:

Where do I go?

How do I get there?

What am I supposed to do when I get there?

Who tells me when it is safe?

That’s what preparedness looks like.

Take the Checklist to the Workplace

Want to put your emergency preparedness plan to the test?

Our Workplace Emergency Preparedness Checklist gives you a practical way to review evacuation, communication, accountability, emergency supplies, and other important areas.

Download the Workplace Emergency Preparedness Checklist and walk through it with your team.

Keep Building Your Emergency Preparedness Plan

This article is part of our National Preparedness Month work place safety series.

Continue exploring the series:

And don’t forget to download our Workplace Emergency Preparedness Checklist to help identify gaps in your current

Important Note

This article is provided for general educational purposes and is not legal or safety consulting advice. Emergency drills should be planned for the specific hazards and conditions of your workplace. Do not conduct exercises that create unnecessary risk or interfere with actual emergency response. Follow applicable OSHA requirements and coordinate with appropriate safety personnel and emergency responders when necessary.

Posted on

Emergency Preparedness for Construction Sites:

What Changes When the Jobsite Changes

Construction sites have one thing that many other workplaces don’t:

They don’t stay the same.

The entrance may move.

A new floor gets added.

Temporary power changes.

Equipment comes and goes.

Crews change.

New subcontractors arrive.

And the hazards can change right along with them.

That creates a unique challenge for emergency preparedness.

A plan that made sense two months ago may not make sense today.

For construction companies, emergency preparedness needs to be more than a document created at the beginning of a project. It needs to keep up with the jobsite.

Why Construction Sites Need a Different Approach

A traditional workplace may have the same exits, assembly area, equipment, and employees every day.

A construction site can change from week to week.

That means emergency planning needs to account for changing conditions.

Some of the challenges can include:

  • Changing access points
  • Temporary stairways and ladders
  • Openings and unfinished floors
  • Temporary electrical systems
  • Heavy equipment
  • Excavation and trenching
  • Scaffolding
  • Cranes and lifts
  • Welding and hot work
  • Flammable materials
  • Chemicals and fuels
  • Changing weather conditions
  • Multiple contractors and subcontractors
  • Employees who may not regularly work at the site

Because the jobsite changes, the emergency plan needs to change with it.

What Does OSHA Say About Construction Emergency Plans?

OSHA’s construction standard, 29 CFR 1926.35, addresses employee emergency action plans.

The standard requires employers to have an emergency action plan for workplaces covered by the requirement. The plan addresses emergency escape procedures, emergency reporting, procedures for employees who remain behind for critical operations, accounting for employees, rescue and medical duties, and designated employees who assist with evacuation.

Construction employers must also designate and train enough people to assist with a safe and orderly emergency evacuation.

OSHA also requires the plan to be reviewed with employees when appropriate, including when employees are initially assigned to the job and when their responsibilities under the plan change.

The important takeaway is simple:

Your construction site needs an emergency plan that employees can actually use.

Start With the Hazards on This Jobsite

Every construction project is different.

So don’t start with a generic emergency plan and assume it covers everything.

Start with the hazards.

Ask:

What could realistically go wrong here?

Depending on the project, that might include:

  • Fire
  • Severe weather
  • Electrical incidents
  • Falls
  • Equipment accidents
  • Trench or excavation emergencies
  • Structural collapse
  • Chemical spills
  • Fuel releases
  • Confined-space emergencies
  • Medical emergencies
  • Utility strikes
  • Heat-related emergencies
  • Workplace violence
  • Flooding
  • Power outages

The list should reflect the actual work being performed.

A high-rise project and a road construction project may have very different emergency risks.

Know How Employees Will Report an Emergency

When something goes wrong, employees shouldn’t have to figure out who to call.

Your plan should clearly explain how emergencies are reported.

Depending on the project, that might include:

  • Calling 911
  • Using a site radio
  • Contacting the superintendent
  • Contacting the safety manager
  • Activating an alarm
  • Using a designated emergency phone

Make sure employees know the procedure.

This is especially important for new workers and subcontractors who may not be familiar with the site.

Keep Emergency Contact Information Current

Construction projects can have a long list of important contacts.

That may include:

  • 911
  • Site superintendent
  • Project manager
  • Safety manager
  • General contractor
  • Property owner
  • Utility companies
  • Emergency medical services
  • Fire department
  • Local emergency management
  • Environmental or hazardous-material response contacts

Don’t let the emergency contact list become another outdated document.

Review it when project contacts change.

Know Where the Emergency Access Points Are

Emergency responders need to be able to find you.

That sounds obvious.

On a construction site, it isn’t always easy.

Temporary roads, gates, equipment, fencing, materials, and changing site conditions can make access difficult.

Make sure employees know:

  • The current site address
  • The best emergency entrance
  • Gate locations
  • Access roads
  • Restricted areas
  • Designated emergency vehicle routes
  • The location of the nearest hospital or medical facility

If the site is large, consider how responders will find the exact area where an incident occurs.

“Come to the construction site” isn’t exactly a great set of directions.

Establish an Assembly Area

Employees need to know where to go after an evacuation.

That means identifying an assembly area that is:

  • Safe from the emergency
  • Accessible
  • Easy to identify
  • Away from emergency vehicle access
  • Large enough for the expected number of people

However, remember that a construction site’s assembly area may need to change.

A location that is safe today may be directly beside tomorrow’s excavation or equipment operation.

Check it as the jobsite changes.

Account for Employees and Subcontractors

Getting everyone out is only half the job.

You also need to know who is missing.

Construction sites may have:

  • General contractor employees
  • Subcontractors
  • Temporary workers
  • Delivery drivers
  • Inspectors
  • Visitors
  • Vendors

That can make accountability challenging.

Your emergency plan should explain how workers will be accounted for and who is responsible for doing it.

Don’t rely entirely on someone yelling, “Is everybody here?”

Use whatever system makes sense for your project.

That could include:

  • Daily sign-in systems
  • Badging
  • Crew rosters
  • Foreman accountability
  • Visitor logs
  • Digital workforce tracking systems

The important thing is that someone owns the process.

Keep Evacuation Routes Usable

A construction site can create new obstacles every day.

Materials get delivered.

Equipment gets parked.

Temporary walls go up.

Stairways change.

Access routes move.

Emergency exits and evacuation paths need to be kept clear and communicated to workers.

Employees should know how to get out from the areas where they are actually working.

That may mean different routes for different phases of the project.

Don’t Forget About Temporary Conditions

Construction sites frequently use temporary systems.

These can include:

  • Temporary electrical systems
  • Temporary stairs
  • Temporary lighting
  • Temporary barriers
  • Temporary access roads
  • Temporary fire protection
  • Temporary structures

Temporary does not mean unimportant.

If a temporary condition changes the way employees evacuate or respond to an emergency, it belongs in the safety conversation.

Severe Weather Can Change Everything

Weather is one of the biggest reasons construction emergency planning needs to stay flexible.

Construction workers may be exposed to:

  • Lightning
  • Tornadoes
  • High winds
  • Heavy rain
  • Flooding
  • Extreme heat
  • Winter weather
  • Hail

A severe-weather plan should explain how employees will receive warnings and where they should go.

For example, an open construction site may not provide adequate shelter during a tornado.

A plan should identify appropriate shelter locations before severe weather arrives.

Don’t wait until the sky turns green to decide where everyone is going.

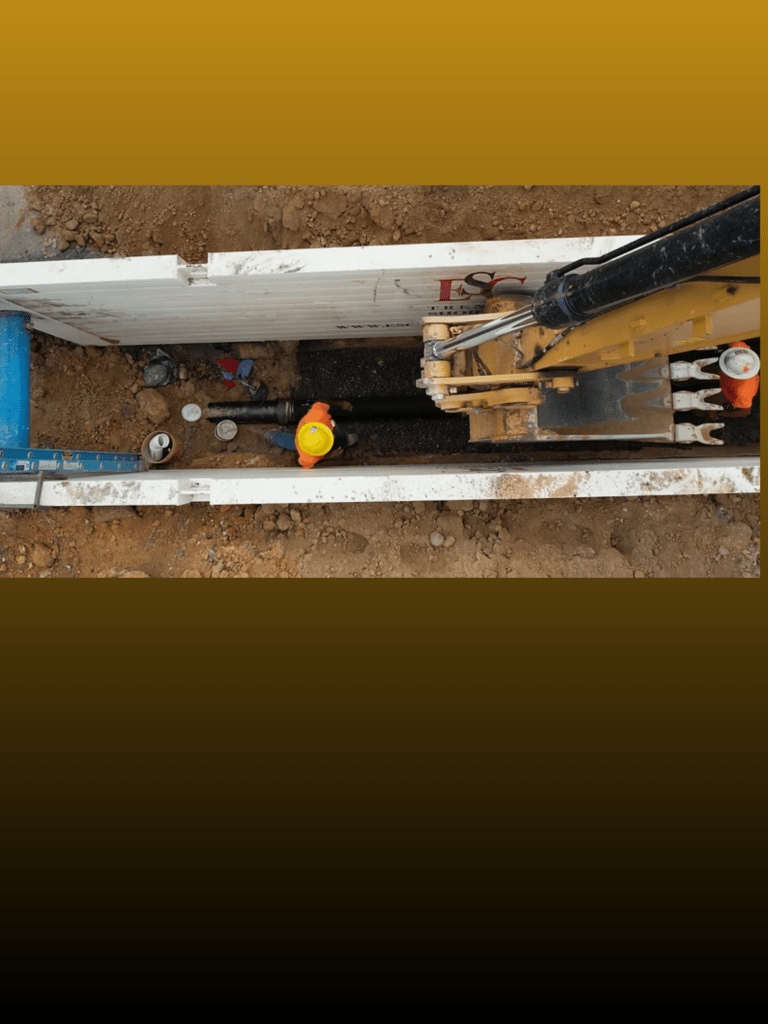
Excavation and Trench Emergencies

Excavation work creates hazards that require specialized planning.

A trench collapse can happen quickly.

Employees should understand that an unplanned rescue attempt can create additional victims.

Construction emergency planning should identify how excavation emergencies will be reported and how qualified emergency responders will be contacted.

OSHA’s excavation standards contain specific requirements for protective systems, access and egress, inspections, and other excavation hazards. Emergency preparedness should work alongside those requirements rather than replace them.

Never treat a trench rescue like a normal cleanup job.

Falls and Rescue Planning

Falls are another important consideration.

Construction sites may involve:

  • Roof work
  • Leading edges
  • Scaffolds
  • Lifts
  • Ladders
  • Structural steel
  • Openings

A fall-arrest system may save a worker’s life, but it can also create a need for prompt rescue planning.

A worker suspended in a harness after a fall may need assistance.

That means employers should consider rescue procedures when developing their fall protection program rather than simply asking, “Do we have harnesses?”

Fall protection and rescue planning go together.

Fire and Hot Work

Welding, cutting, grinding, roofing, temporary heating, and other hot-work activities can introduce fire hazards.

Construction emergency planning should consider:

  • Fire extinguishers
  • Alarm methods
  • Emergency exits
  • Flammable materials
  • Fuel storage
  • Hot-work procedures
  • Fire watch responsibilities
  • Emergency access for responders

Employees should know what they are expected to do if a fire starts.

They should also know when the appropriate response is to evacuate rather than attempt to extinguish the fire.

Spill Response on Construction Sites

Construction sites can contain fuel, oils, paints, solvents, adhesives, cleaning products, and other materials.

That means spill preparedness belongs in the emergency plan.

Employees should know:

  • What materials are present
  • Where SDS information is available
  • Where spill kits are located
  • What PPE is required
  • How to report a spill
  • When an incidental spill can be safely handled
  • When employees should leave the area and call for help

Not every spill should be handled by the person who happens to be standing closest to it.

For more information, see our guide:

Spill Happens: What Every Workplace Should Know About Spill Response

Medical Emergencies

Construction sites should also have a plan for medical emergencies.

Depending on the project, consider:

  • First aid supplies
  • Trained first-aid personnel
  • AED availability
  • Emergency communication
  • Site access for EMS
  • Address or GPS information
  • Nearest medical facility
  • Procedures for serious injuries

Make sure employees know how to get help quickly.

Minutes matter during a serious injury.

New Workers Need Emergency Information

Construction sites regularly bring new workers onto the project.

That makes orientation important.

A new employee or subcontractor should understand the site’s emergency procedures before starting work.

At a minimum, workers should know:

  • How to report an emergency
  • Emergency exits and routes
  • Assembly locations
  • Alarm signals
  • Emergency contacts
  • First aid locations
  • Severe-weather procedures
  • Site-specific hazards

A five-minute conversation can be much more useful than handing someone a 40-page document and saying, “Read this.”

Subcontractors Need to Be Part of the Plan

A construction site’s emergency plan shouldn’t stop with the general contractor’s employees.

Subcontractors need to understand the site’s emergency procedures too.

Different companies may have different:

  • Radios
  • Communication systems
  • Emergency procedures
  • Training
  • PPE
  • Supervisors

The jobsite still needs one coordinated emergency response.

Make sure subcontractors know how the site’s emergency system works and who is responsible for coordinating the response.

Review the Plan When the Jobsite Changes

This may be the biggest difference between construction emergency preparedness and emergency planning in a permanent facility.

The jobsite changes.

So review the plan when:

  • A new phase of construction begins
  • Site access changes
  • Crews change
  • New hazards are introduced
  • Temporary structures are added
  • Work moves to a different area
  • Evacuation routes change
  • The assembly area changes
  • Emergency contacts change
  • New subcontractors arrive
  • A drill identifies a problem
  • An incident occurs

Don’t wait for the annual safety meeting to discover that the emergency exit is now behind a stack of drywall.

A Quick Construction Emergency Preparedness Check

Take the Checklist to the Jobsite

Emergency preparedness is easier to evaluate when you have something practical to work from.

Our Workplace Emergency Preparedness Checklist gives you a simple way to review your emergency procedures, supplies, communication, evacuation, accountability, and other key areas.

Download the checklist and walk the jobsite with it. You may find a few things that need attention before an emergency puts your plan to the test.

Walk the site and ask:

☐ Does everyone know how to report an emergency?

☐ Is the current site address clearly available?

☐ Can emergency responders easily access the site?

☐ Are evacuation routes current?

☐ Is the assembly area still safe?

☐ Can employees be accounted for?

☐ Are subcontractors included?

☐ Are emergency contacts current?

☐ Are first aid supplies available?

☐ Are spill supplies appropriate for the materials on site?

☐ Are employees prepared for severe weather?

☐ Have fall-rescue needs been considered?

☐ Have excavation and trench emergencies been addressed where applicable?

☐ Has the emergency plan been reviewed since the jobsite changed?

If you answered “I’m not sure” to several of these questions, your emergency plan may need an update.

Emergency Preparedness Is a Moving Target

Construction safety already requires you to think about what can go wrong.

Emergency preparedness takes that thinking one step further.

It asks:

What happens if something goes wrong, and how are we going to respond?

The answer can change as the project changes.

That is why emergency preparedness shouldn’t be treated as a one-time paperwork requirement.

Walk the site.

Talk to the crews.

Review the hazards.

Check the equipment.

Update the plan.

Then do it again when the job changes.

Because on a construction site, the only thing you can count on staying the same is that something will change.

Keep Building Your Emergency Preparedness Plan

This article is part of our National Preparedness Month work place safety series.

Continue exploring the series:

And don’t forget to download our Workplace Emergency Preparedness Checklist to help identify gaps in your current

Important Note

This article is provided for general educational purposes and is not legal or safety consulting advice. Emergency drills should be planned for the specific hazards and conditions of your workplace. Do not conduct exercises that create unnecessary risk or interfere with actual emergency response. Follow applicable OSHA requirements and coordinate with appropriate safety personnel and emergency responders when necessary.

Sources

Posted on

Spill Happens: What Every Workplace Should Know About Spill Response

Let’s face it.

Spills happen.

A container gets knocked over. A hydraulic line leaks. A drum develops a problem. Someone drops a bottle of cleaning chemical.

The question isn’t whether your workplace will ever have a spill.

The better question is:

Will your employees know what to do when one happens?

A good spill response plan can help employees recognize hazards, protect themselves, contain an appropriate spill, and know when it is time to step away and call for help.

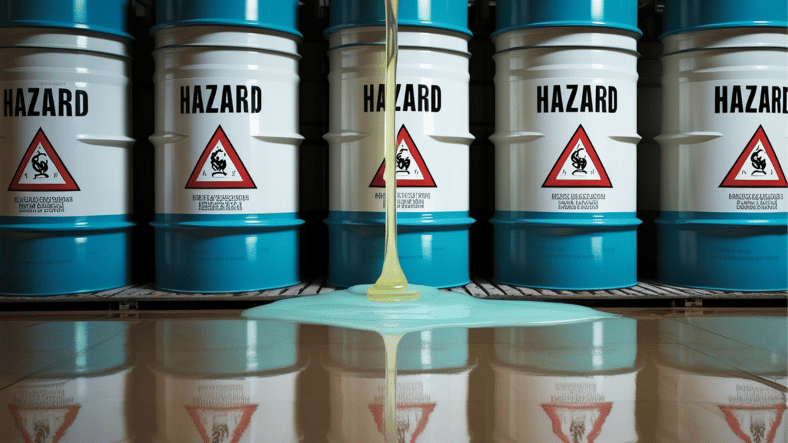
Workplace spill response
Drum develops a problem

What Is a Workplace Spill Response Plan?

A spill response plan explains what employees should do when a material is accidentally released.

The plan should be based on the materials used or stored at your workplace and the hazards they present.

Depending on your operation, that could include:

  • Oil and lubricants
  • Fuel
  • Cleaning chemicals
  • Paints and coatings
  • Solvents
  • Battery chemicals
  • Industrial chemicals
  • Bodily fluids
  • Other hazardous substances

Your plan should also identify who is responsible for responding, what equipment is available, and when employees should evacuate or call for outside assistance.

Not Every Spill Is an Emergency

This is one of the most important things to understand.

OSHA’s Hazardous Waste Operations and Emergency Response standard, commonly called HAZWOPER, makes an important distinction between an incidental release and an emergency response.

An incidental release is one that employees in the immediate area can safely absorb, neutralize, or otherwise control without creating a significant safety or health hazard.

An uncontrolled release of a hazardous substance, or a release that creates a significant potential for fire, explosion, or exposure, can require a much different response.

In other words:

A small spill that you can safely control is not the same thing as an uncontrolled hazardous-material release.

That distinction matters.

Employees should never be encouraged to “just clean it up” simply because a spill looks small.

Step 1: Stop and Identify the Hazard

Before anyone reaches for a spill kit, stop.

Ask:

What spilled?

If the material is unknown, employees should not guess.

Check the container label and the Safety Data Sheet (SDS), when available. The SDS can provide important information about hazards, handling, required PPE, first aid, storage, and accidental-release measures.

Employees should also consider:

  • Is the material flammable?
  • Can it produce harmful vapors?
  • Can it burn the skin?
  • Can it damage the eyes?
  • Is it reactive?
  • Is there a risk of exposure?
  • Is the spill spreading?
  • Could it reach a drain or waterway?
  • Is there a fire or explosion hazard?

If employees cannot safely identify or assess the material, back away and get help.

Step 2: Protect People First

The first priority is not saving the floor.

It’s protecting people.

Depending on the situation, the appropriate response may include:

  • Alerting nearby employees
  • Isolating the area
  • Preventing unnecessary access
  • Moving employees away from the release
  • Using an emergency alarm
  • Evacuating the area
  • Calling emergency responders

Do not let the desire to save a product, floor, machine, or cleanup cost put someone in danger.

People first. Property second.

Step 3: Know Your Spill Kit

A spill kit is only useful if employees know where it is and know how to use it.

A basic spill kit may include items such as:

  • Absorbent pads
  • Absorbent socks or booms
  • Granular absorbent
  • Disposal bags
  • Gloves
  • Eye protection
  • Protective clothing
  • Warning or caution tape
  • Other equipment appropriate for the material being handled

The right kit depends on the hazard.

For example, an oil-only spill kit is designed for petroleum-based liquids. A universal kit may be suitable for many non-aggressive liquids. Chemical spills may require specialized absorbents and PPE.

One spill kit does not automatically fit every spill.

Step 4: Wear the Right PPE

PPE should be selected based on the hazard.

That may include:

  • Chemical-resistant gloves
  • Safety glasses
  • Goggles
  • Face shields
  • Protective clothing
  • Chemical-resistant aprons
  • Respiratory protection when required
  • Safety footwear

The important word is appropriate.

A pair of disposable gloves may be perfectly reasonable for one cleanup and completely inadequate for another.

OSHA’s HAZWOPER requirements emphasize hazard evaluation and the use of appropriate engineering controls, work practices, and PPE for covered hazardous-material operations.

Employees should know what PPE is required before they begin cleanup.

Step 5: Stop the Spill From Spreading When It Is Safe

If the situation is safe to control, employees may need to prevent the material from spreading.

That might mean:

  • Uprighting a container
  • Closing a valve
  • Placing absorbent socks around the spill
  • Protecting nearby drains
  • Using appropriate absorbent material
  • Moving unaffected materials away from the area

But there is an important limitation:

Do not attempt to stop a release if doing so would expose an employee to an unsafe condition.

Containment is not worth an injury.

Step 6: Keep Spills Away From Drains

A spill that reaches a floor drain can quickly become a much bigger problem.

Depending on the material, a release can move beyond the immediate work area and potentially reach wastewater systems, soil, or waterways.

That’s why drain covers and absorbent socks can be valuable components of a spill response program.

Employees should know where these supplies are located before an emergency happens.

Step 7: Clean Up and Dispose of Materials Properly

Once the spill has been safely contained, cleanup materials still need to be handled correctly.

Used absorbents, contaminated PPE, containers, and other cleanup materials may need special handling or disposal depending on what they contain.

Don’t assume that everything used to clean up a chemical spill can simply go into the regular trash.

The material, the amount released, and applicable environmental and waste requirements can all affect disposal decisions.

When in doubt, consult the SDS, your workplace procedures, environmental requirements, and qualified professionals.

When Should Employees NOT Clean Up a Spill?

This may be the most important section of this article.

Employees should not attempt to clean up a release simply because they have access to a spill kit.

Stop and get help when:

  • The material is unknown.
  • The spill is spreading rapidly.
  • There is a fire or explosion hazard.
  • Dangerous vapors are present.
  • Employees may be exposed to a hazardous substance.
  • The spill is beyond the employee’s training.
  • The required PPE is not available.
  • The release cannot be safely contained.
  • The incident requires specialized equipment or trained responders.
  • The workplace emergency plan calls for evacuation.

OSHA’s HAZWOPER standard specifically distinguishes emergency response to uncontrolled releases from incidental releases that can be safely controlled by employees in the immediate area.

Knowing when not to respond is part of good emergency preparedness.

Training Matters

A spill response plan only works if employees understand it.

Employees should know:

  • What materials they may encounter
  • Where SDSs are located
  • Where spill kits are stored
  • What PPE is required
  • How to report a spill
  • How to isolate an area
  • When they can handle an incidental spill
  • When they should evacuate
  • Who to contact for help

For workplaces covered by HAZWOPER emergency-response requirements, OSHA has specific training requirements based on the employee’s role in the response.

Don’t Forget to Check the Spill Kit

This one sounds obvious.

It isn’t.

Spill kits have a way of becoming the workplace equivalent of the junk drawer.

Someone uses half the absorbent.

The gloves disappear.

The disposal bags get borrowed.

Nobody replaces anything.

Then six months later, there is a spill.

And suddenly everyone discovers that the “spill kit” isn’t really a spill kit anymore.

Check your supplies regularly.

Make sure employees can find them quickly.

Replace used or expired supplies.

Keep the appropriate PPE nearby.

And make sure the equipment matches the hazards present in your workplace.

A Quick Spill Response Checklist

Use this as a simple starting point for your workplace:

☐ Do employees know how to report a spill?

☐ Are hazardous materials clearly identified?

☐ Are current SDSs accessible?

☐ Does your workplace have the right type of spill kit?

☐ Do employees know where spill kits are located?

☐ Is appropriate PPE available?

☐ Do employees know when they can handle an incidental spill?

☐ Do employees know when to evacuate?

☐ Are emergency contacts easy to find?

☐ Are used spill supplies replaced promptly?

☐ Are employees trained on your spill response procedures?

If you answered “I’m not sure” to a few of these, that’s a good reason to review your spill response plan.

Spill Preparedness Is Part of Emergency Preparedness

A spill doesn’t have to become a major emergency.

Good preparation can help employees recognize the hazard, protect themselves, contain an appropriate release, and get the right help when the situation goes beyond their training.

That starts before the spill happens.

Know your hazards.

Know your procedures.

Know your PPE.

Know your spill supplies.

And most importantly, know when to walk away.

Keep Building Your Emergency Preparedness Plan

This article is part of our National Preparedness Month work place safety series.

Continue exploring the series:

And don’t forget to download our Workplace Emergency Preparedness Checklist to help identify gaps in your current

Important Note

This article is provided for general educational purposes and is not legal or safety consulting advice. Emergency drills should be planned for the specific hazards and conditions of your workplace. Do not conduct exercises that create unnecessary risk or interfere with actual emergency response. Follow applicable OSHA requirements and coordinate with appropriate safety personnel and emergency responders when necessary.

Sources

Posted on

10 Workplace Emergency Preparedness Mistakes That Could Leave Your Team Unprepared

You have an emergency plan. Your employees have been told where to go. There’s a first aid kit somewhere in the building. You’ve got a spill kit on the jobsite. So you’re prepared…right?

Maybe.

The problem with emergency preparedness is that the gaps often don’t become obvious until something goes wrong.

A plan can look perfectly good on paper and still fail when employees don’t know who is responsible for what, an evacuation route has changed, a spill kit isn’t appropriate for the material released, or nobody remembers where the emergency contacts are.

OSHA recommends emergency action planning as a way to help employers and workers respond effectively when an emergency occurs. For employers subject to OSHA’s Emergency Action Plan requirements, the plan must address specific elements including reporting emergencies, evacuation procedures, accountability, rescue or medical duties, and responsible contacts.

Here are 10 common mistakes worth checking before you need your emergency plan.


1. Your Emergency Plan Exists—but Nobody Knows It Exists

One of the easiest mistakes to make is assuming that because an emergency plan exists, employees know what it says.

They may not.

Employees should understand the portions of the plan that apply to them, including how to report an emergency, where to evacuate or shelter, how accountability works, and what responsibilities they may have.

OSHA requires review of applicable emergency action plans with employees at specified points, including when the plan is developed, when responsibilities change, and when the plan changes.

Ask yourself:

If you stopped five employees at random today and asked, “What do you do if the alarm sounds?” would you get five reasonably consistent answers?

If not, there’s work to do.


2. The Plan Is Outdated

This is especially important for construction sites and other workplaces where conditions change.

A new piece of equipment is installed.

A wall is moved.

A chemical is introduced.

An excavation changes access to part of the site.

A new employee takes over an emergency responsibility.

A subcontractor joins the project.

Suddenly, the plan that was accurate six months ago may not accurately describe today’s workplace.

OSHA recommends reviewing and updating emergency plans when changes to layout, equipment, hazardous materials, processes, personnel responsibilities, or hazards affect emergency procedures.

If your workplace changes, your emergency plan should change with it.


3. You Have an Evacuation Route—but No Backup

What happens if the primary exit is blocked?

A fire, structural problem, equipment incident, severe weather event, or other emergency could make a normally usable route unavailable.

Your emergency planning should consider alternate routes and the different types of emergencies that could require evacuation or shelter.

OSHA notes that evacuation procedures should address the different types of emergencies that may occur and the appropriate response for each.

Ask:

“If our normal exit were blocked right now, where would everyone go?”

If the answer is silence, you found a gap.


4. Nobody Has a Reliable Way to Account for Employees

Getting everyone out of a building or away from a hazard is only part of the problem.

How do you know everyone is out?

Your plan should establish a method for accounting for workers after evacuation.

That becomes more complicated when you have:

  • Multiple shifts
  • Contractors
  • Temporary workers
  • Visitors
  • Employees working away from the main facility
  • Large construction sites
  • Multiple crews

OSHA identifies employee accountability after evacuation as a required element of EAPs covered by 29 CFR 1910.38 and 29 CFR 1926.35.

A headcount process that only works when everyone is standing at the front door isn’t much of a process.


5. You Forgot About Contractors and Visitors

Your employees may know the emergency procedures.

But what about the electrician who arrived this morning?

The delivery driver?

The subcontractor working on the other side of the site?

The customer visiting the facility?

The temporary worker who started yesterday?

Emergency planning should account for everyone who may be exposed to the emergency—not just the people who appear on the payroll.

This is especially important on construction sites and multi-employer worksites.

A good question to ask:

“If a visitor arrived five minutes before an emergency, how would we get them to safety?”


6. Your Emergency Equipment Is There—but You Can’t Find It

This one sounds ridiculous until you need something immediately.

Where’s the first aid kit?

Where’s the spill kit?

Where are the emergency lights?

Where are the fire extinguishers?

Where are the radios?

Where’s the eyewash?

Who knows?

OSHA’s emergency preparedness guidance recommends identifying common emergency equipment and assigning responsibility for inventorying and maintaining emergency equipment and supplies.

Emergency equipment should be:

Accessible.

Identifiable.

Appropriate for the hazard.

Maintained.

And, most importantly:

Known to the people who may need it.

Southern Safety Tip

Don’t just ask whether you have an emergency kit.

Ask:

“Could a new employee find it in under two minutes?”

If not, consider improving signage, location, training, or all three.


7. You Bought a Spill Kit—but Didn’t Consider What Could Actually Spill

A spill kit isn’t a universal solution.

The right response equipment depends on the material and the circumstances.

For example, a workplace dealing primarily with oils and fuels may have different spill-response needs than a facility handling corrosive or hazardous chemicals.

Before buying emergency spill supplies, identify:

  • What materials are present?
  • How much could potentially be released?
  • Where are those materials stored or used?
  • What PPE may be needed?
  • Who is trained and authorized to respond?
  • When should employees evacuate instead?
  • When should outside emergency responders be contacted?

Some hazardous-substance emergency response activities can trigger OSHA’s HAZWOPER requirements. Employers should not assume that every employee is authorized or trained to handle a hazardous-material emergency simply because a spill kit is available.

Related Southern Safety resource:

Spill Happens: What Should You Do During a Workplace Spill?

Need spill-response supplies?


8. You’ve Never Actually Practiced the Plan

This may be the biggest one.

A plan can look great in a meeting.

Then the alarm goes off.

Someone asks where everyone is supposed to go.

Someone else can’t hear the alarm.

The assembly area is blocked.

Nobody knows who is counting employees.

And suddenly everyone discovers the plan has some holes.

OSHA recommends practice drills as often as necessary to keep employees prepared and encourages employers to evaluate the strengths and weaknesses of the plan after each drill.

A drill doesn’t have to be elaborate.

Try a scenario such as:

“At 10:15 Tuesday morning, a forklift strikes a container and a spill occurs.”

Then ask:

  • Who reports it?
  • Who sounds the alarm?
  • Who stops nearby work?
  • Who evacuates?
  • Where does everyone go?
  • Who accounts for workers?
  • Who contacts emergency responders?
  • Who is authorized to address the spill?
  • What happens afterward?

You may learn more from a 15-minute exercise than from another hour spent reading the emergency plan.


9. You Prepared for the Emergency—but Not the Aftermath

The immediate danger isn’t necessarily the end of the problem.

After an emergency or drill, ask:

  • Did everyone get accounted for?
  • Did communication work?
  • Were emergency routes accessible?
  • Was the correct equipment available?
  • Were there delays?
  • Were employees confused about their responsibilities?
  • What supplies were used?
  • What needs to be replaced?
  • Does the plan need to be updated?

OSHA recommends evaluating drills, identifying strengths and weaknesses, and improving the plan based on what you learn.

Emergency preparedness should be a cycle:

Plan → Train → Practice → Evaluate → Improve

Then do it again.


10. You Don’t Know What You Don’t Know

This may be the hardest mistake to catch.

Every workplace has hazards that are easy to overlook because they’re part of the normal routine.

A forklift has always operated in that area.

The fuel tank has always been there.

The chemical has always been stored in that room.

The excavation has always been on that side of the site.

The same emergency equipment has been sitting in the same cabinet for years.

Familiar doesn’t mean safe.

Start your emergency preparedness review by walking the workplace with fresh eyes.

Look at:

Environmental risks

Severe weather, flooding, extreme temperatures and other natural hazards.

Operational risks

Equipment failures, vehicle incidents, utility strikes, power failures and machinery emergencies.

Chemical risks

Spills, leaks, releases, incompatible materials and exposure hazards.

Structural risks

Collapse, falling objects, excavation incidents, scaffolding problems and temporary structures.

Fire and life-safety risks

Fire, smoke, explosion, electrical emergencies and gas releases.

OSHA recommends conducting a hazard assessment that considers physical and chemical hazards inside or outside the workplace that could create an emergency, along with the site’s layout, structural features and emergency systems.


The 5-Minute Preparedness Test

Want to see where your plan stands?

Ask your team these five questions:

1. What is the most likely serious emergency we could face?

2. How would you know it was happening?

3. Where would you go?

4. Who is responsible for coordinating the response?

5. What equipment would you need—and where is it?

If your team can answer those questions quickly and consistently, you’re off to a good start.

If they can’t, don’t panic.

You’ve just identified what to work on next.


Ready to Find the Gaps?

Southern Safety Supply can help you identify practical safety and emergency-response equipment for your workplace or jobsite.

That may include:

  • First aid supplies
  • Spill kits and absorbents
  • Safety eyewear
  • Gloves
  • Emergency eyewash
  • High-visibility apparel
  • Barricades and warning products
  • Emergency lighting
  • Jobsite safety equipment
  • Other PPE appropriate to your hazards

And if keeping critical PPE and emergency supplies stocked is a challenge, ask us about Never Out™ Inventory Management.

The goal isn’t to sell you a bigger emergency cabinet.

It’s to help make sure that when something goes wrong, your people aren’t standing around asking, “Where’s the stuff we need?”


Keep Building Your Emergency Preparedness Plan

This article is part of our National Preparedness Month work place safety series.

Continue exploring the series:

And don’t forget to download our Workplace Emergency Preparedness Checklist to help identify gaps in your current

Important Note

This article is provided for general educational purposes and is not legal or safety consulting advice. Emergency drills should be planned for the specific hazards and conditions of your workplace. Do not conduct exercises that create unnecessary risk or interfere with actual emergency response. Follow applicable OSHA requirements and coordinate with appropriate safety personnel and emergency responders when necessary.



Sources & Further Reading

This article is provided for general educational purposes and is not a substitute for a site-specific hazard assessment, emergency action plan, training, or applicable federal, state, and local requirements.

Posted on

Trench Safety: Five Critical Steps That Save Lives on Every Jobsite

Construction crew working safely inside a protected trench using a trench box, ladder access, and proper PPE.

Every year, trench and excavation incidents change lives in an instant. A trench may appear stable one moment and collapse the next, leaving workers with little or no opportunity to escape. Soil is surprisingly heavy—just one cubic yard can weigh as much as a small pickup truck—making even a shallow collapse potentially fatal.

The good news is that most trench accidents are preventable. Proper planning, the right protective equipment, and following OSHA requirements dramatically reduce the risk of serious injury or death.

Why Trench Safety Matters

Trenching and excavation work is among the most hazardous activities in construction. Cave-ins remain one of the leading causes of fatalities because they happen quickly and often without warning. Beyond cave-ins, workers also face hazards such as:

  • Falling loads and equipment
  • Hazardous atmospheres
  • Water accumulation
  • Falls into excavations
  • Struck-by incidents from heavy machinery

Recognizing these hazards before work begins is the first step toward a safer jobsite.

Five Essential Trench Safety Practices

1. Always Have a Competent Person

OSHA requires a competent person to inspect trenches daily and whenever conditions change, such as after rainstorms, vibrations from nearby traffic, or other events that could affect soil stability.

A competent person has the knowledge and authority to identify hazards and stop work until conditions are safe.

2. Use the Proper Protective System

Any trench five feet deep or greater generally requires a protective system unless the excavation is made entirely in stable rock.

Common protective systems include:

  • Sloping
  • Benching
  • Trench boxes (shielding)
  • Shoring systems

The correct solution depends on soil classification, depth, and jobsite conditions.

3. Provide Safe Entry and Exit

Workers should never have to climb excessive distances to leave a trench.

Ladders, ramps, or other safe means of egress should be located so employees do not have to travel more than 25 feet laterally to exit the excavation.

4. Keep Materials Away from the Edge

Spoil piles, tools, and heavy equipment should remain at least two feet from the edge of the trench whenever possible. This helps reduce pressure on trench walls and minimizes the risk of material falling onto workers below.

5. Never Assume Yesterday’s Trench Is Safe Today

Changing weather, nearby construction activity, groundwater, and vibrations can all affect soil conditions. Every trench should be inspected before each shift and throughout the day whenever conditions change.

PPE Is Only One Part of the Solution

Hard hats, high-visibility apparel, gloves, eye protection, and protective footwear all help reduce injuries around excavation sites. Depending on the work being performed, additional equipment such as gas monitors, fall protection, or confined space equipment may also be required.

Personal protective equipment is important, but it should never replace proper trench planning and protective systems.

Building a Strong Safety Culture

The safest jobsites are those where every worker feels empowered to speak up when something doesn’t look right. Investing in training, routine inspections, and quality safety equipment not only helps companies comply with OSHA standards but also protects their most valuable asset—their people.

At Southern Safety Supply, we work with contractors, municipalities, manufacturers, and industrial facilities to help them find the right PPE, jobsite safety equipment, and safety solutions for every phase of the job. Whether it’s excavation safety, fall protection, confined space equipment, or everyday PPE, our goal has remained the same for three decades: helping our customers keep their teams safe and productive and Never Out™ of product.

As Southern Safety Supply celebrates 30 years of serving businesses across East Tennessee and beyond, we’re grateful for the opportunity to continue supporting safer workplaces—one jobsite at a time.

Frequently Asked Questions

What is the biggest hazard in trench work?

The greatest hazard is a cave-in. Trench walls can collapse suddenly, burying workers within seconds.

When is a trench box required?

A trench box is one type of protective system used to protect workers from cave-ins. Whether it is required depends on the excavation depth, soil conditions, and the protective method selected by the competent person.

What OSHA standard covers trench safety?

OSHA’s excavation standards are found in 29 CFR 1926 Subpart P, which covers trenching, excavation, protective systems, inspections, and worker safety requirements.

How often should trenches be inspected?

A competent person should inspect trenches before each shift and after any event that could increase hazards, including rainstorms or changes in soil conditions.

Sources

The information in this article is based on guidance from the following authoritative resources:

  1. Occupational Safety and Health Administration (OSHA). Safety and Health Regulations for Construction – Excavations (29 CFR 1926 Subpart P). Available at: https://www.osha.gov/laws-regs/regulations/standardnumber/1926/1926SubpartP
  2. Occupational Safety and Health Administration (OSHA). Trenching and Excavation Safety. Available at: https://www.osha.gov/trenching-excavation
  3. National Institute for Occupational Safety and Health (NIOSH). Trenching and Excavation Safety. Available at: https://www.cdc.gov/niosh/construction/topics/trenching/default.html
  4. National Institute for Occupational Safety and Health (NIOSH). Preventing Worker Deaths from Trench Cave-Ins. DHHS (NIOSH) Publication No. 2011-208. Available at: https://www.cdc.gov/niosh/docs/2011-208/

This article is intended for educational purposes and should not replace applicable OSHA regulations, site-specific safety plans, or professional safety training.

Posted on

Night Work Zone Safety at Night:

Protecting Workers After Dark

Road construction workers wearing ANSI high-visibility apparel in a nighttime work zone illuminated by traffic control lighting.

Night work zones help keep projects moving, reduce traffic congestion, and allow critical repairs and construction to continue with less disruption. However, working after dark creates challenges that significantly increase risk for both workers and motorists.

Reduced visibility, driver fatigue, improper lighting, and changing traffic patterns can all contribute to incidents in a nighttime work zone. Understanding these hazards and preparing for them is essential for contractors, utility crews, public works departments, and transportation teams.

Download Our Free Night Work Zone Safety Checklist

Preparing for a nighttime project? Download our free Night Work Zone Safety Checklist to help your crew review traffic control, lighting, PPE, fatigue management, and emergency preparedness before work begins.

Why Night Work Zone Safety Matters

Nighttime operations are inherently different from daytime work. Studies have shown that driver reaction times can be up to 50 percent slower at night because of reduced visibility, glare, and fatigue. Drivers often rely on expectations instead of details, increasing the likelihood of sudden braking, missed signs, and incorrect lane choices.

Workers can also experience fatigue during overnight operations, reducing awareness and increasing the potential for mistakes. Effective night work zone safety requires a coordinated approach that combines visibility, traffic control, lighting, and worker readiness.

Visibility Is About Recognition, Not Brightness

A common misconception is that brighter always means safer. In reality, drivers need to quickly recognize what they are seeing and understand where to travel.

Confusing traffic patterns, inconsistent device placement, and visual clutter can delay reactions and increase risk. A well-designed work zone uses clear traffic control layouts, clean reflective devices, and consistent channelization to help drivers instantly recognize the intended path through the work zone.

Lighting and Driver Behavior After Dark

Lighting is one of the most important elements of a nighttime work zone, but poor lighting can create new hazards. Improperly aimed lights can produce glare, reduce contrast, and make hazards more difficult to identify.

Driver behavior also changes after dark. Limited visibility and fatigue can lead to delayed reactions and poor decisions. Simple, easy-to-understand traffic control measures and properly directed lighting help motorists navigate work zones more safely.

High-Visibility PPE and Worker Readiness

High-visibility PPE remains one of the final layers of protection between workers and moving traffic. ANSI-compliant high-visibility apparel uses retroreflective materials that help workers stand out in vehicle headlights, but only when garments are properly maintained and workers remain visible from all directions.

Fatigue is another critical factor. Alertness naturally decreases during overnight hours, especially between 2:00 a.m. and 5:00 a.m. Monitoring workers for signs of fatigue, encouraging hydration, scheduling breaks, and rotating tasks can significantly improve worker readiness and reduce risk.

A Systems Approach to Night Work Zone Safety

There is no single product or procedure that makes a nighttime work zone safe. Effective work zone safety depends on several elements working together, including traffic control, lighting, high-visibility PPE, fatigue management, and ongoing worker training.

By focusing on visibility, consistency, and human factors, organizations can reduce confusion, improve driver recognition, and create safer conditions for everyone on the roadway.

Southern Safety Supply LLC provides ANSI-compliant high-visibility apparel, traffic control products, lighting solutions, hard hats, and jobsite safety equipment to help organizations prepare for nighttime operations. Whether you’re managing a roadway project, utility repair, public works operation, or industrial shutdown, our team can help keep your crews visible, compliant, and protected.

Contact Southern Safety Supply LLC, today to learn more about our work zone safety solutions.

Never Out™ Inventory Management

Running Low on Safety Gear?

Night work is hard enough without discovering you’re short on vests, gloves, hard hats, batteries, or traffic control products. Southern Safety Supply’s Never Out™ Inventory Management Program helps keep critical PPE and safety supplies stocked, organized, and ready when your crews need them.

Posted on

May 2026 Construction Safety & Industry Update

Construction season is ramping up across East Tennessee, and contractors are preparing for busy schedules, hotter temperatures, and evolving safety demands. At Southern Safety Supply, we’re helping crews stay ready with dependable PPE, emergency deliveries, safety expertise, and practical solutions built for real jobsites. From TN811 growth to women-specific PPE and hands-on safety training at Safety Fest TN 2026, here’s what matters most this month.

East Tennessee Construction Growth Means Crews Need Reliable Safety Partners

Summer work is accelerating across Tennessee, and contractors are feeling the pressure to keep projects moving safely and efficiently. With over 317,000 dig requests processed annually through Tennessee 811, East Tennessee continues leading the state in new requests, with Knoxville ranking #1 in growth activity.

That growth creates opportunity—but also increases the need for dependable suppliers, fast turnaround times, and safety support contractors can count on.

One thing we continue hearing from utilities and contractors alike is simple: relationships matter. During a recent AGC lunch & learn, representatives discussed how organizations like Chattanooga Electric Power Board prioritize dependable supplier partnerships and responsive customer service just as much as competitive pricing.

That’s exactly where Southern Safety Supply LLC helps customers succeed. Whether crews need emergency PPE delivery, replacement safety gear, or quick answers from someone who understands the field, having the right support partner keeps projects moving.

Three Quick TN811 Reminders for Busy Crews

Dig permits aren’t just for large commercial projects—homeowners need them too.

Every contractor must have their own permit. Borrowing someone else’s permit is not allowed.

Bottom line: whether you’re breaking ground on a major commercial site or tackling a weekend residential project, TN811 is one of the easiest ways to keep crews safe and projects on track.

Safety Fest TN 2026 Put Real-World Safety Front and Center

Safety Fest TN 2026 brought safety to life with hands-on demonstrations, live field operations, and real-world training scenarios that went far beyond the classroom.

Participation from the Tennessee Valley Authority and the Tennessee Army National Guard added practical field perspective, while attendees including Consolidated Nuclear Security highlighted the strong industry engagement surrounding workplace safety this year.

Events like Safety Fest reinforce an important reality:

crews need more than products. They need fast support, knowledgeable partners, and access to safety solutions that actually work in the field.

That’s why Southern Safety Supply continues investing in services that help customers respond quickly when problems happen, including:

  • Emergency PPE delivery
  • Never Out safety supply services
  • Fast replacement options for damaged equipment
  • On-site support and product recommendations
  • Specialized PPE solutions for different workforce needs

5 Signs Your Fall Arrest Harness May Need Replaced

  1. Frayed webbing or cuts
  2. Missing labels or inspection tags
  3. Rusted or damaged hardware
  4. UV fading or brittle material
  5. Equipment involved in a previous fall event

If your gear shows any of these signs, it may be time for replacement before the next jobsite inspection—or worse, an incident.

Did You Know?

Southern Safety Supply offers Never Out™ PPE delivery to help crews avoid costly downtime when safety equipment fails unexpectedly.

Women in Construction Deserve PPE That Actually Fits

Channeling a little sparkle from Dolly Parton, we’re celebrating the women helping keep Tennessee building strong—and making sure they have PPE designed to truly fit.

Women in construction continue reshaping the industry, but properly fitted PPE is still too often overlooked. Gear built specifically for women improves comfort, mobility, and protection while helping crews stay productive throughout long shifts.

Inspired by the support and encouragement highlighted during the National Association of Women in Construction Southeast Region events, Southern Safety Supply is proud to help outfit hardworking women with safety gear designed for real-world performance.

Whether it’s gloves, high-visibility apparel, harnesses, or protective footwear, the right fit matters.

Stop by our Dolly-themed photo booth—or contact our team to learn more about PPE options designed specifically for women in construction.

Seasonal Safety Reminder

As temperatures rise heading into summer, crews should review heat stress prevention plans, hydration practices, and jobsite dress code policies. Some updated OSHA guidance allows more flexibility depending on site-specific requirements, including the use of shorts in certain environments if approved by site leadership.

Always verify site-specific PPE and dress requirements with your supervisor or safety manager before changing workwear practices.